The ASRock Z170 Extreme7+ Review: When You Need Triple M.2 x4 in RAID
by Ian Cutress on November 27, 2015 11:59 AM EST- Posted in
- Motherboards
- ASRock
- M.2
- Skylake
- Z170
ASRock Z170 Extreme7+ BIOS
As odd as it sounds, for the most part we are achieving some sort of harmony when it comes to BIOS design. I’m not talking about colors or actual options, but in a conceptual way, the four major manufacturers are sort of aligning on the same path for Z170. The 100-series chipset is now the fourth generation of UEFI/EFI graphical interface design, with one purpose on providing in an interactive format to the user to view or change their system settings. In 2015, this means better fonts, more color, more style, and a separation of options into a simple one-page ‘EZ Mode’ or the more detailed ‘Advanced Mode’. With the Z170 Extreme7+, ASRock is finally on this route.

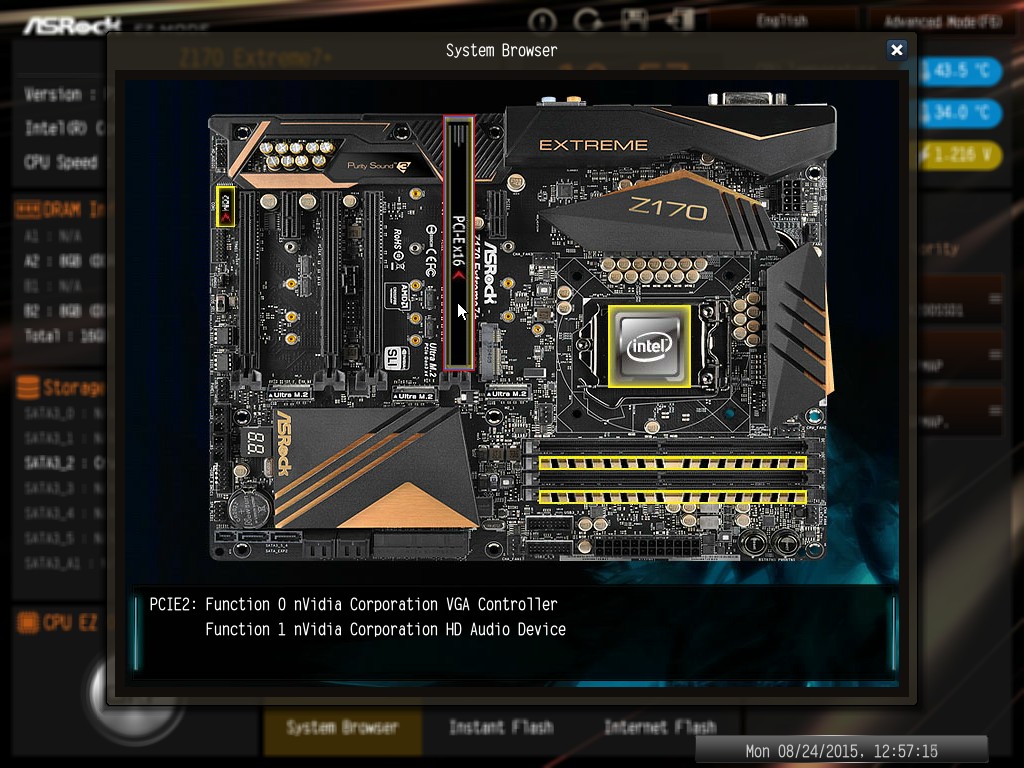
Due to the lack of a better description, it comes across very clear that ASRock has in part tried to imitate ASUS’ implementation of how to present critical system information in their EZ mode. They layout near enough matches what ASUS has, with motherboard model, BIOS version, CPU installed, CPU speed and DRAM information all the top left. The DRAM is a per-module breakdown of information, followed by a per-SATA port breakdown and per-fan RPM data. With this menu, users can implement an easy overclock with the button in the bottom left, or adjust the CPU fan without having to go into the BIOS. There is temperature information in the top right, and a boot menu below it. Three buttons at the bottom offer a system browser as well as BIOS update options.
Perhaps not to be too harsh, currently ASUS’ implementation is one of the best available right now and this is only ASRock’s first version, meaning that they have time to find their own path but also a base visual of the system, it is easy to read and digest.
Pressing F6 moves to Advanced Mode.
<petty rant> Pressing F6 is different to F7 or F2 in other motherboard manufacturer modes purely because of historic button assignments for those were already taken. Make sense? No it doesn’t. As someone that delves into BIOSes on different products regularly, some form of parity on button assignments would be nice. This isn’t directed as ASRock, but having all four main players on the same page would be a good thing.</petty rant>
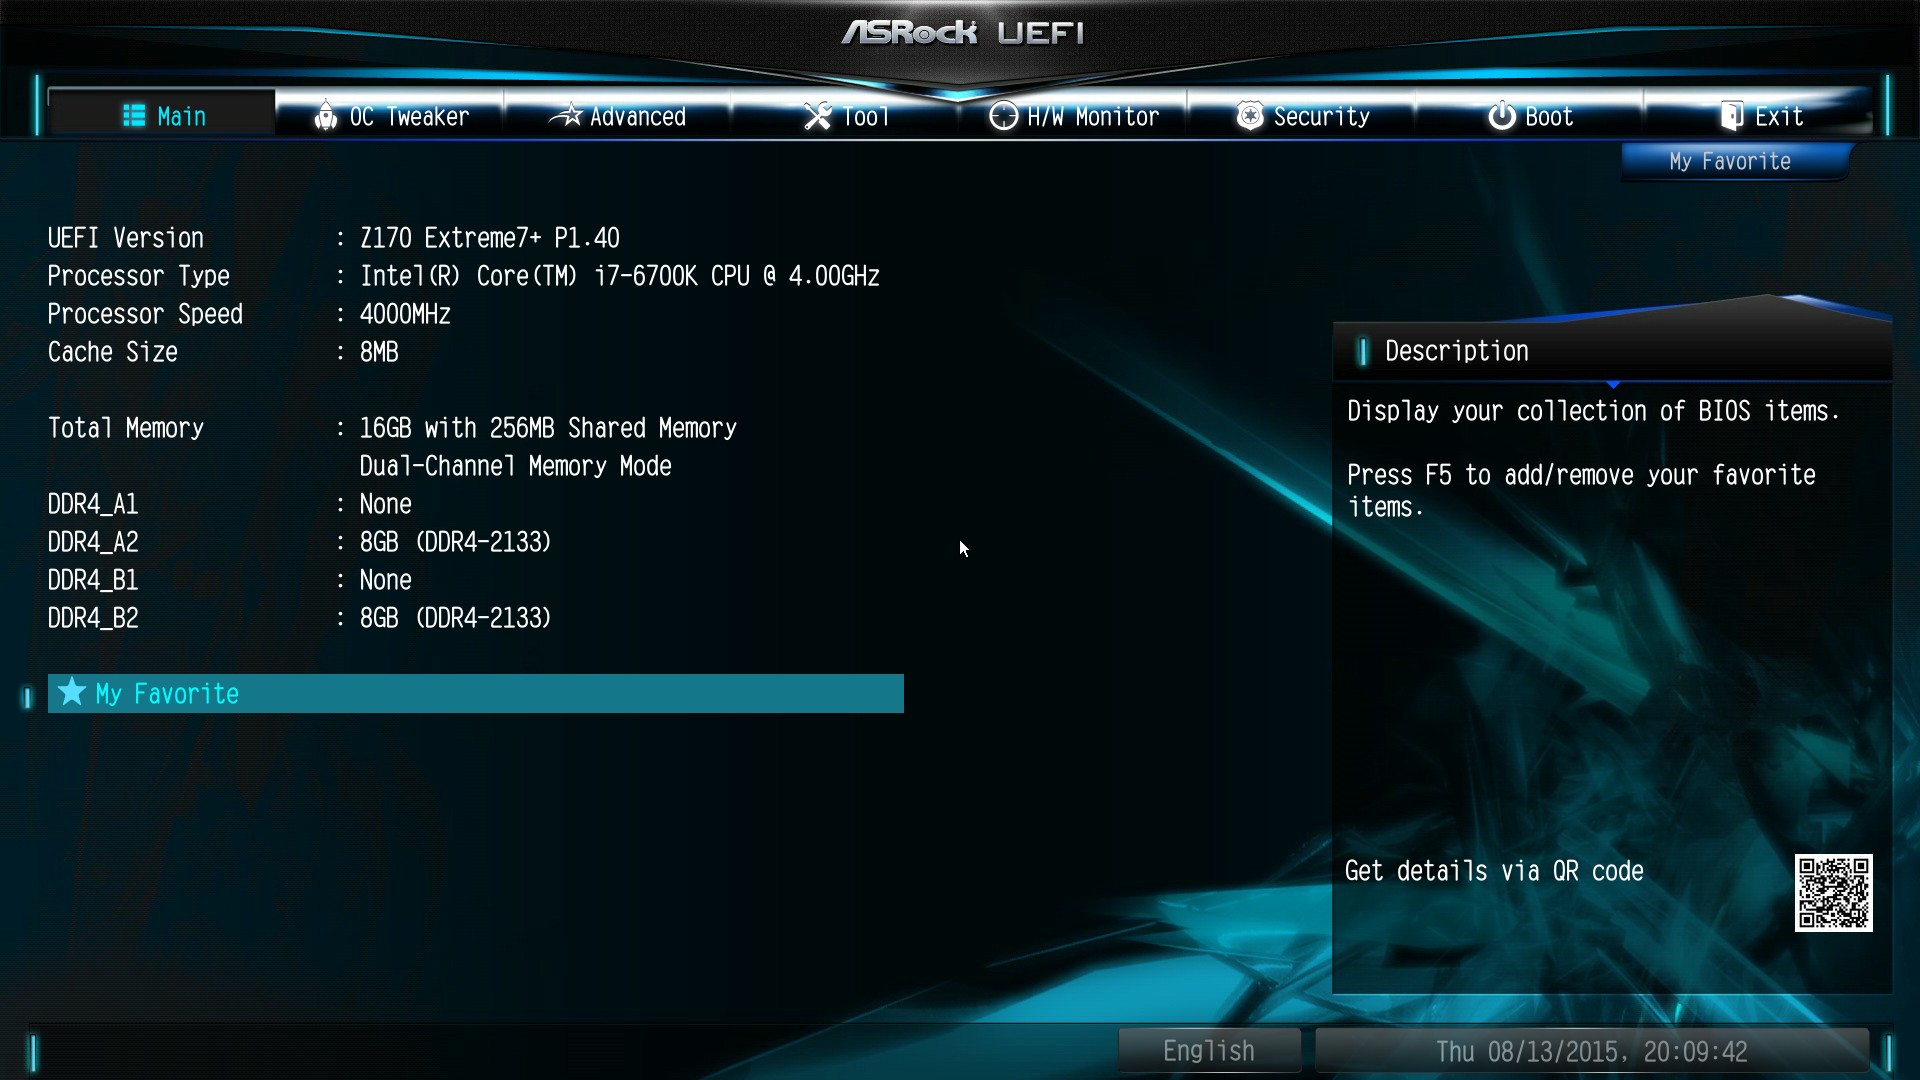
Advanced mode for the 100-series from ASRock has relatively few new features compared to the latest X99 or Z97 BIOS versions. In the past we have criticized the Main element of this mode for having not enough information, but that was only because it was the entry point of the BIOS – now that EZ mode takes over, this criticism is solved.
On this Main screen is a link to the My Favorites menu to help manual overclockers populate the custom menu with their most used commands. So, for example:
Here we have taken some of the popular overclocking options from the various sub-menus and ended up with an easy interface to access them all.
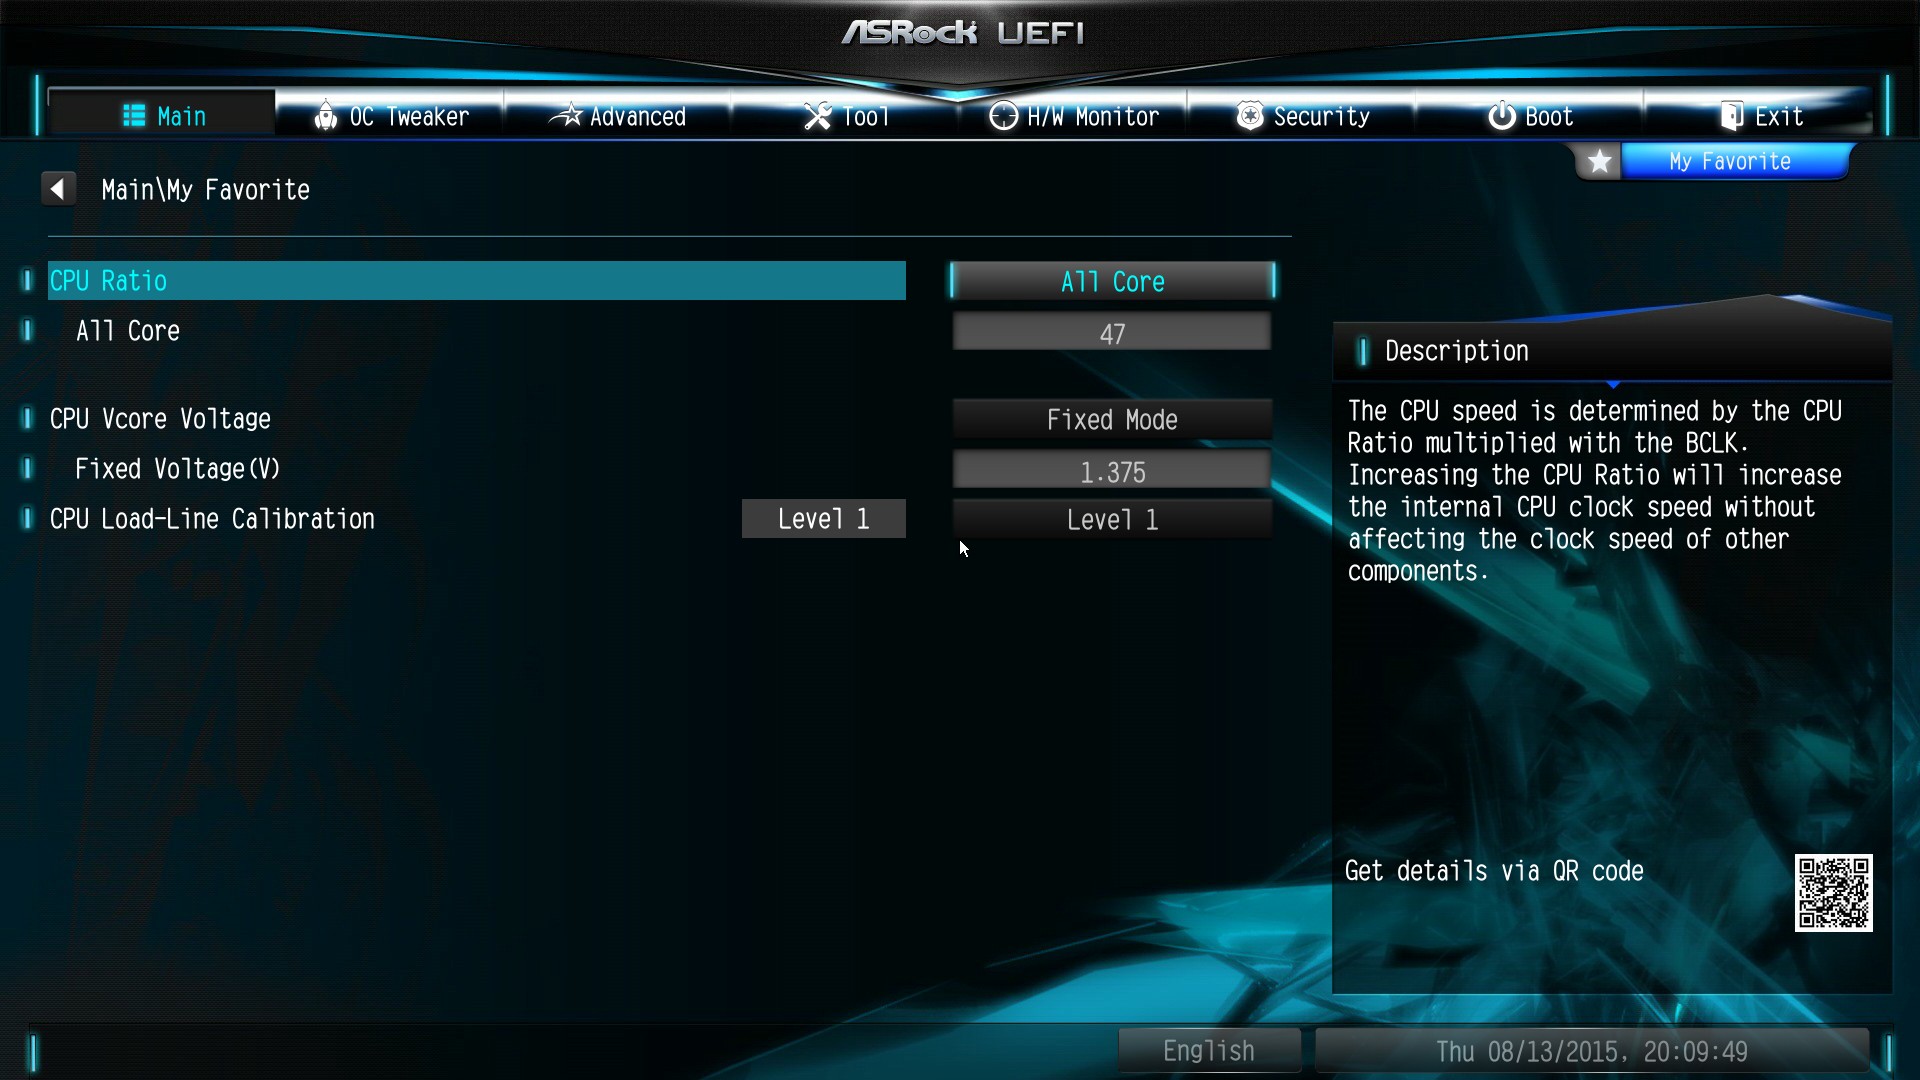
The menus these options come from start with the OC Tweaker tab.
ASRock has adjusted this tab in recent versions and separated the various options into submenus for CPU, DRAM and voltage similar to GIGABYTE’s way of organizing things. There are both upsides and downsides to this – while it makes the interface much neater and easier to navigate, it does mean that in order to change several options at once the user needs to go in and out of menus a fair bit. ASRock advises that these users should add the options they need to the My Favorites menu and use that instead.
At the top of the OC Tweaker menu are the automated overclock options, where Advanced Turbo offers Gear 1 or Gear 2 for overclocks, Optimized CPU OC Setting gives values between 4.4 GHz and 4.8 GHz for our i7-6700K processor, and the GPU OC Setting appears when running the integrated graphics.
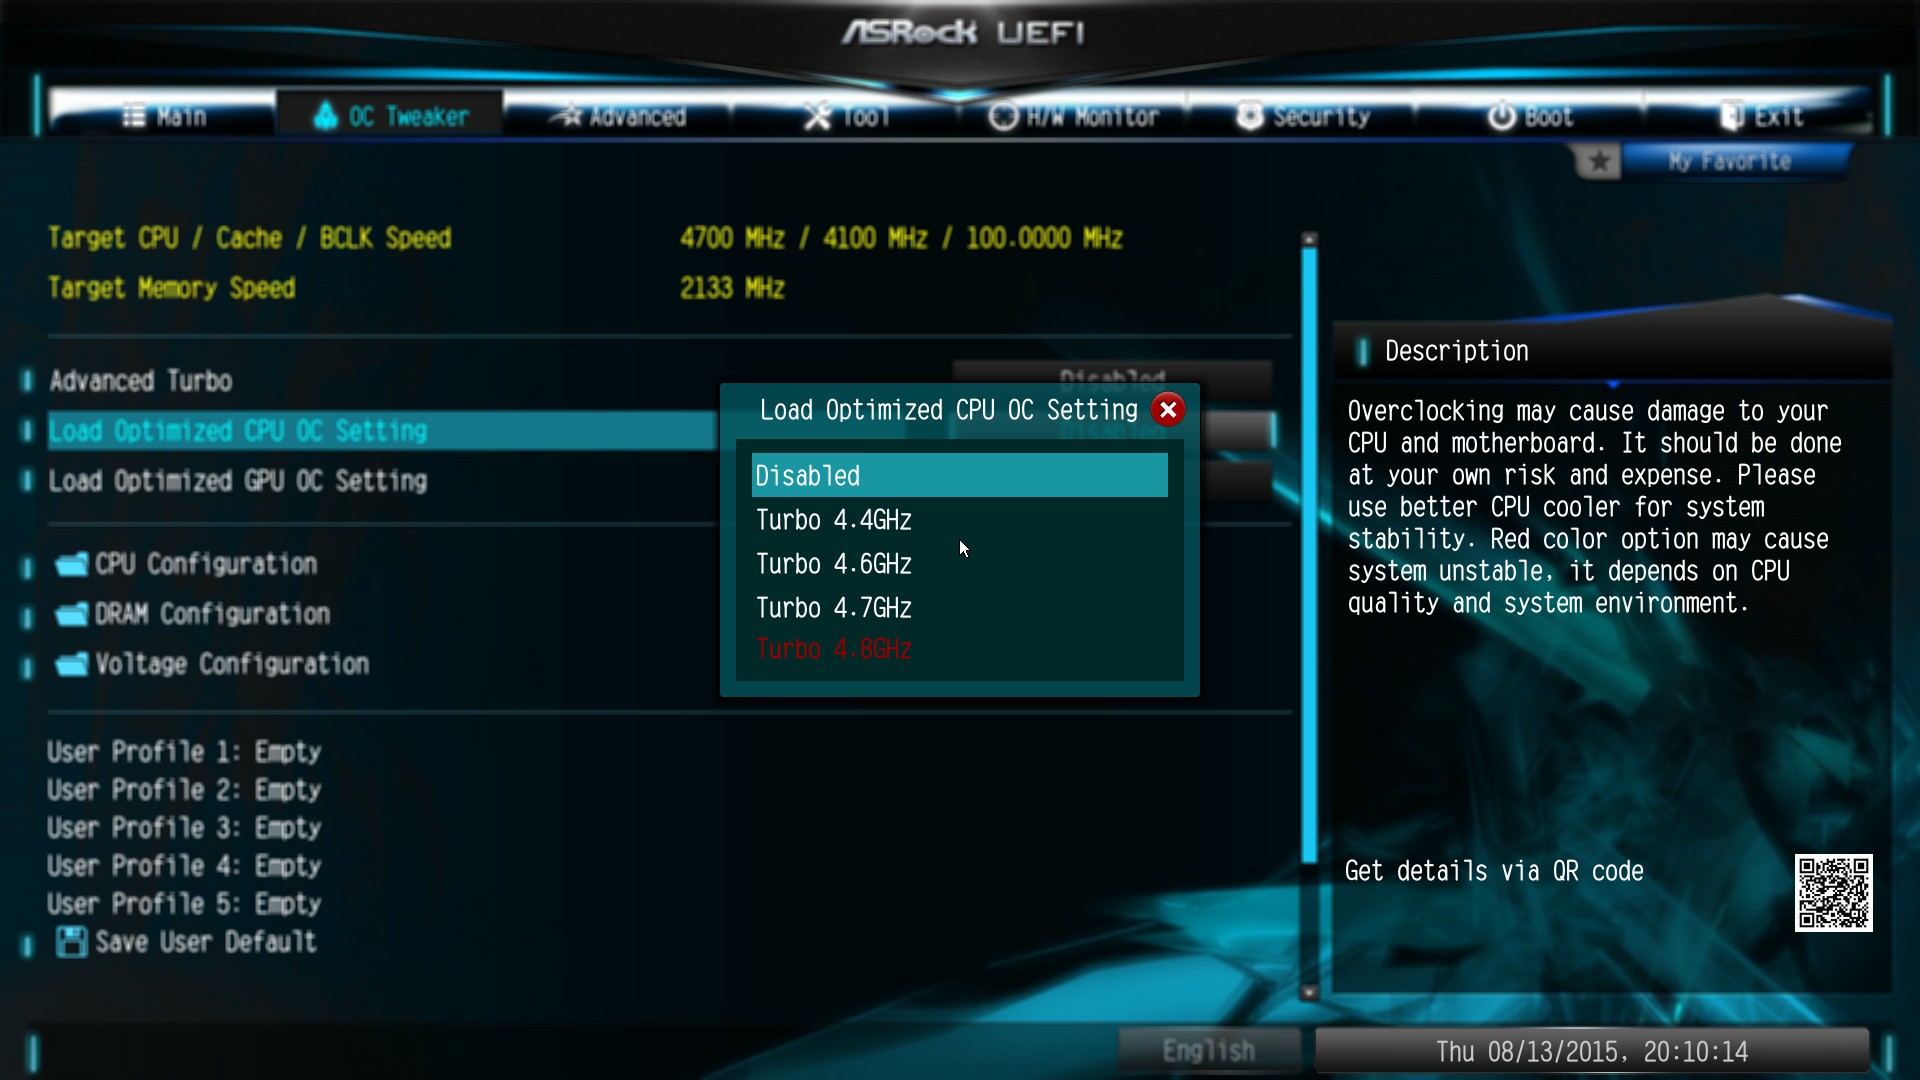
For these pre-configured OC options, ASRock puts the extreme ones in red as these do not work for all processors, depending on the cooling. Our results on these overclocking tests can be found in the overclocking section on the first page of this review.
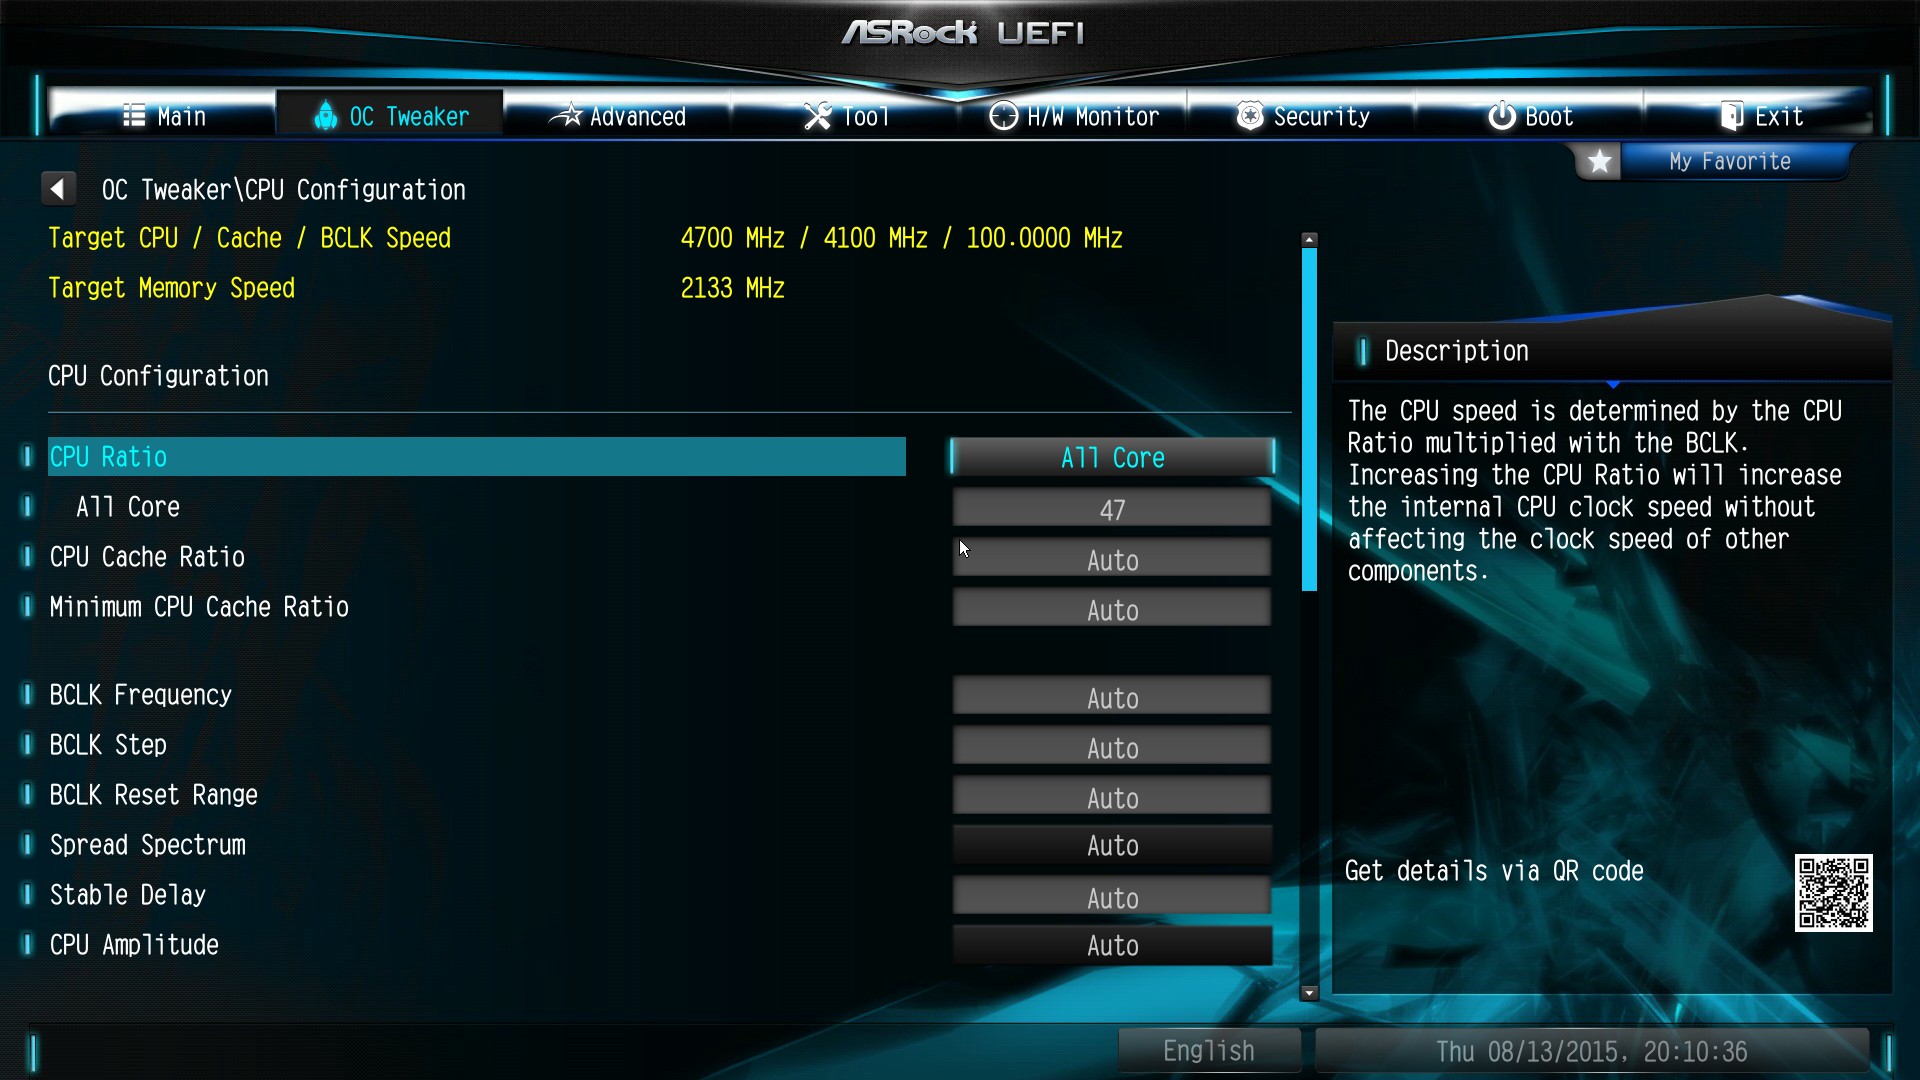
The overclocking menus contain the usual array of OC options for CPU multipliers, base frequencies, a variety of spectrum/slew commands that few people outside engineers understand, but also power and current limits that help push the boundaries for extreme overclocking.
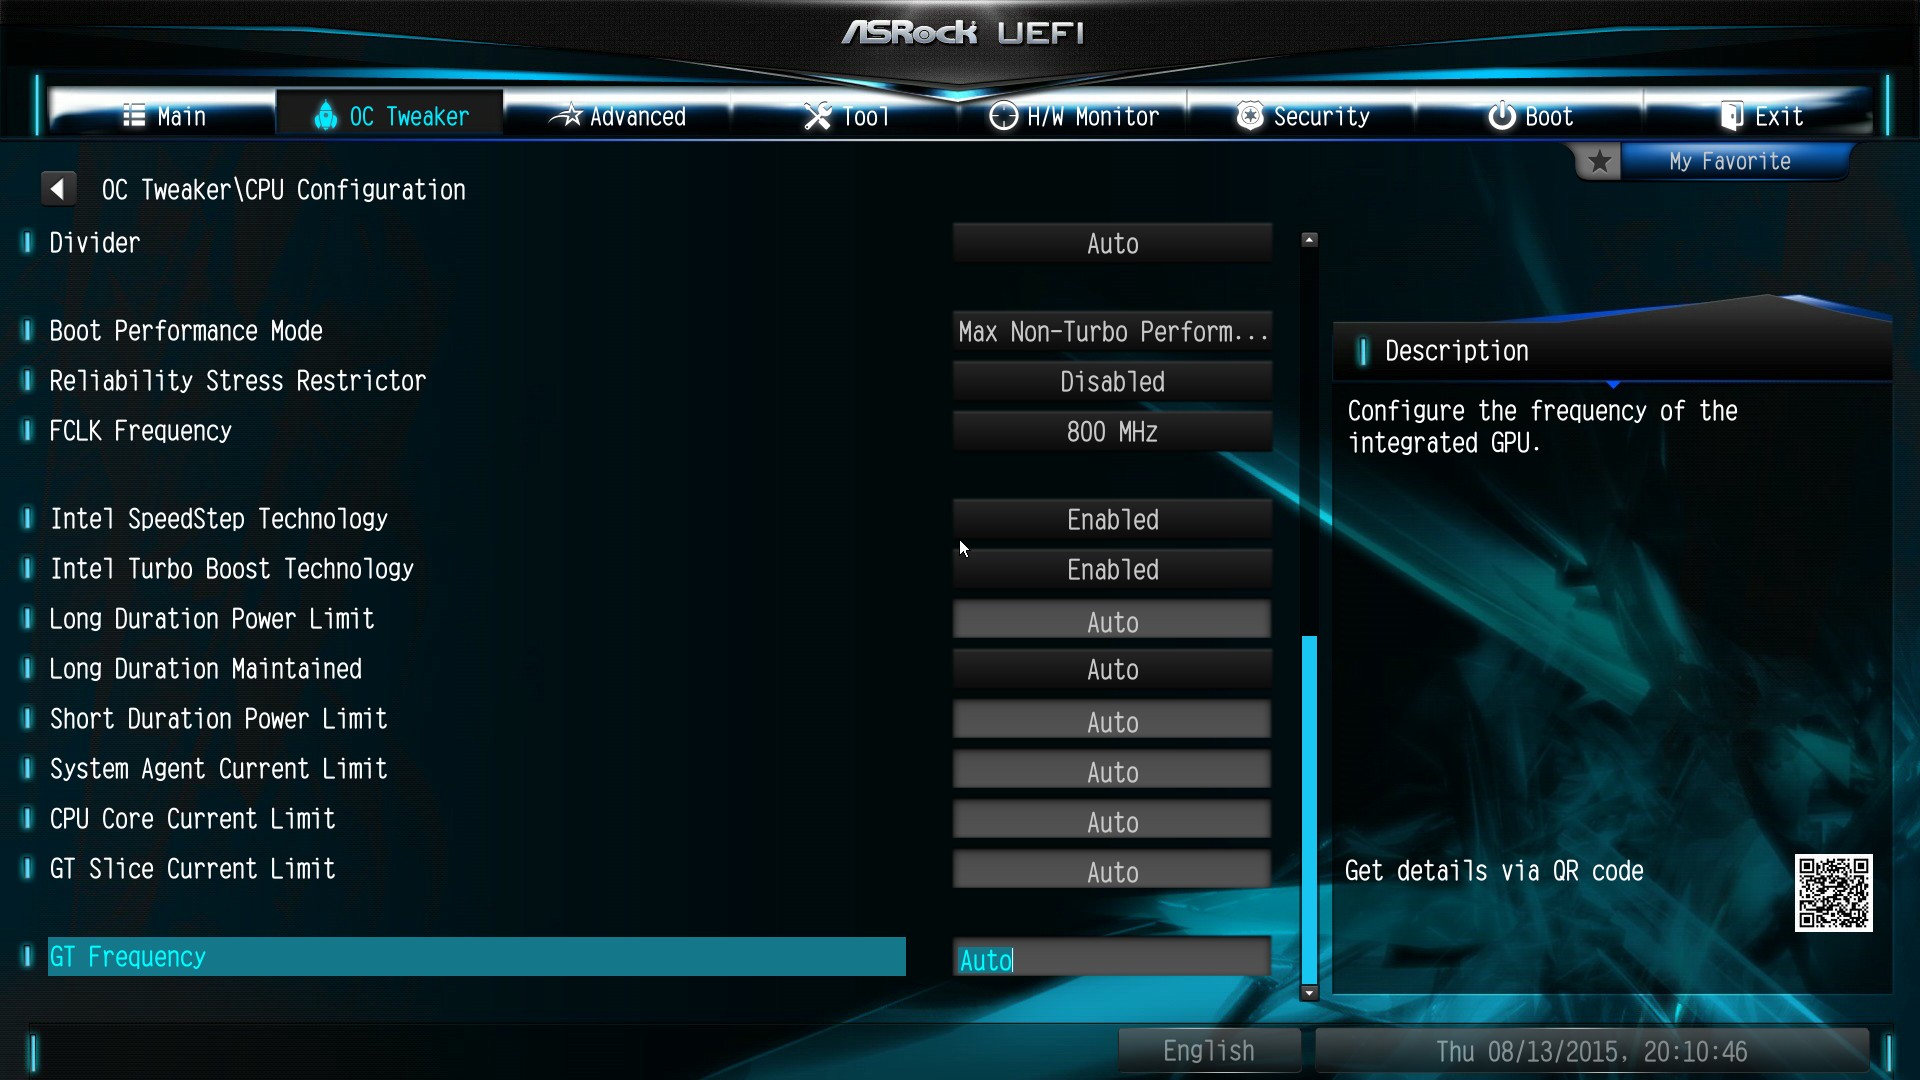
As noted in our overview, the Extreme7+ is not necessarily built with extreme overclocking specifically in mind, but for most motherboards in a manufacturer line up, the base BIOS options are the same hence why we have some included here.
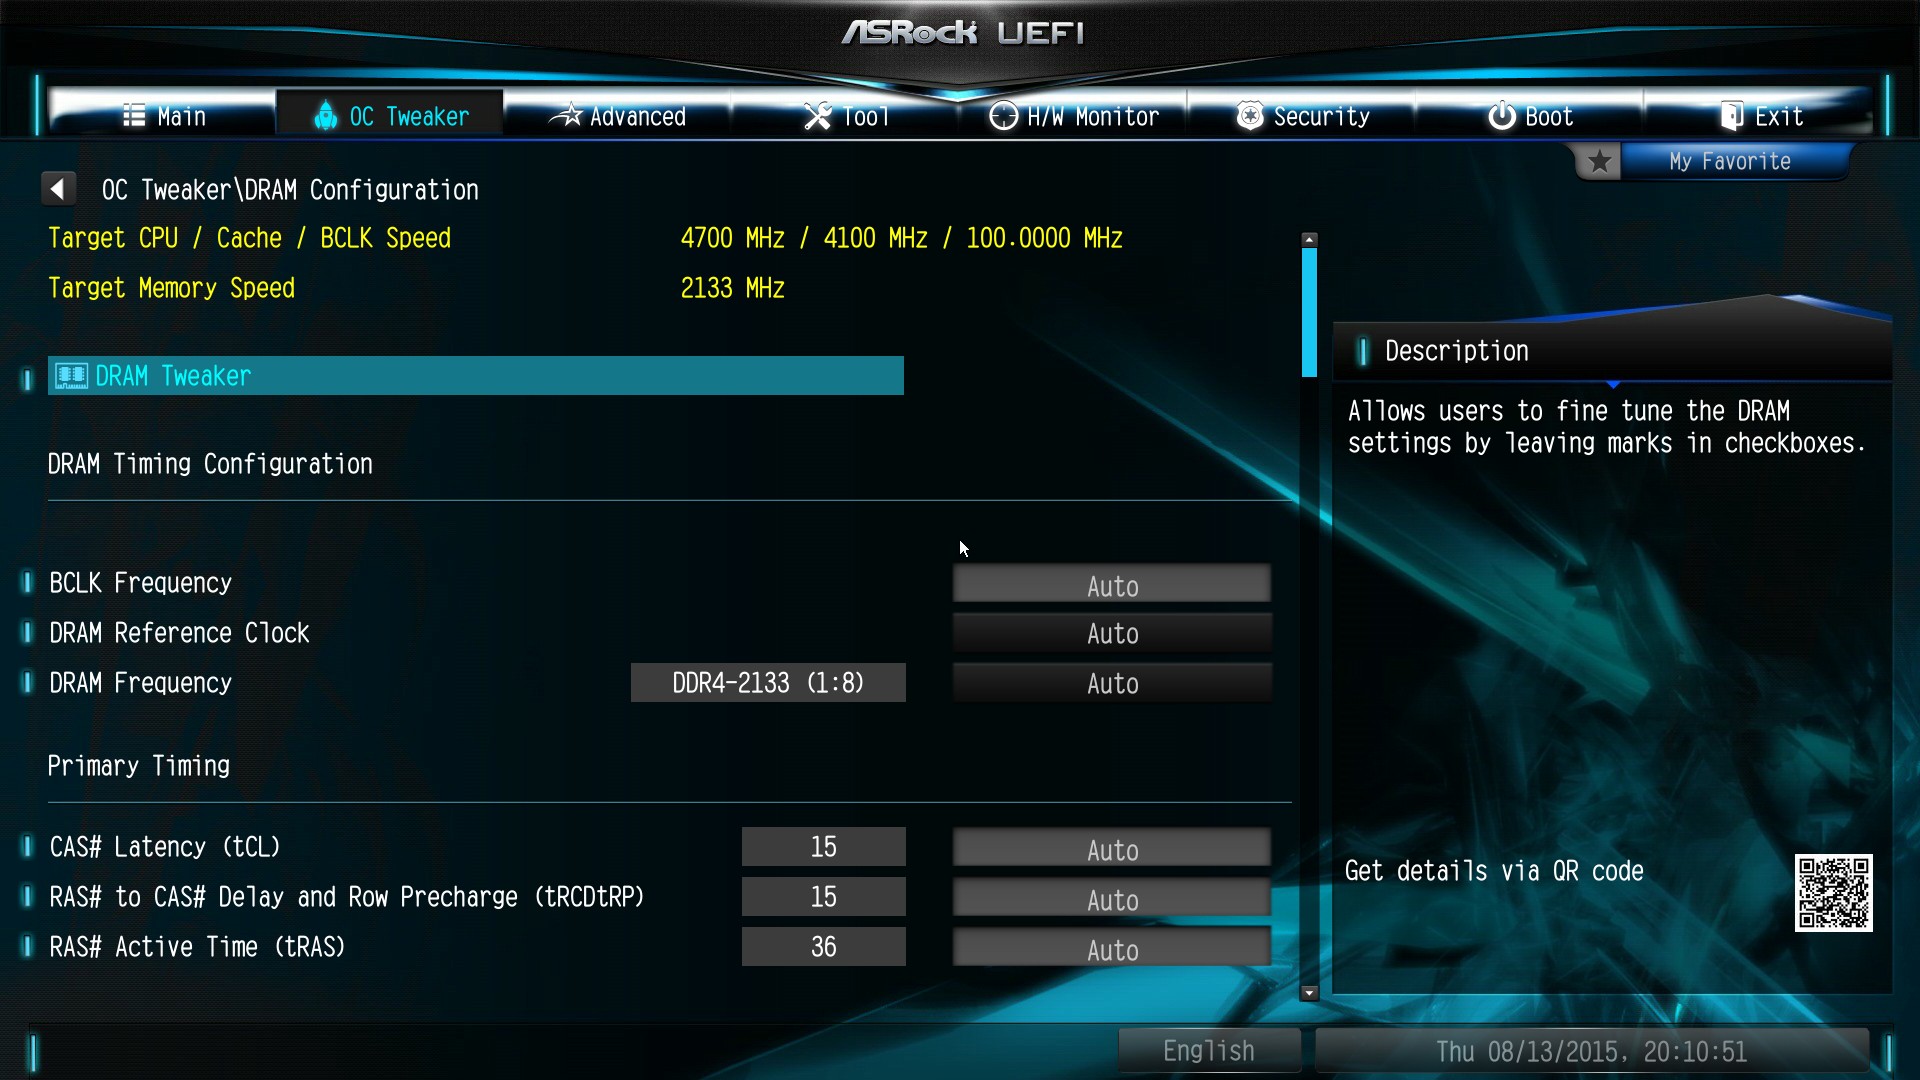
Memory configuration options show the current values of the memory and lets the user set them as appropriate, along with XMP. ASRock also has a feature called DRAM Tweaker, which shows the SPD information of the kit currently installed.

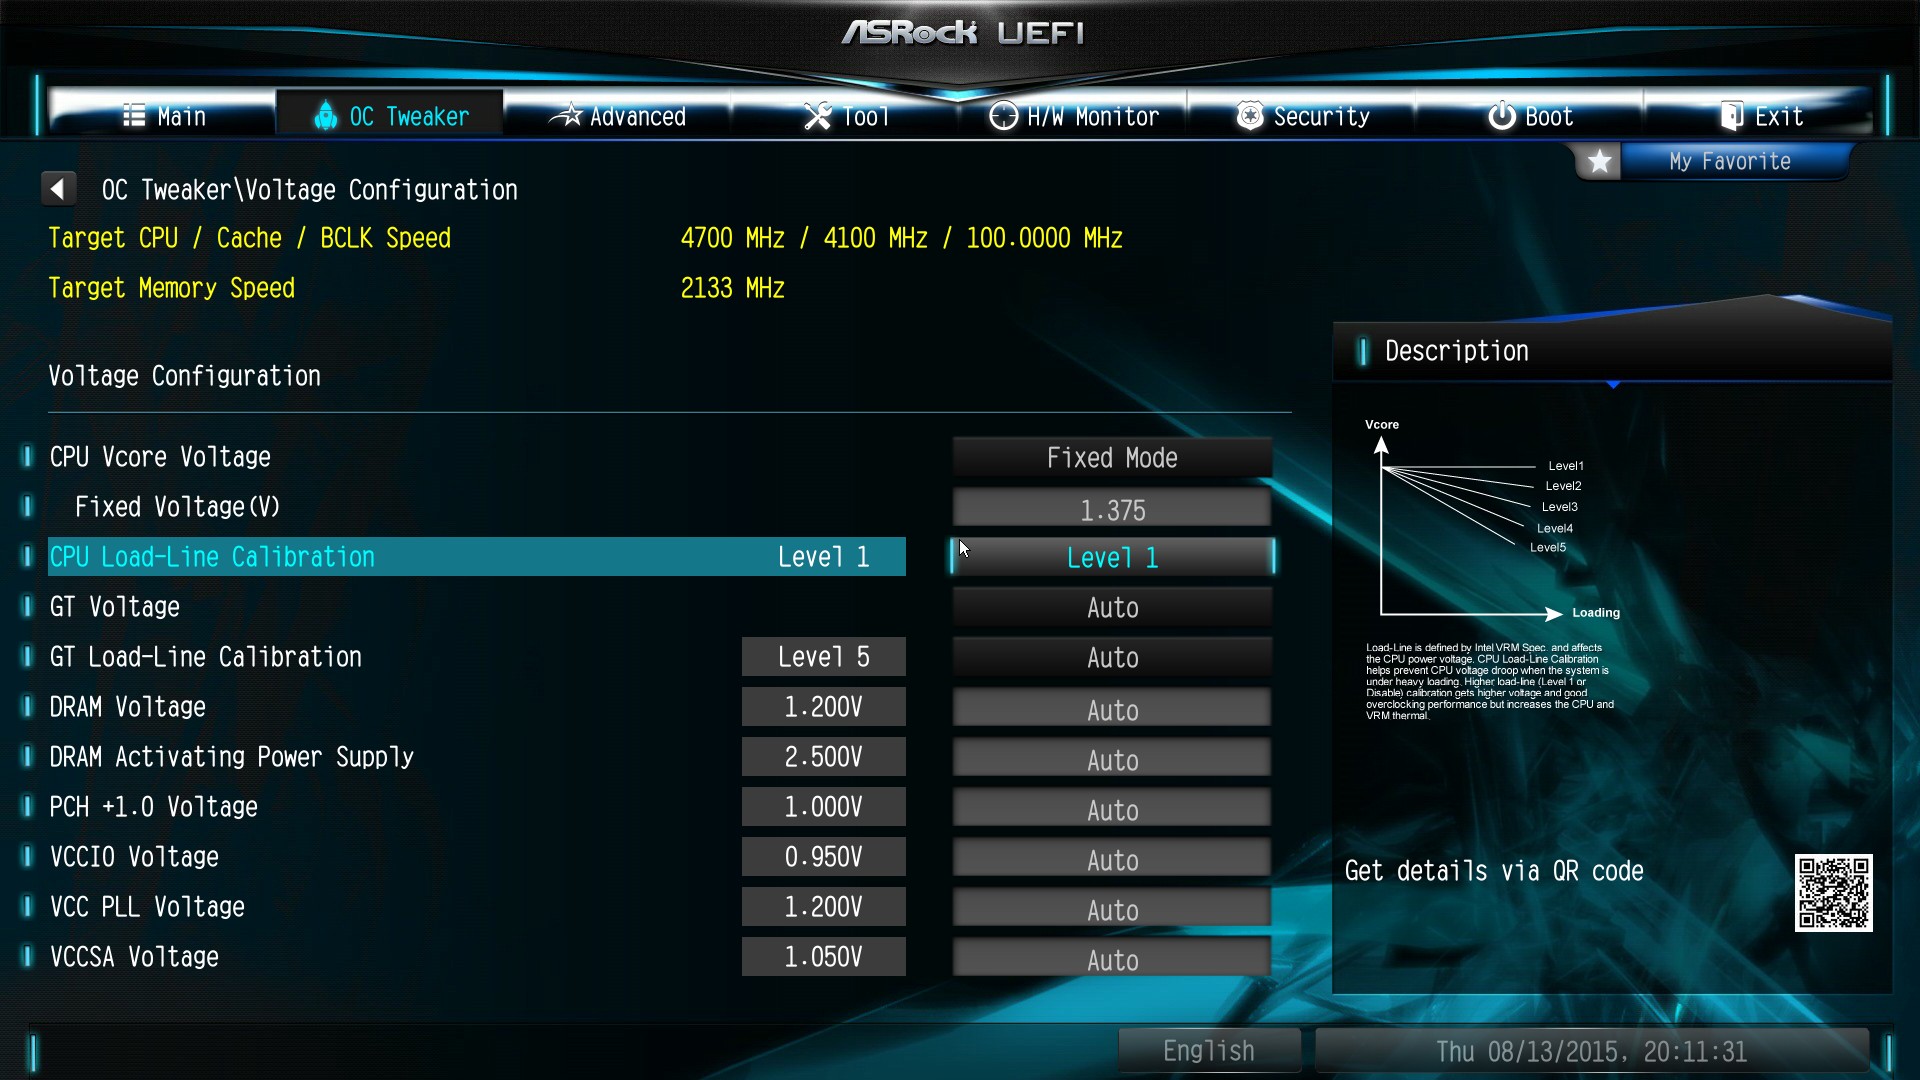
Voltage and load line calibration options are in the Voltage sub-menu of OC Tweaker, and in order to improve understanding as to what features such as load line calibration is (as well as how the options work), ASRock adds in a small diagram:
The Advanced tab of the BIOS has the usual array of configuration settings for the CPU, the chipset, storage and controllers. As part of the media blitz for this motherboard, ASRock sent a document detailing how to get three-way M.2 RAID 0 configured, which involves a multi-step process using these commands. This document should be available on ASRock’s website as well.
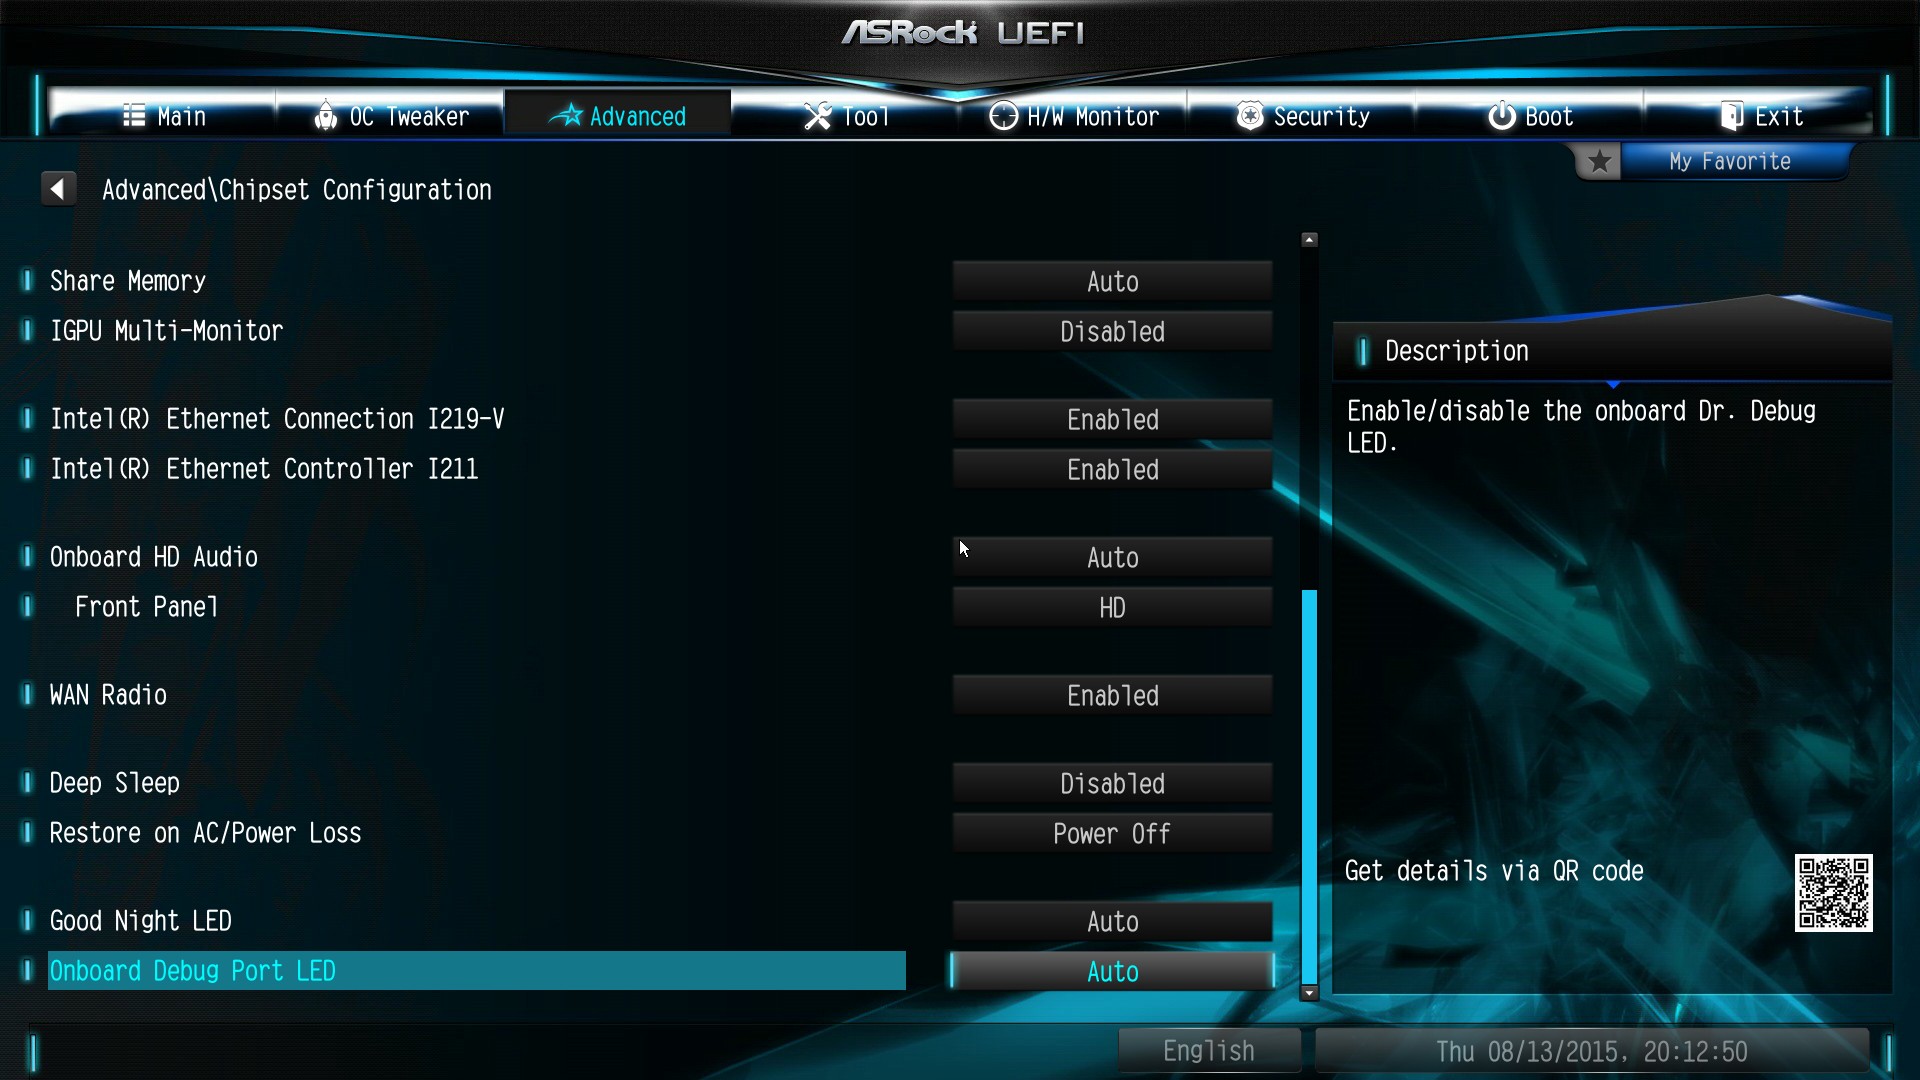
The chipset configuration menu is where most of the controller options outside storage are, and it is worth noting that features such as IGP Multi-Monitor are disabled by default but if a Wi-Fi module is added to the mini-PCIe, that should work straight away.
The Tool main tab is usually where we find some of ASRock’s more esoteric BIOS options.
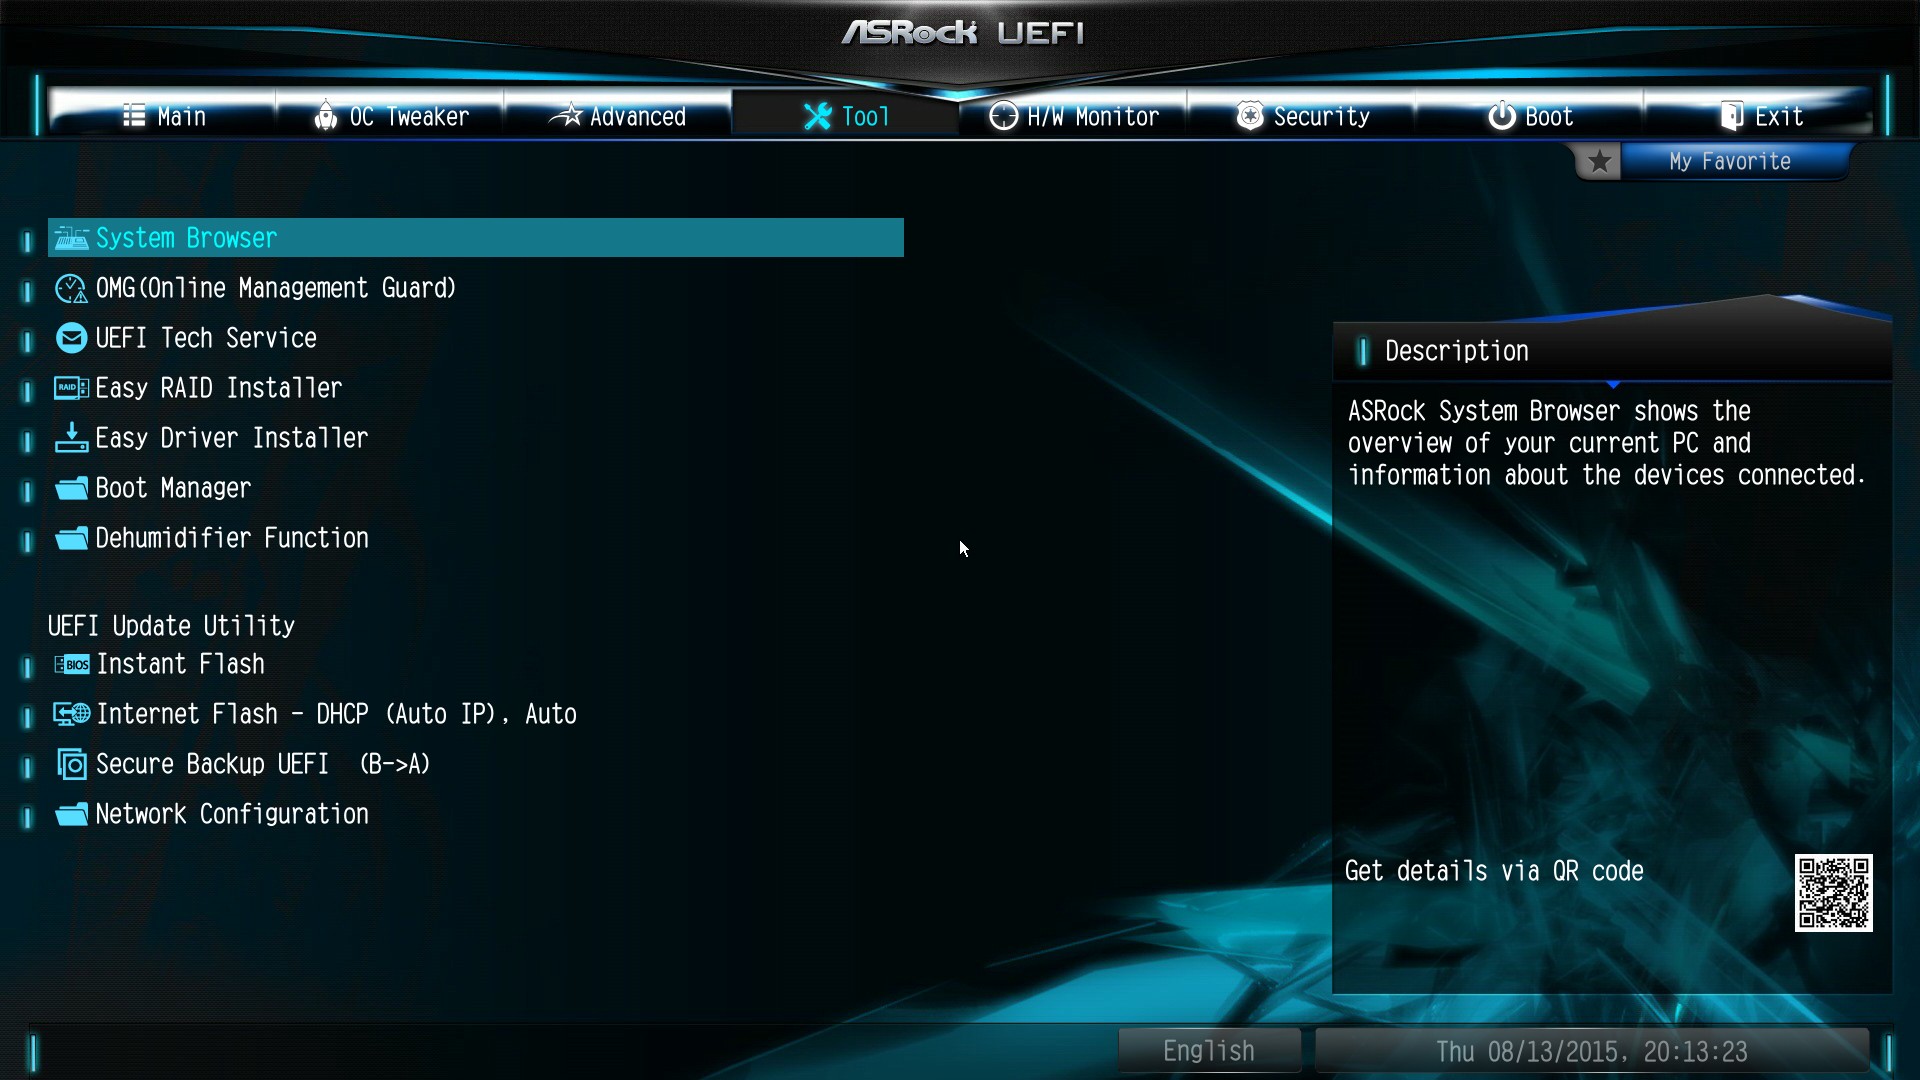
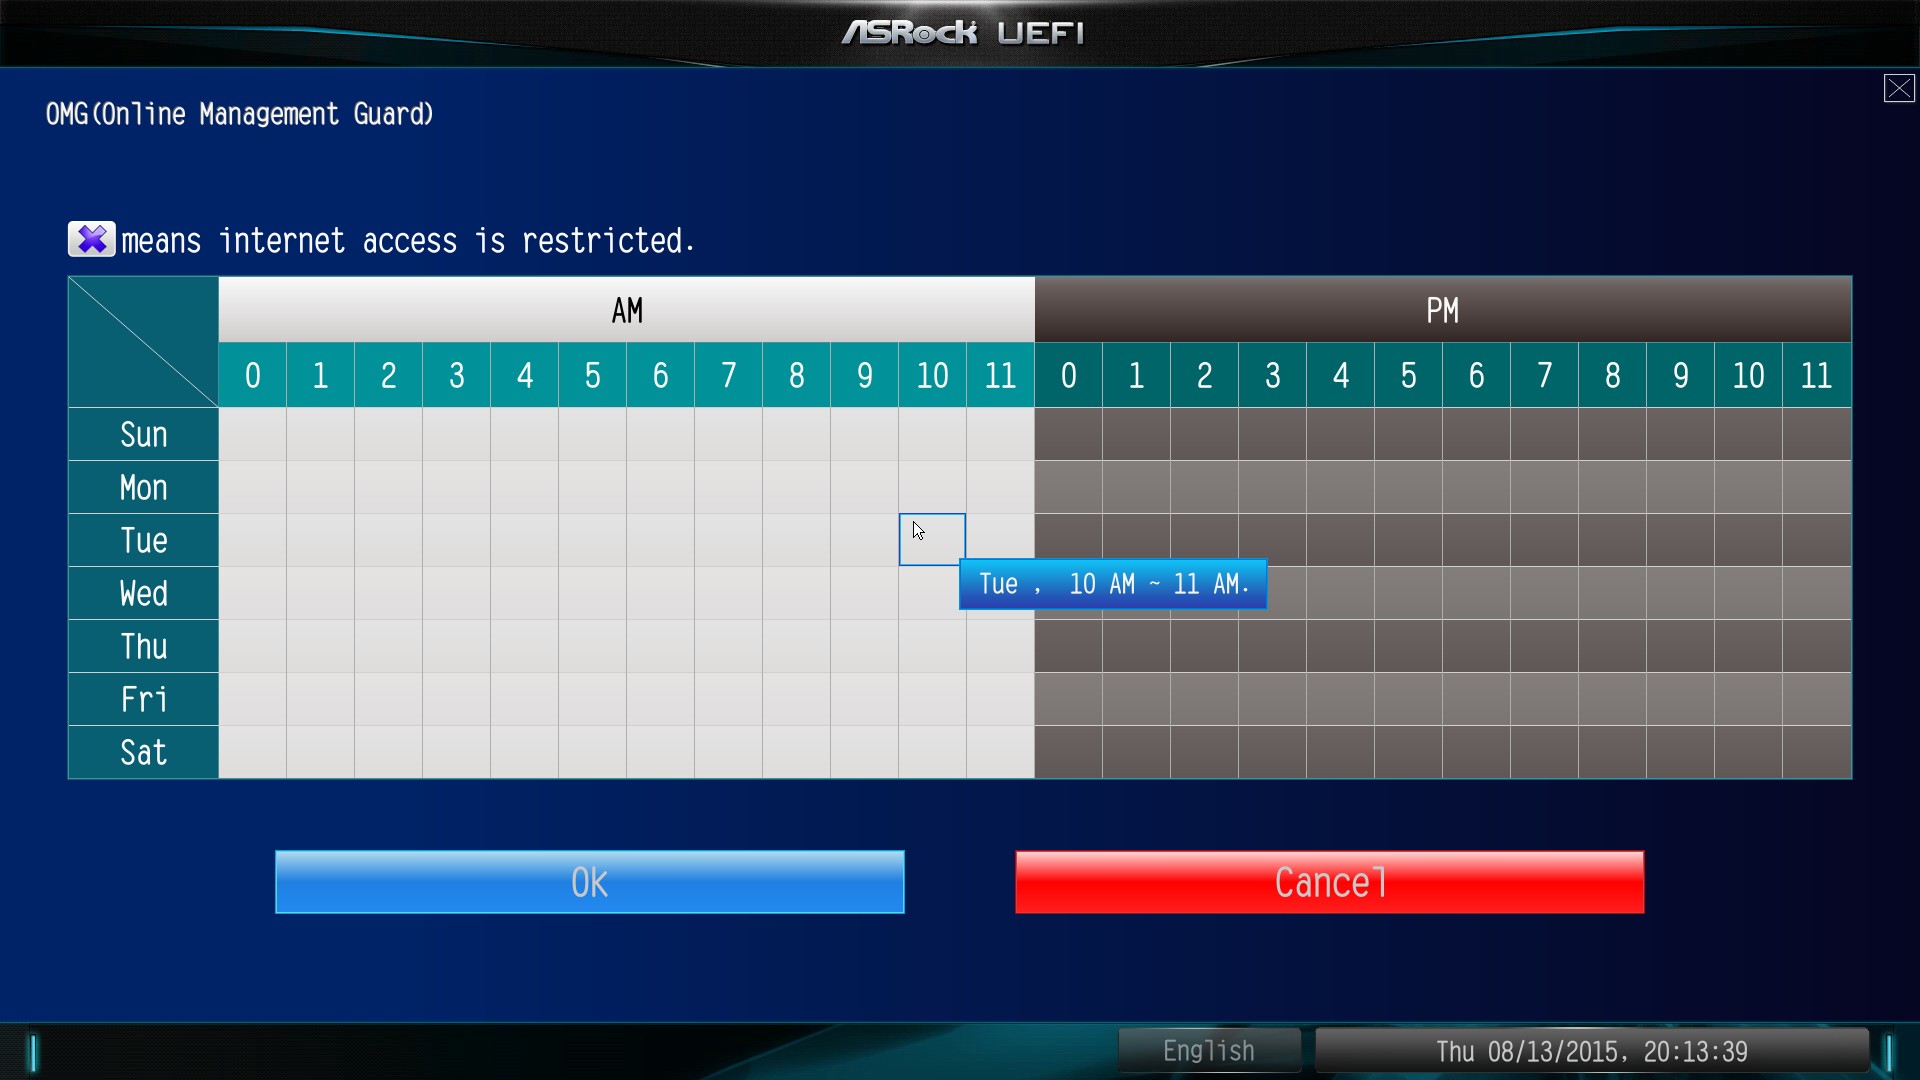
System Browser we covered as part of EZ mode, showing what is installed in the system and is a quick resource to check in case a memory module gets loose or stops working. There is also the Online Management Guard (OMG!) which has been a staple of ASRock motherboards for a number of years now. This allows the admin to adjust the times of day when the network ports are enabled:
The UEFI Tech Service is this weird idea for ASRock to receive submissions about BIOS errors and issues. I’m not sure if ASRock actually answers any of these, or if it is just used as an internal metric to move certain issues up the priority chain.
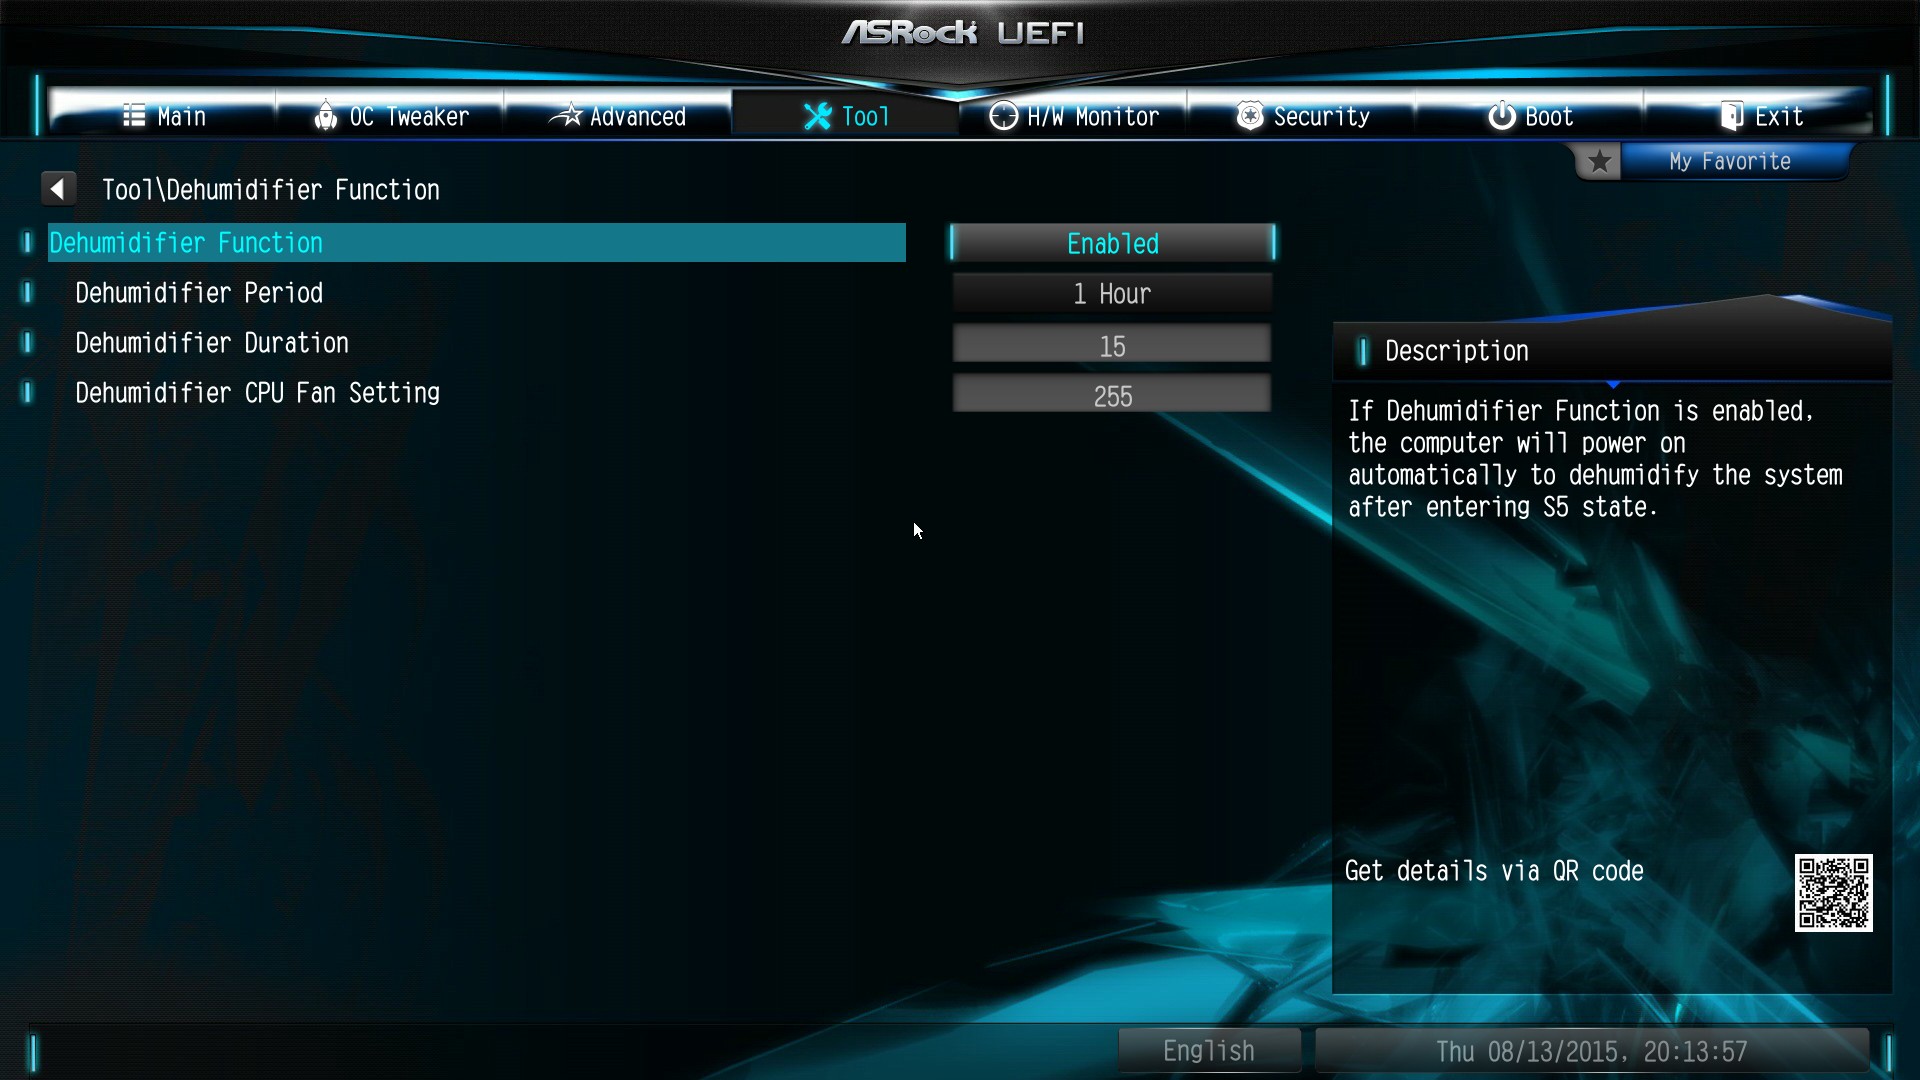
The Dehumidifier function is also a long running feature, which despite the misleading name is designed to keep the fans on the system spinning after shutdown and for small periods of time afterwards in order to remove the hot air that might still be in the case if the system is shut down after an intense gaming/work session. This is important in high humidity environments, due to the temperature gradient causing condensation in the case if the system keeps the hot air trapped and releasing the moisture as the air cools.
One of ASRock’s nice features is the ability to update the BIOS from the Internet automatically without the need for a USB stick or a separate machine – as long as an Ethernet cable is plugged in and there’s no firewall / requirement on the network to log in to get access, then this Internet Flash option does the business.
For fan options and monitoring, we saw ASRock’s new fan control service with X99 and it appears here as well.
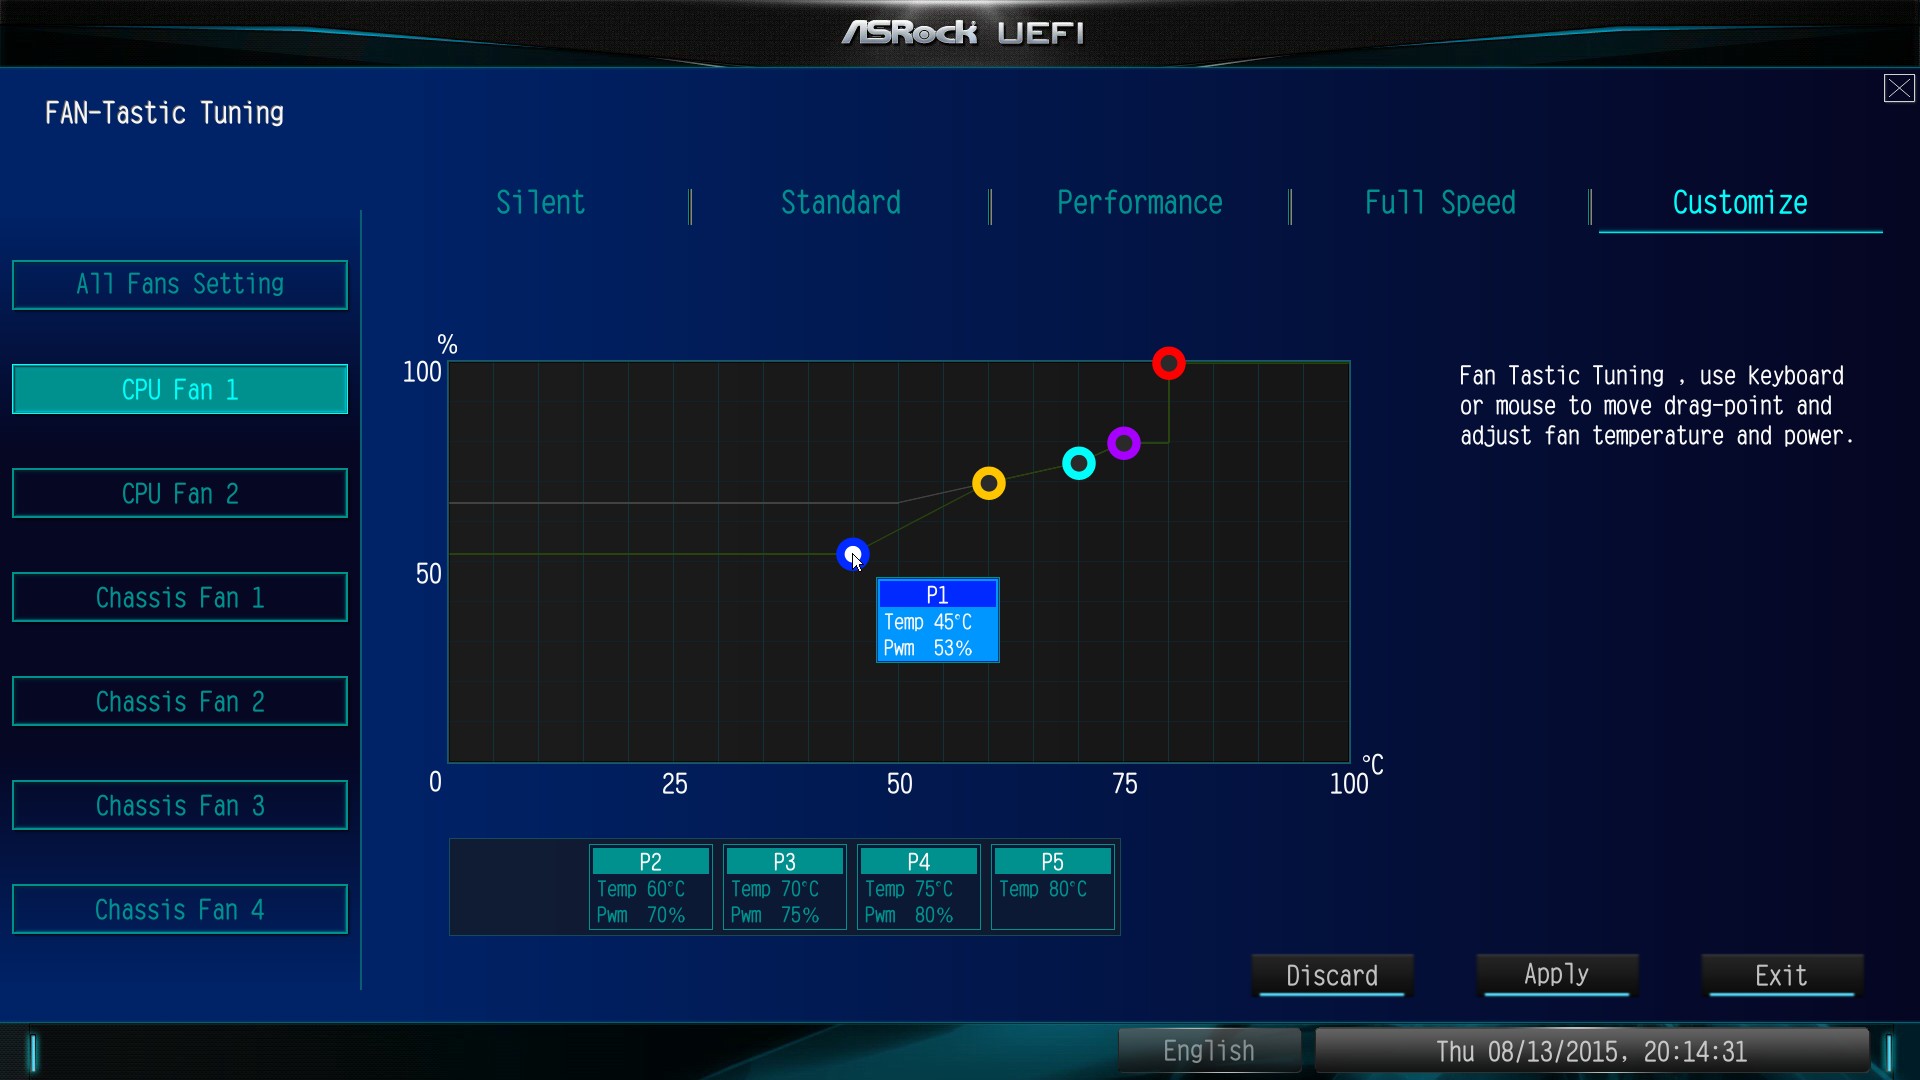
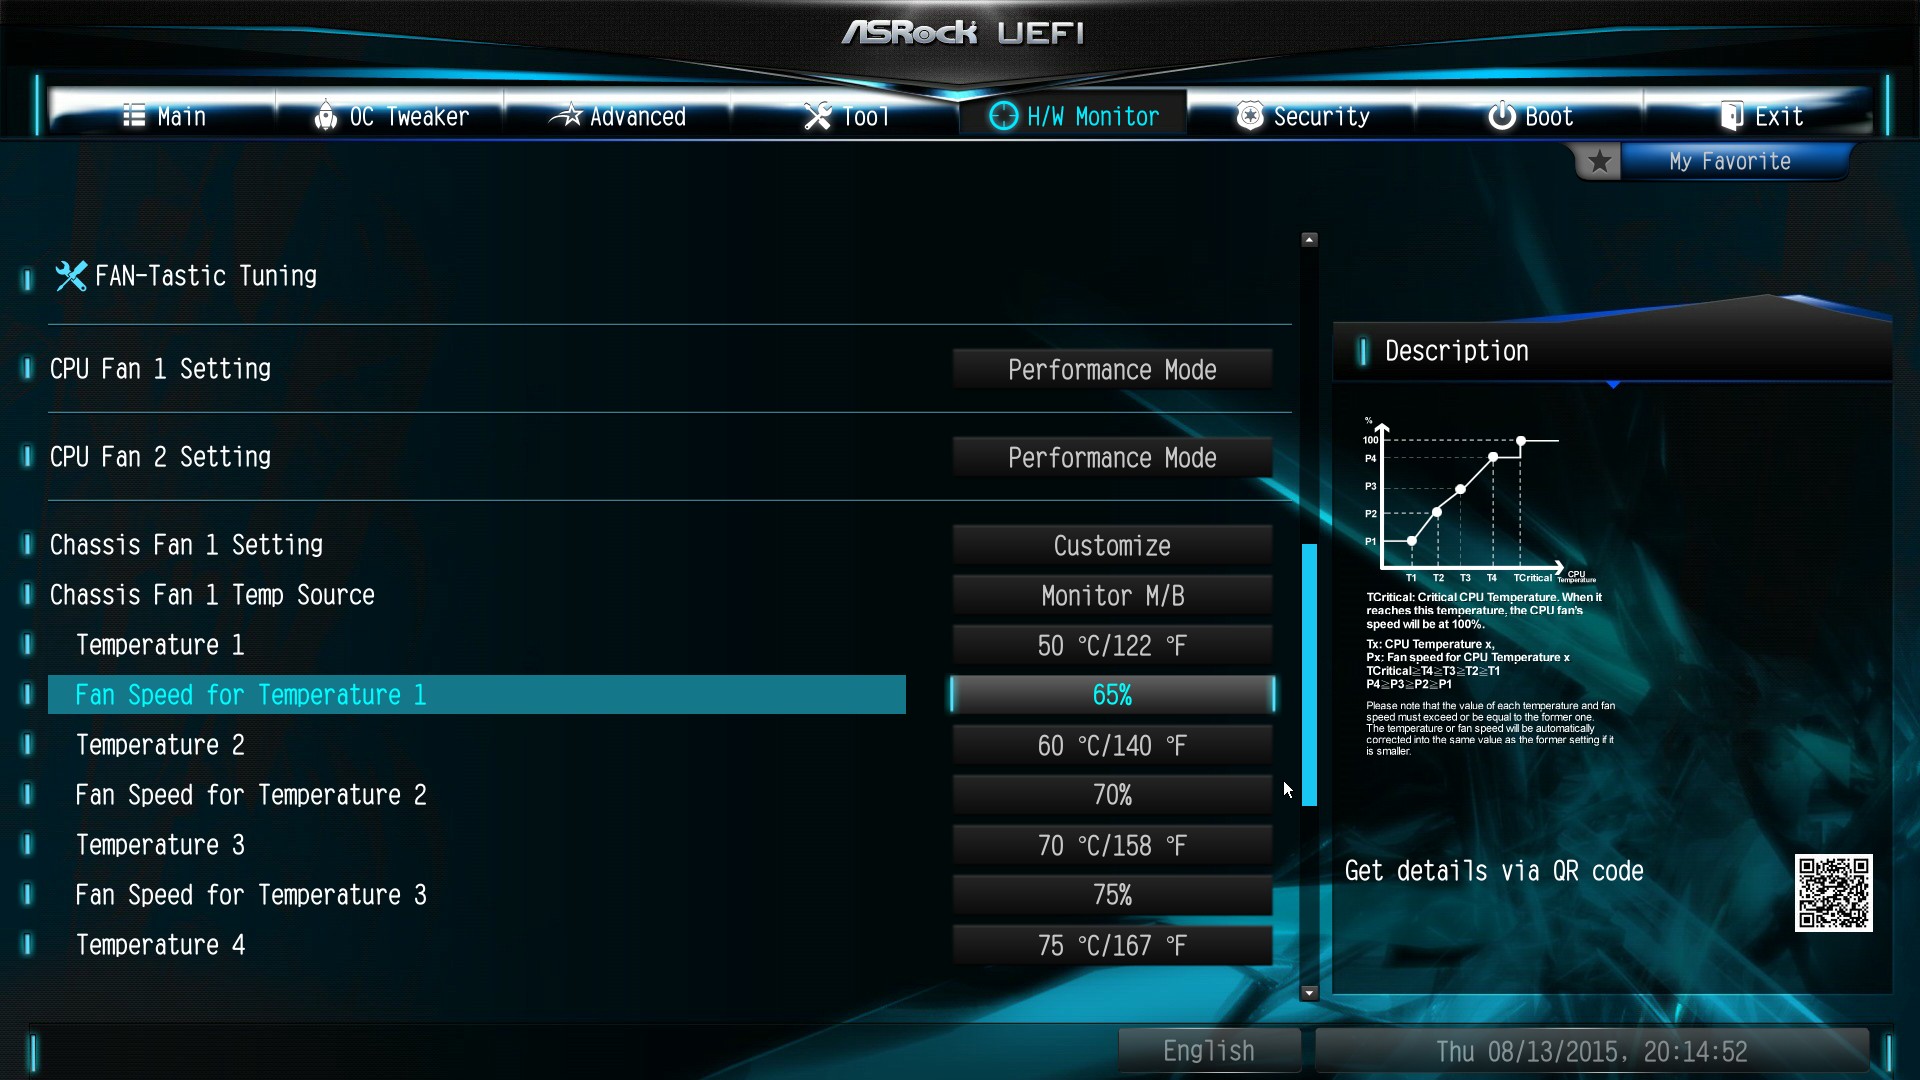
All the fans offer some form of control, as either one of the presets or through automatic tuning. In manual mode, as seen here, the CPU has five gradient points to adjust. If you want to do it old school, the ASRock BIOS does that as well with a diagram to show it:
The rest of the BIOS involves boot options, CSM and security.


63 Comments
View All Comments
DanNeely - Monday, November 30, 2015 - link
Immediate availability isn't a concern, and I'd rather have a 2x type C model anyway (Asus has announced one, but it's a 5.25" bay enclosure for a full height expansion card making it a bit of a WTF); I probably won't have a USB-C device until late summer/early fall of next year.If these can be made usable with Haswell at all is a bigger concern for me. I know I'd be bandwidth limited and only able to hit max speed on one port if the second is idle; but that's a limitation I could live with.
pedjache - Monday, November 30, 2015 - link
It's actually ASmedia controller that drives the front panel, so apart from the fact that using SATAexpress will probably disable 2 of your SATA ports, I see no other concern on usability with haswell.nunya112 - Friday, November 27, 2015 - link
how many layers in the motherboard? is there copper etc.??ASROCK interests me, as they are better priced. if they start to have better components etc. and now the only issue I have is the motherboards are usually thin, and quite flexible
extide - Monday, November 30, 2015 - link
Why do you care about the # of layers? Do you mistakenly think that more is better?tuxRoller - Saturday, November 28, 2015 - link
How many samples did you use to determine that dpc time?careyd - Saturday, November 28, 2015 - link
Ian, love the article, read every word, studied every chart. Desperate to see the headline feature of triple M2 RAID benchmarked. Preferably with Samsung 950's, since I think adapting to the Intel 750's is a lot less elegant despite the possibility of greater performance. This type of arrangement should saturate anyway. But want to see throughput and IOPS numbers. Also, if this beggar can be a chooser, I'd love to see benchmarkes of two of the M.2's striped, with a third running solo. I could envision a number of reasons why this configuration might be a preferable, having a solo M.2 for system drive and the striped pair for other data intensive tasks/media/etc. I think it would make a heck of a cache drive for Adobe After Effects.TesseractOrion - Sunday, November 29, 2015 - link
I think I'd choose striped for OS, solo for redundancy instead, I'd want the OS to be as responsive as humanly (computerly) possible.jasonelmore - Sunday, November 29, 2015 - link
what a waste. the OS is never going to need 2.1GB Per second write and reads. Only a scratch disk or video editing app would use it, then you might as well use careyd configurationmurak01 - Sunday, November 29, 2015 - link
A few tests with three 950 Pro in RAID0 would be interesting. Thanks for a good review!Reflex - Sunday, November 29, 2015 - link
Right now you can pick up 250GB Samsung 850 EVO M.2 SSD's for only $79 at Newegg and Amazon. Given that this board is $220, dropping $240 on storage is not ridiculous and should perform exceptionally well.