Averting Disaster - A Guide To Computer Backups (2014)
by Brett Howse on May 21, 2014 9:00 AM EST- Posted in
- IT Computing
- Mac
- Apple
- Windows
- Cloud Computing
- macOS
Built-in Backup Tools - OS X
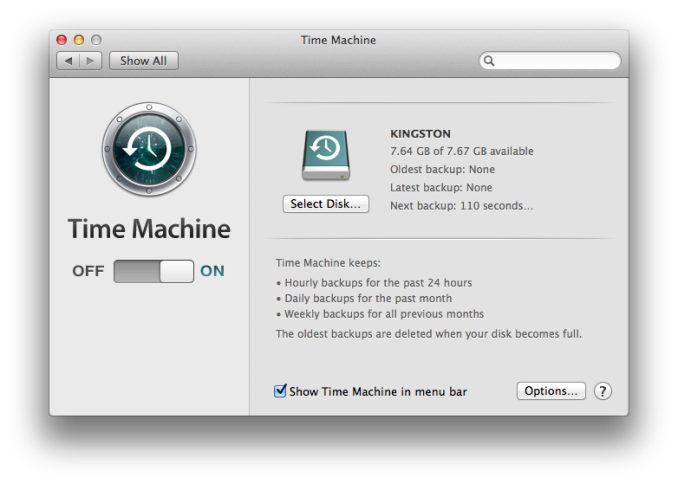
Apple introduced Time Machine back with the Leopard release in 2007. Time Machine is an all-in-one built-in backup utility, allowing both file and image level backups with versioning. Time Machine will back up to internal or external disks, as well as the AirPort Time Capsule which is Apple’s own NAS specifically for backups. You can also back up to another Mac running at least Leopard, and with Mountain Lion Apple added the ability to backup to multiple destinations, with the backups alternating among the backup targets to provide additional levels of redundancy. Officially, Time Machine is not supported on other NAS devices. It does not work natively with Server Message Block (SMB) or Network File System (NFS) shares but instead requires the Apple Filing Protocol (AFP). If you are not going to use an AirPort device, ensure the NAS you select specifically supports Time Machine. Time Machine is simple to use, and yet powerful enough to be an almost complete backup solution for the Mac. Let’s look at how to set it up:
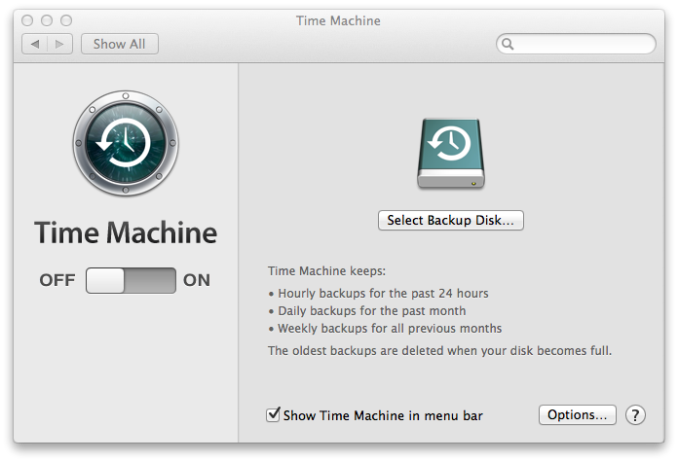
- First you need to configure a backup disk. Ensure you have your backup disk connected, or your AirPort Time Capsule configured, and then open the Time Machine menu from the menu bar by clicking the Time Machine icon and choosing Open Time Machine Preferences…
- On the Time Machine menu, click Select Backup Disk…
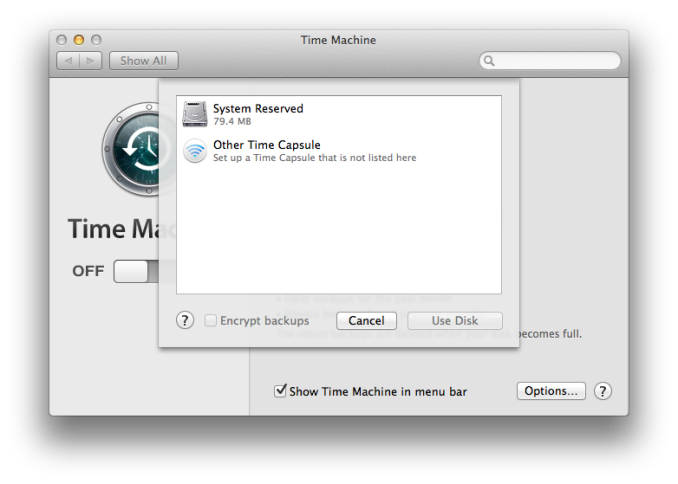
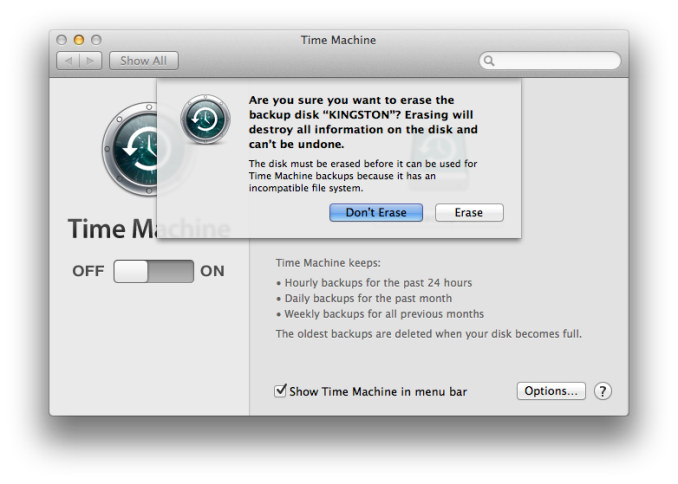
- Here it will display the available backup targets. Choose the backup target you’d like to use, whether it is an attached hard disk or the AirPort Time Capsule and click Use Disk. If the hard disk is not formatted with HFS+, you will be prompted to erase the disk and reformat which will of course delete any data currently on the backup target.
- Now that you’ve selected a disk, Time Machine will automatically start backing up.
Time Machine does a full backup of your system, and then it starts to back up every hour. If the backup target is unavailable it will delay the backup until it is available again. Because only changes are backed up, each successive backup is relatively quick. If you would like to exclude some files from being backed up, click the Options button in the Time Machine menu to add exclusions.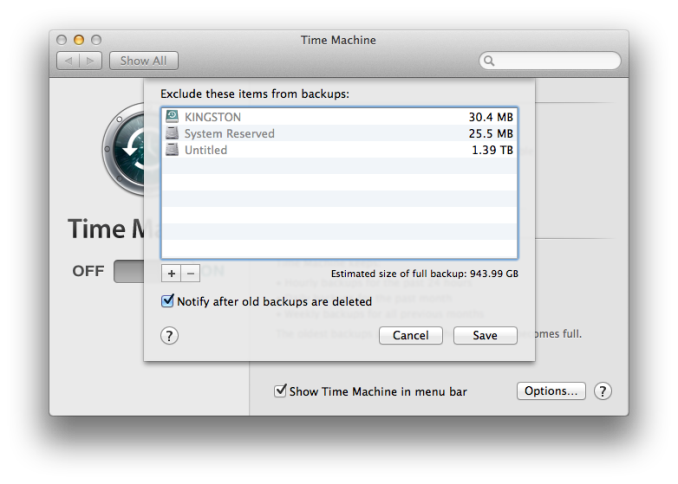
Other advanced options are not available, so there is no way to increase or decrease the frequency of backups or specify how many versions of a file to keep. The program will just back up indefinitely until it fills the available backup target, at which point it begins to delete the oldest files first.
Restoring files is relatively easy as well:
- Navigate to the folder where the file you want to recover should be (example – Documents).
- Click on the Time Machine icon in the menu bar and choose Enter Time Machine.
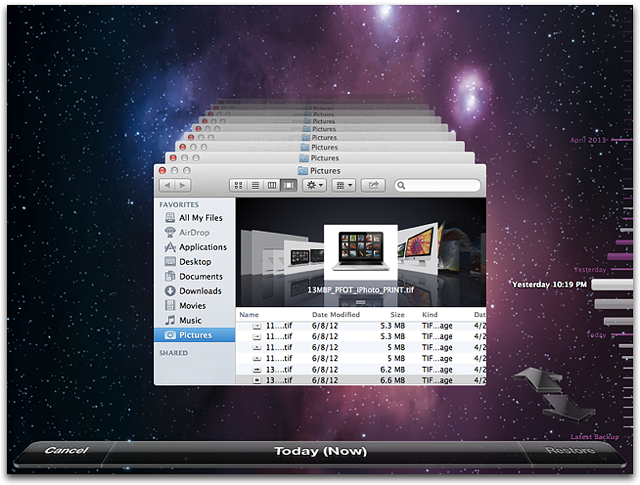
- This will open the restore interface, which shows a list of all of the previous backups sequentially. Using the arrows allows you to move from one backup to the next, or you can utilize the date bar on the right side which will allow you to move back to a known date. Selecting a backup date will then display the folder exactly as it was during the backup.
- Once you’ve located the file you wish to restore, select the file, and then click Restore. If the file was deleted, it will just be restored, but if the file still exists in its original location, you will be prompted to overwrite the file.
Time Machine can also be used within certain programs such as contacts, and restores operate in the same manner as files.
To restore the entire system to a previous state, hold down the Command and R keys at startup to enter the Recovery mode. In Recovery mode, one of the options is to restore from a Time Machine backup.






133 Comments
View All Comments
Samus - Thursday, May 22, 2014 - link
+1 for Acronis True Image. Amazing product, I've purchased the newer editions every time a major Windows OS is released (TrueImage 2008, TrueImage 2010, TrueImage 2013, now TrueImage 2014)I purchased TrueImage 2014 because it introduced integrated cloud backup which works extremely well, and they give you 250GB for the first year free (and $50/year after that.) Since I upgraded from 2013, it only cost $20 for the upgrade to 2014. You can also sneakily use the Intel SSD Migration software as your "upgrade" edition if you happen to have an Intel SSD, essentially getting you the full software and a year of cloud storage for $20 bucks.
The downside is additional storage is expensive, where as Crashplan and Carbonite have what are virtually unlimited plans starting at $100, some plans even covering "unlimited" users making it perfect for small business.
Either way, great article. We need to spread the backup knowledge so everyone does it, because I think the reason most people don't backup is because they don't know how.
bsd228 - Thursday, May 22, 2014 - link
Brett- the primary con of cloud services that I think must always be kept in mind is the consequence of your provider going out of business. We've seen this before, and so long as we see newcomers offering unlimited storage cheap as an initial lure to get customers, we'll continue to see it. If it's just your backup, then the cost is the effort required to identify another and get the first full dump done. If we're in the 100s of gigs and beyond, that is significant. So my philosophy is to pick a stable vendor who is making a profit on me, not finding the one offering terms I can exploit. Generally this means pricing based on data size, and a preference to very stable firms like Amazon or Google.toyotabedzrock - Thursday, May 22, 2014 - link
I wish they would provide a way for families to store each others data encrypted so they could provide for their own disaster recovery.RoboKaren - Tuesday, June 10, 2014 - link
It's called Crashplan. Backing up to another person's (friend's, family, etc.) drive is a free option.easp - Thursday, May 22, 2014 - link
Notebook users should really, really, have a networked backup target as part of their mix.External HDDs don't really cut it for Notebook users, unless they regularly "dock" with a monitor or USB hub connected to the drive. Some people do, but I know many many that don't, and while they may have the best of intentions, they will not remember to hook up the external drive on a regular basis.
A network target on their LAN will ensure that automatic backups happen in the course of regular use. A publicly accessable network target, like Crashplan Cloud, or AWS Glacier, or even Crashplan's PTP with portmapping or UPnP enabled, allow automatic backups to happen whenever they have an internet connection. Anything less is a disaster waiting to happen.
Z15CAM - Thursday, May 22, 2014 - link
So a 1.32MB DOS app named GHOST.EXE writing to FAT32 is no longer applicable - As if.Z15CAM - Thursday, May 22, 2014 - link
You can't migrate BackUp's over Networks thru GUI using Symantec's Ghost Counsel.Rogatti - Thursday, May 22, 2014 - link
Already in the linux world:-
ISO for DVD
$ dd if=/dev/sr0 of=imagem.iso bs=2048 ##(if=dvd unit - of= name.iso)##
-
MondoRescue
http://www.mondorescue.org/docs/mondorescue-howto....
Z15CAM - Thursday, May 22, 2014 - link
Already in the Linux world:NO the DOS World
SeanFL - Friday, May 23, 2014 - link
One issue I had with dropbox, box, or copy is they all wanted to setup their own directory and do the backup from there. If I have a well organized set of drives with various folders and subfolders, I'd like to be able to choose what to backup and skip (as I can do in Crashplan). Have any of the cloud ones mentioned above made it so you can choose your own directories to backup?