Averting Disaster - A Guide To Computer Backups (2014)
by Brett Howse on May 21, 2014 9:00 AM EST- Posted in
- IT Computing
- Mac
- Apple
- Windows
- Cloud Computing
- macOS
Built-in Backup Tools - OS X
Apple introduced Time Machine back with the Leopard release in 2007. Time Machine is an all-in-one built-in backup utility, allowing both file and image level backups with versioning. Time Machine will back up to internal or external disks, as well as the AirPort Time Capsule which is Apple’s own NAS specifically for backups. You can also back up to another Mac running at least Leopard, and with Mountain Lion Apple added the ability to backup to multiple destinations, with the backups alternating among the backup targets to provide additional levels of redundancy. Officially, Time Machine is not supported on other NAS devices. It does not work natively with Server Message Block (SMB) or Network File System (NFS) shares but instead requires the Apple Filing Protocol (AFP). If you are not going to use an AirPort device, ensure the NAS you select specifically supports Time Machine. Time Machine is simple to use, and yet powerful enough to be an almost complete backup solution for the Mac. Let’s look at how to set it up:
- First you need to configure a backup disk. Ensure you have your backup disk connected, or your AirPort Time Capsule configured, and then open the Time Machine menu from the menu bar by clicking the Time Machine icon and choosing Open Time Machine Preferences…
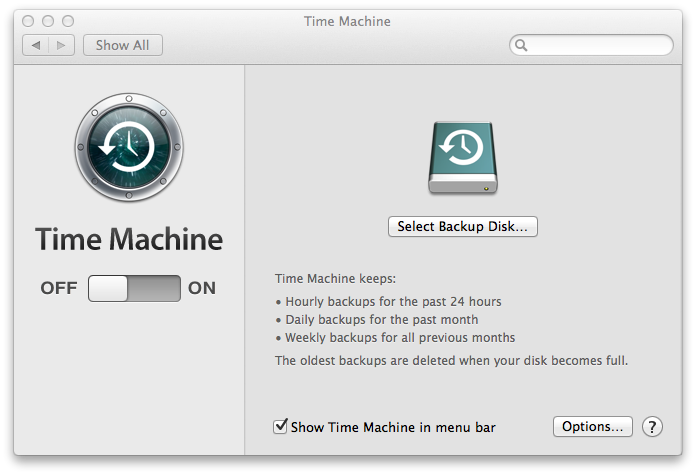
- On the Time Machine menu, click Select Backup Disk…
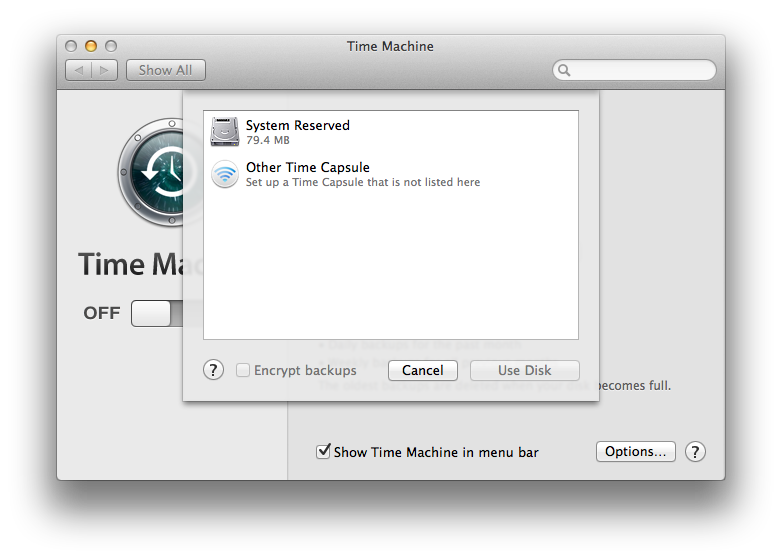
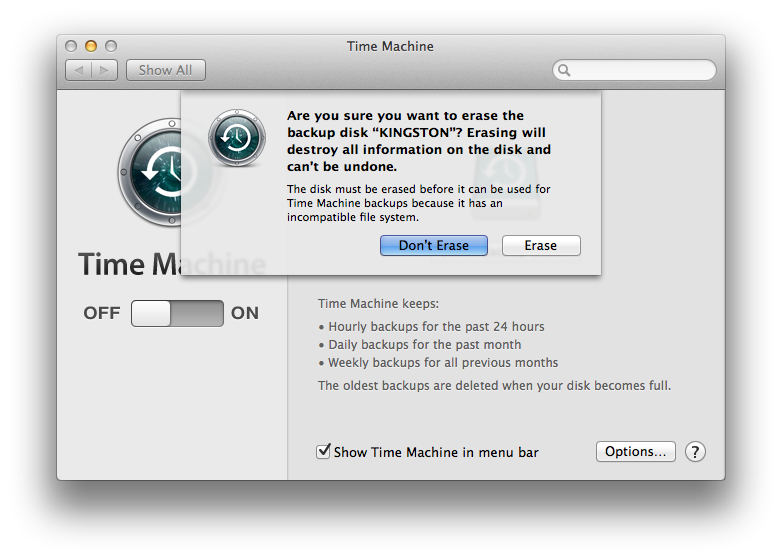
- Here it will display the available backup targets. Choose the backup target you’d like to use, whether it is an attached hard disk or the AirPort Time Capsule and click Use Disk. If the hard disk is not formatted with HFS+, you will be prompted to erase the disk and reformat which will of course delete any data currently on the backup target.
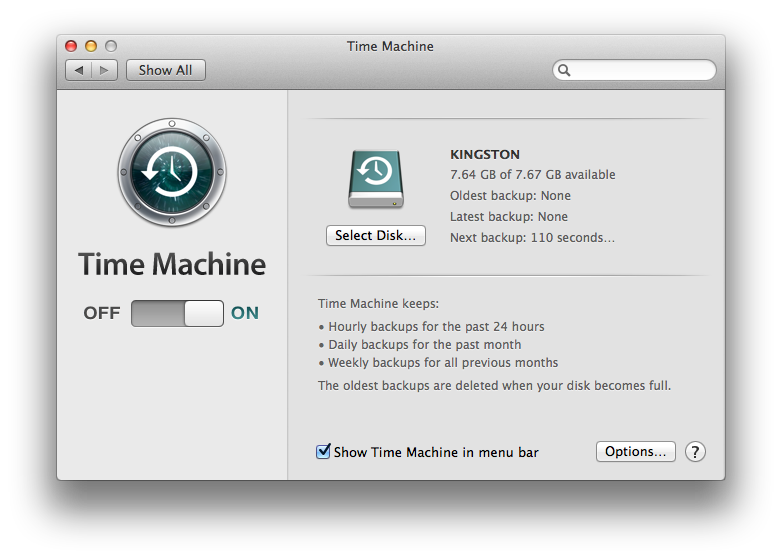
- Now that you’ve selected a disk, Time Machine will automatically start backing up.


Time Machine does a full backup of your system, and then it starts to back up every hour. If the backup target is unavailable it will delay the backup until it is available again. Because only changes are backed up, each successive backup is relatively quick. If you would like to exclude some files from being backed up, click the Options button in the Time Machine menu to add exclusions.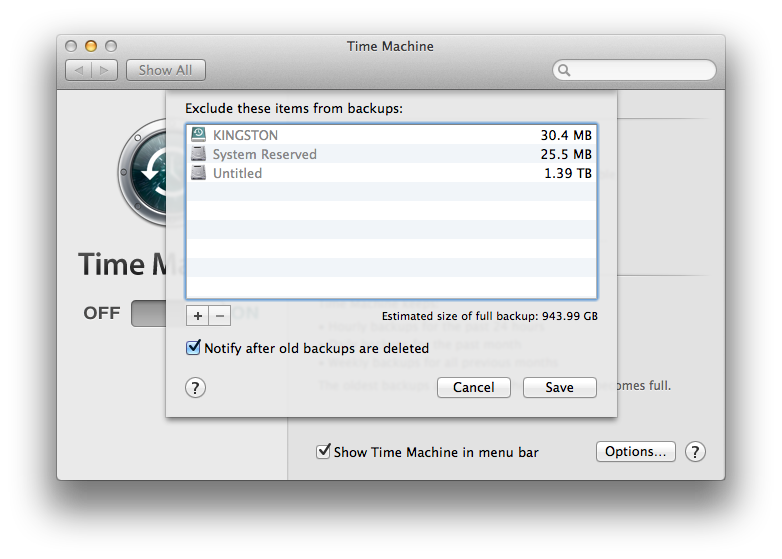
Other advanced options are not available, so there is no way to increase or decrease the frequency of backups or specify how many versions of a file to keep. The program will just back up indefinitely until it fills the available backup target, at which point it begins to delete the oldest files first.
Restoring files is relatively easy as well:
- Navigate to the folder where the file you want to recover should be (example – Documents).
- Click on the Time Machine icon in the menu bar and choose Enter Time Machine.
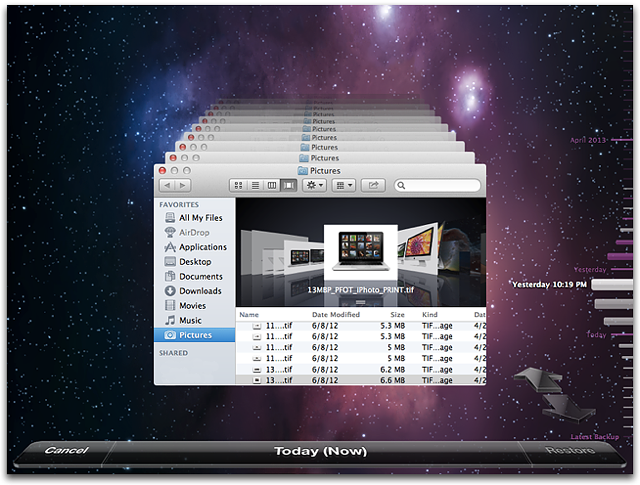
- This will open the restore interface, which shows a list of all of the previous backups sequentially. Using the arrows allows you to move from one backup to the next, or you can utilize the date bar on the right side which will allow you to move back to a known date. Selecting a backup date will then display the folder exactly as it was during the backup.
- Once you’ve located the file you wish to restore, select the file, and then click Restore. If the file was deleted, it will just be restored, but if the file still exists in its original location, you will be prompted to overwrite the file.
Time Machine can also be used within certain programs such as contacts, and restores operate in the same manner as files.
To restore the entire system to a previous state, hold down the Command and R keys at startup to enter the Recovery mode. In Recovery mode, one of the options is to restore from a Time Machine backup.


133 Comments
View All Comments
gcoupe - Wednesday, May 21, 2014 - link
Well, to be fair WHS 2011 is not yet "defunct". It is in mainstream support until April 2016:http://support.microsoft.com/lifecycle/search/defa...
However, I agree that it is a crying shame that Microsoft has left the home server market to wither on the vine. WHS was a good product. WHS 2011 was not the advance over the original that it should have been, because of Microsoft organizational politics. Still, it was a real bargain at $40. Windows Server Essentials 2012 is too expensive for home users to even consider.
peterfares - Wednesday, May 21, 2014 - link
I agree. I Use Windows Server 2012 R2 because I got a license from DreakSpark but there is absolutely no way I'd consider buying that for home server use. I'd probably just run a client version of Windows and use third party programs to handle backups. It's unfortunate that they removed automatic system image backups from Windows 8.1kmmatney - Wednesday, May 21, 2014 - link
WHS 2011 with Stablebit DrivePool has been working for me. I plan on keeping it a while, but after that I'll just figure out a way to pretty a regular version of Windows on the machine, and third party central backup programs. I also use my WHS server as a Minecraft server, and media server.SirGCal - Wednesday, May 21, 2014 - link
100 GB - $241 TB / $120
10 TB / $1200
20 TB / $2400
300 TB / $3600
Don't you mean 30TB, not 300TB? For Google Drive on 'Consumer Cloud and What I Do' page? If not, then 300TB is for sure the way to go. What a savings...
Brett Howse - Wednesday, May 21, 2014 - link
Yes I did fixed tyvm!Guinpen - Wednesday, May 21, 2014 - link
No mention of options for Linux? Why?Brett Howse - Wednesday, May 21, 2014 - link
I mentioned Crashplan has a Linux client. I don't use Linux on my home computers, and neither do most people, so I didn't discuss it for the most part.wumpus - Thursday, May 22, 2014 - link
I plan on backing up my cousin's windows computer (I owe him one, otherwise highly not recommended). Best I can tell, the way to do this (especially if you have some handy drives that will store the data compressed, but not uncompressed) is to install Linux on some removeable drives (OpenSUSE looks promising, see below) and then use the dd command to copy the windows drive completely as an image to the Linux external drive (this gives you the option to either copy the entire system back (with everything already installed) or to mount the file with -loopback and copy individual files). Note that you will likely want a compressed linux drive (to save space). This looks easiest with btfs (thus Opensuse, and don't forget the forcing option otherwise the compressor will give up before it hits all that empty space). Using this system for incremental backups requires a bit of programming (but is surprisingly easy with pyfuse).Quite frankly, the dd "disk destroyer" command is so famous to get wrong (and thus write empty sectors over what you wanted to back up) that I would be afraid to include step by step instructions in something like this. You have been warned.
It would be nice to see if you could back up with something like Anaconda, especially for free.
peterfares - Wednesday, May 21, 2014 - link
Ah sweet I didn't know there was still a GUI method for doing a system backup in Windows 8.1! I thought you had to use wbadmin. I was wondering why the Windows 8.1 recovery still supported system image restores when I thought there was no way to create a system image without the command line.Anyways for previous versions on Windows 8.1: they're still there! Just the tab is not shown for local drives. If you access a network share you can still see the previous versions of files done with Volume Shadow Copy. Turn on system recovery for all your hard drives (it's on for the system drive as default) and then access your own computer via it's UNC path (\localhost\C$ or whatever other share you want to access). Then when you press properties on folder or file the previous versions tab is present!
Another way to access volume shadow copies of files is to use ShadowExplorer.
peterfares - Wednesday, May 21, 2014 - link
More details http://winhowto.blogspot.com/2012/09/windows-8-how...