The MSI X299 SLI Plus Motherboard Review: $232 with U.2
by Joe Shields on November 29, 2017 8:00 AM EST- Posted in
- Motherboards
- MSI
- X299
- Skylake-X
- Kaby Lake-X
- SLI Plus
BIOS
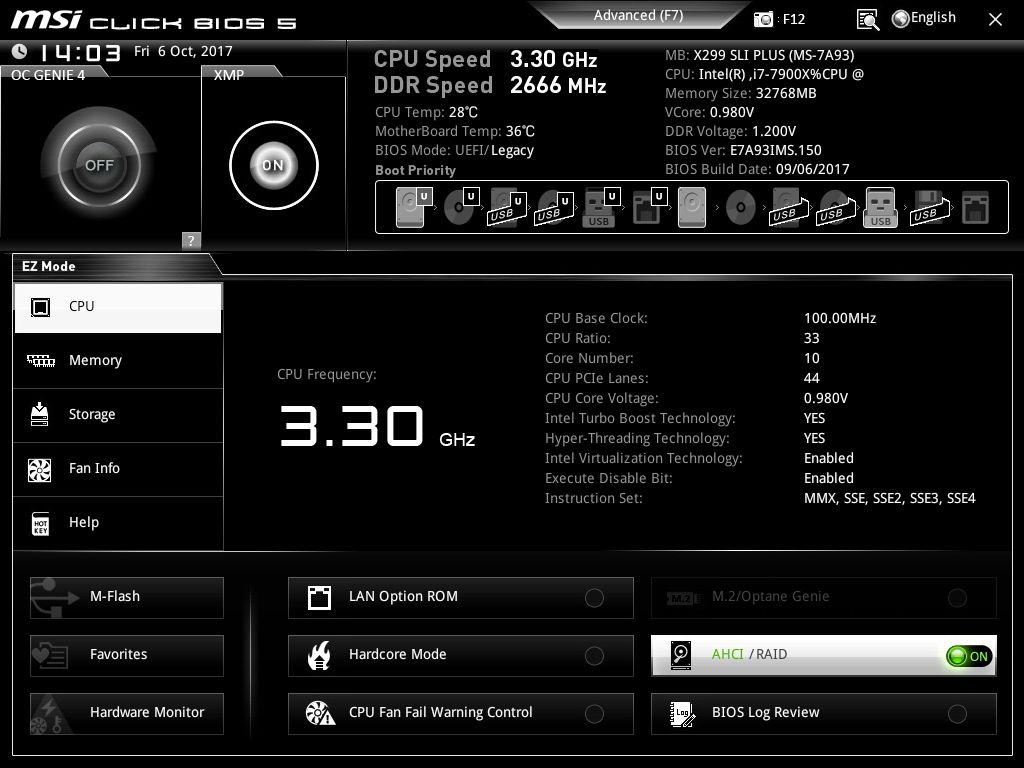
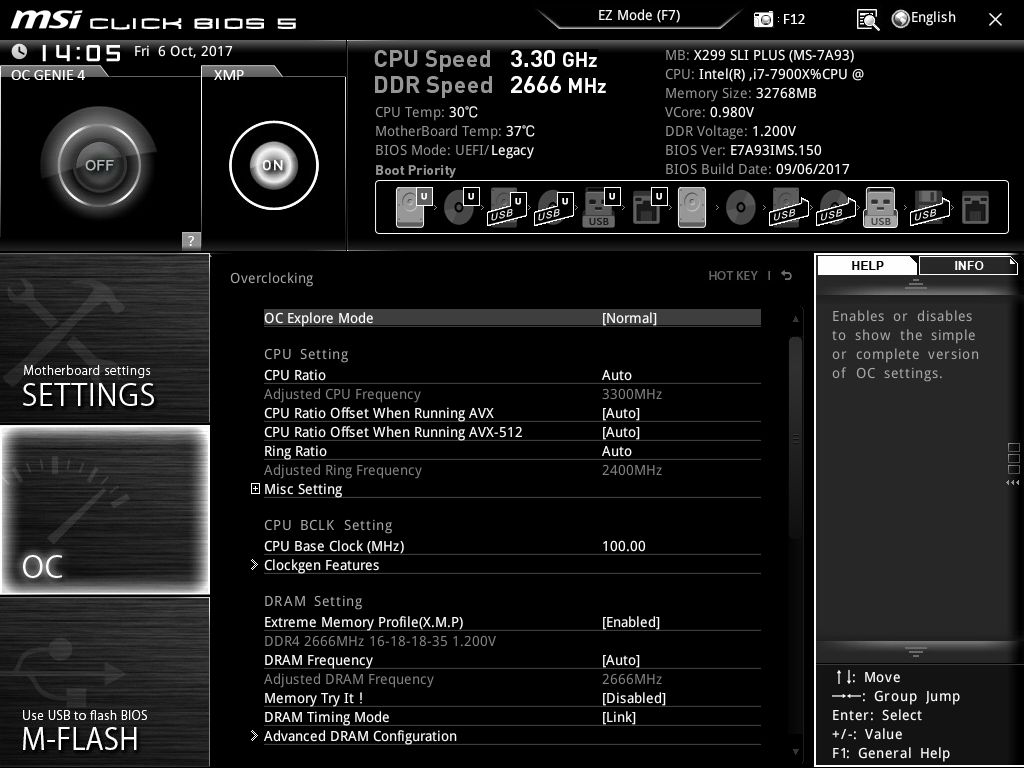
The MSI X299 SLI Plus also uses the Click BIOS 5 found in the Tomahawk Arctic and is quite similar in regards to layout. The biggest difference between the two is in the color. Where the Tomahawk Arctic is predominately black and red, the SLI Plus is black and white, fitting with previous SLI Plus themes. Users are greeted by the EZ Mode version of the BIOS which displays high-level system information such as the CPU used and its current speed, the total amount of RAM installed, as well as CPU and motherboard temperatures, and boot priority. Clicking the sections on the left side provides a bit more detail for each selection. Access to M-Flash, Favorites, and Hardware Monitor is also found on this screen. We use the latest available public, non-beta BIOS for testing. In this case, version 1.5, dated 9/6/2017.
Editable options in the EZ Mode include XMP Profiles as well as the OC Genie (called Game Boost on the Tomahawk Arctic), for one-touch overclocking. Boot Priority is able to be adjusted by simply dragging the icons around the boot priority list. Your first boot item will be on the left. In order to reach advanced mode, press F7.
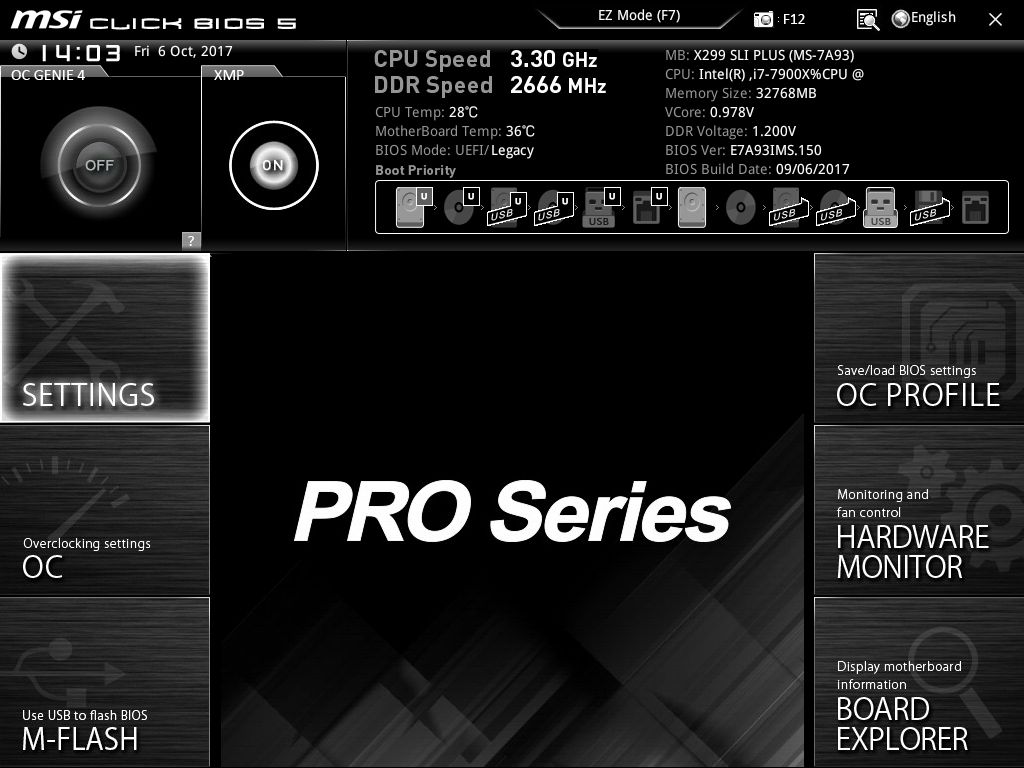
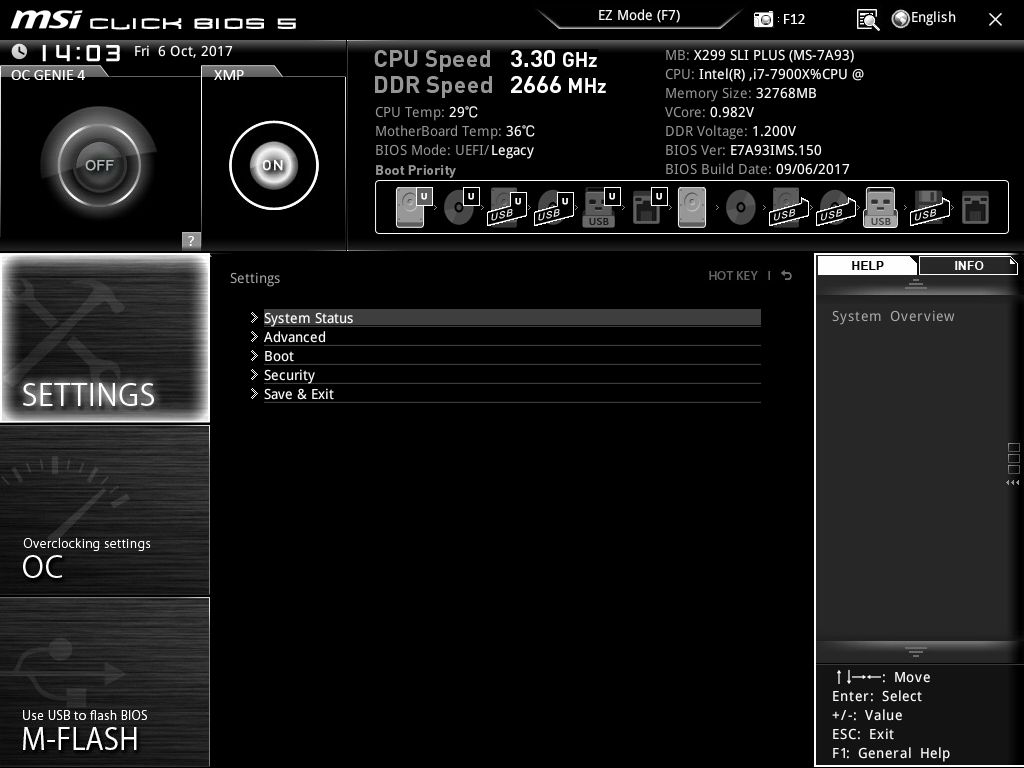
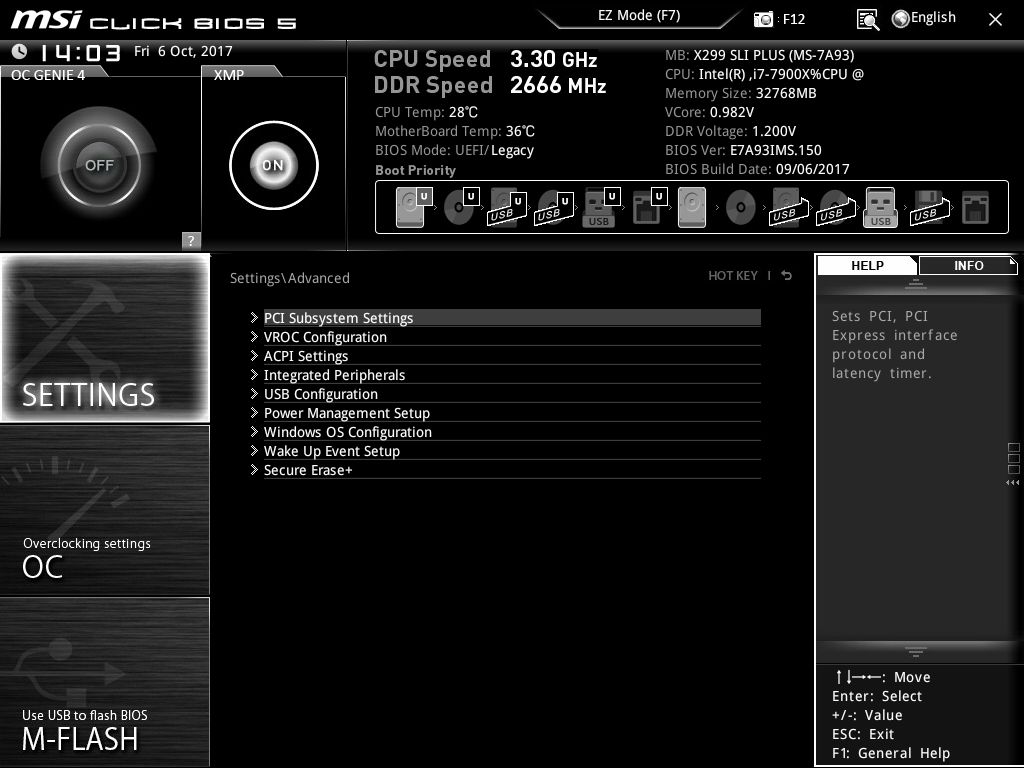
Once in Advanced mode, we see only the bottom two-thirds has changed to display different section of the BIOS users can dig into. The Settings section dives into System Status, Advanced, Boot, Security, and a Save & Exit Option. Changes to your subsystems from PCIe modes, to VROC Configuration, Integrated Peripherals such as LAN, SATA, and Audio Controllers, USB configurations for enabling/disabling the controller or Legacy support. There is even an option to secure erase an SSD through the Settings section.
The "OC" section is where users are able to make adjustments the CPU and DRAM, and Voltages. Items like the CPU Multiplier, BCLK, Memory speed and timings, and a plethora of voltages from VCore, DRAM, and the FIVR, all make their home in this section. This section also has an option for Normal or Expert, where expert adds a few more advanced overclocking options and expands dropdowns. For ambient overclocking (and this review), purposes, there is little reason to get into expert mode unless manually setting per core multipliers is the way you happen to go about overclocking or perhaps trying to squeeze the last MHz out of your system.

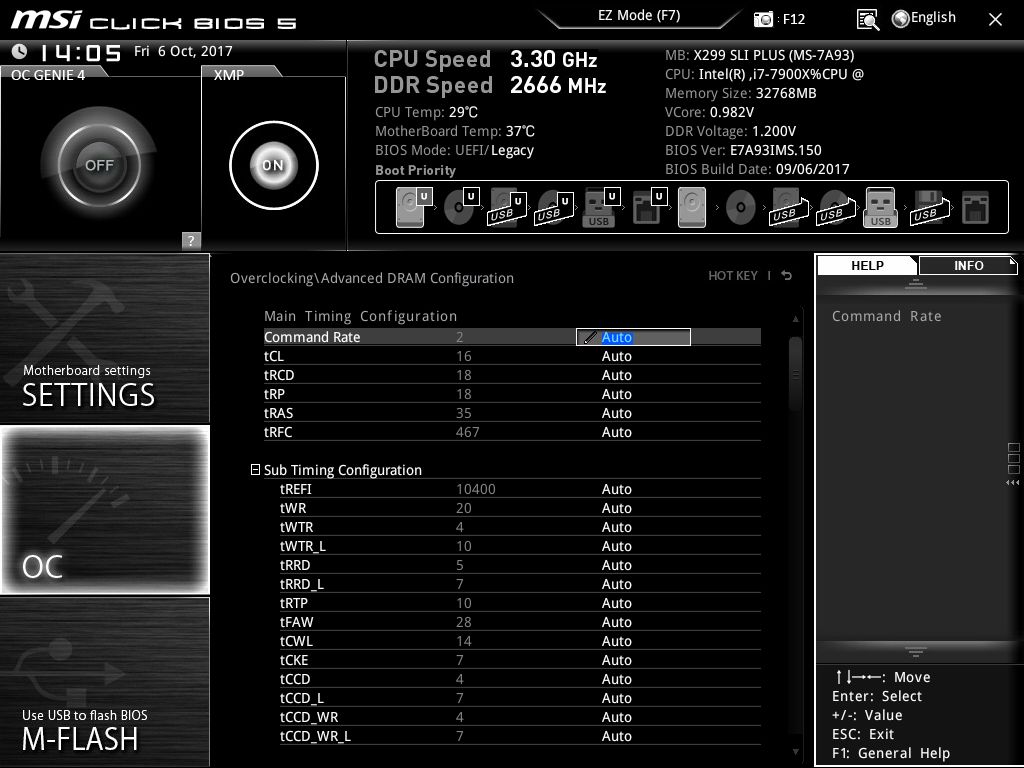
In order to change advanced DRAM options, we will need to enter the Advanced DRAM Configuration section. Here users are able to adjust the all forms of memory timings from the few primary timings like CL, tRCD, tRP, tRAS, tRFC, and the Command Rate. There are a couple more screens worth of secondary and tertiary timings, below the screenshot posted; a dizzying amount in fact.
The M-Flash screen is not pictured, but this section is where a user can update the BIOS. There are two options where the source BIOS comes from, either a USB stick or from the internet. If it is USB, simply select the drive and navigate to the file, click OK, and wait a minute or so for it to reboot and complete. The other method is to have the motherboard check the MSI website for the latest version. In this case, it will reach out to the server, find and download the file, and install it. If there isn't a newer BIOS than what is currently installed it will say so.
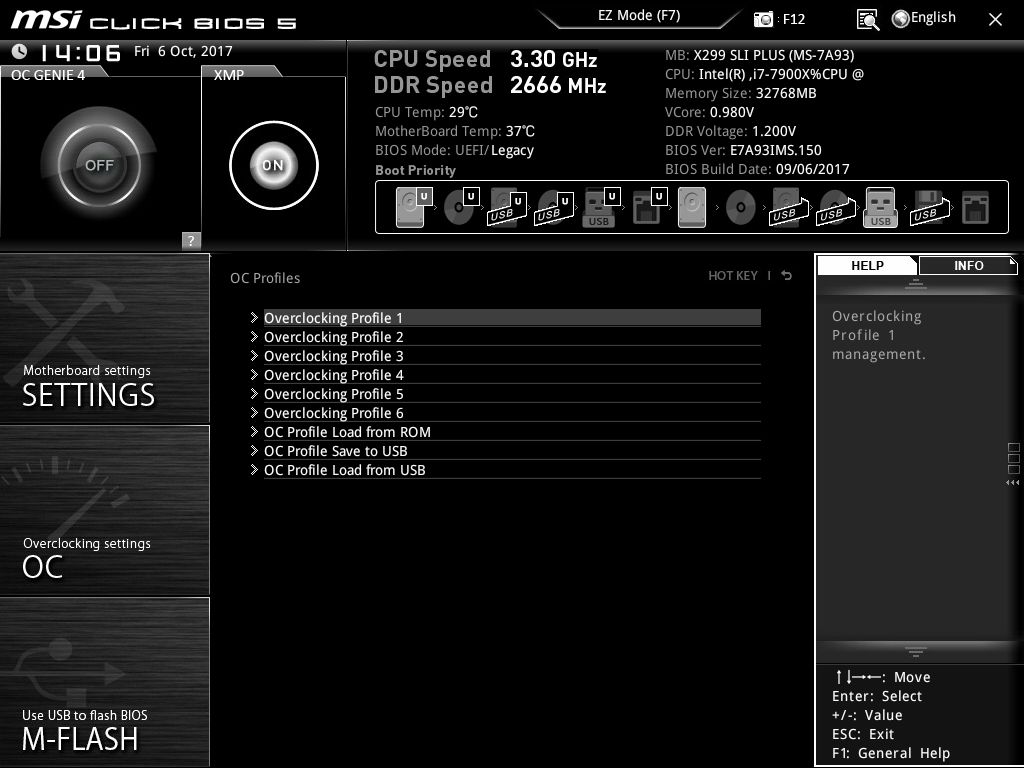
The OC Profile section covers saving and loading the settings in the BIOS. Users are able to dial in a working and stable overclock, or a simple change in settings, and save it to one of the six profiles on the board, or they are able to be saved (and loaded from) a USB stick. Note when flashing your BIOS to a newer version, the profiles stored will be lost.
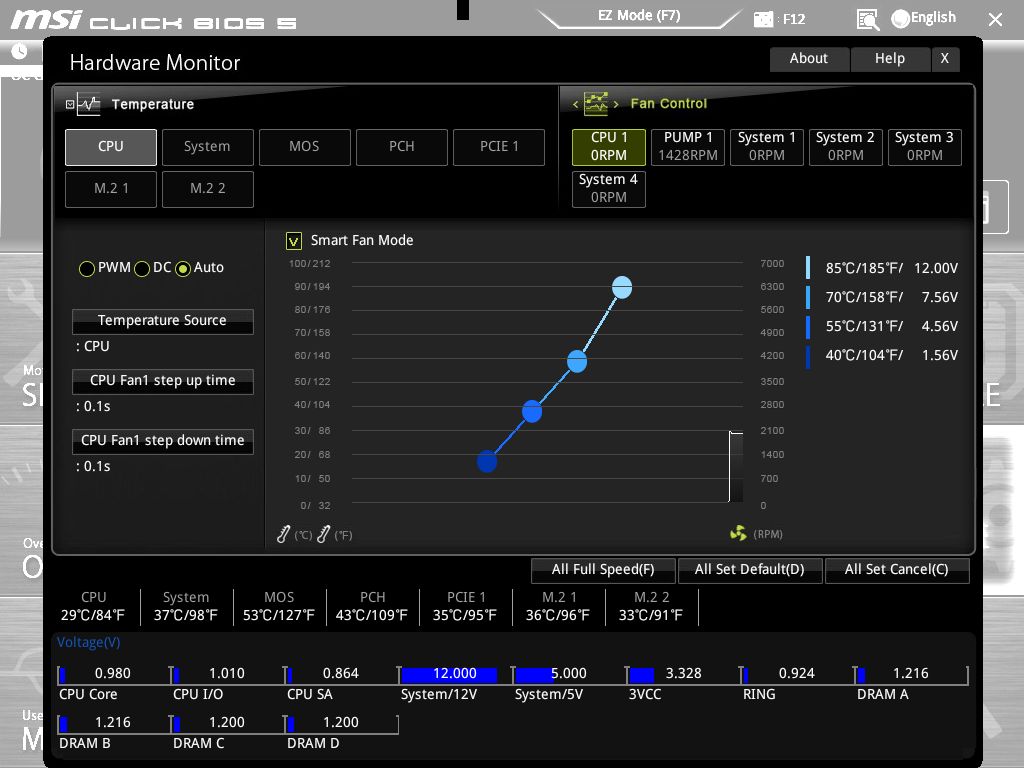
Last up in the BIOS is the Hardware Monitor section. Here users are able to see information regarding fan speed system temperatures, and several voltages including CPU Core, CPU IO, CPU SA, DRAM, as well as power supply voltages for the 12V and 5V rails. All headers on the board are able to control the attached fans by either PWM or DC(voltage) methods. The default is auto-sensing and worked fine when I had swapped out fans on the same header or on a different header.
The Click BIOS 5 worked well in my limited time working with the board. Mouse movements were again smooth in this MSI board, as it was in Tomahawk Arctic. I like the EZ Mode for high-level changes, while the advanced mode offers a lot of options, more than the vast majority will ever need.


Software
The first piece of software I normally start off with is not going to be pictured here. Try as I may, I was unable to get the driver disk to work on my system. I can click on the files in explorer to manually run it, or autorun works, however, it does not pop up on the screen and simply shows as an icon on the taskbar which will not pop out. We are thinking it is a bad disk as it behaves the same way on the other system I had in the house with an optical drive. This isn't a big deal as most things work out of the box with a Windows installation anyway while the latest drivers can be downloaded from the website. To be truthful, I would pay a couple dollars more for a board if it came with a small USB stick with all of the files on it and do away with the optical disc for drivers.
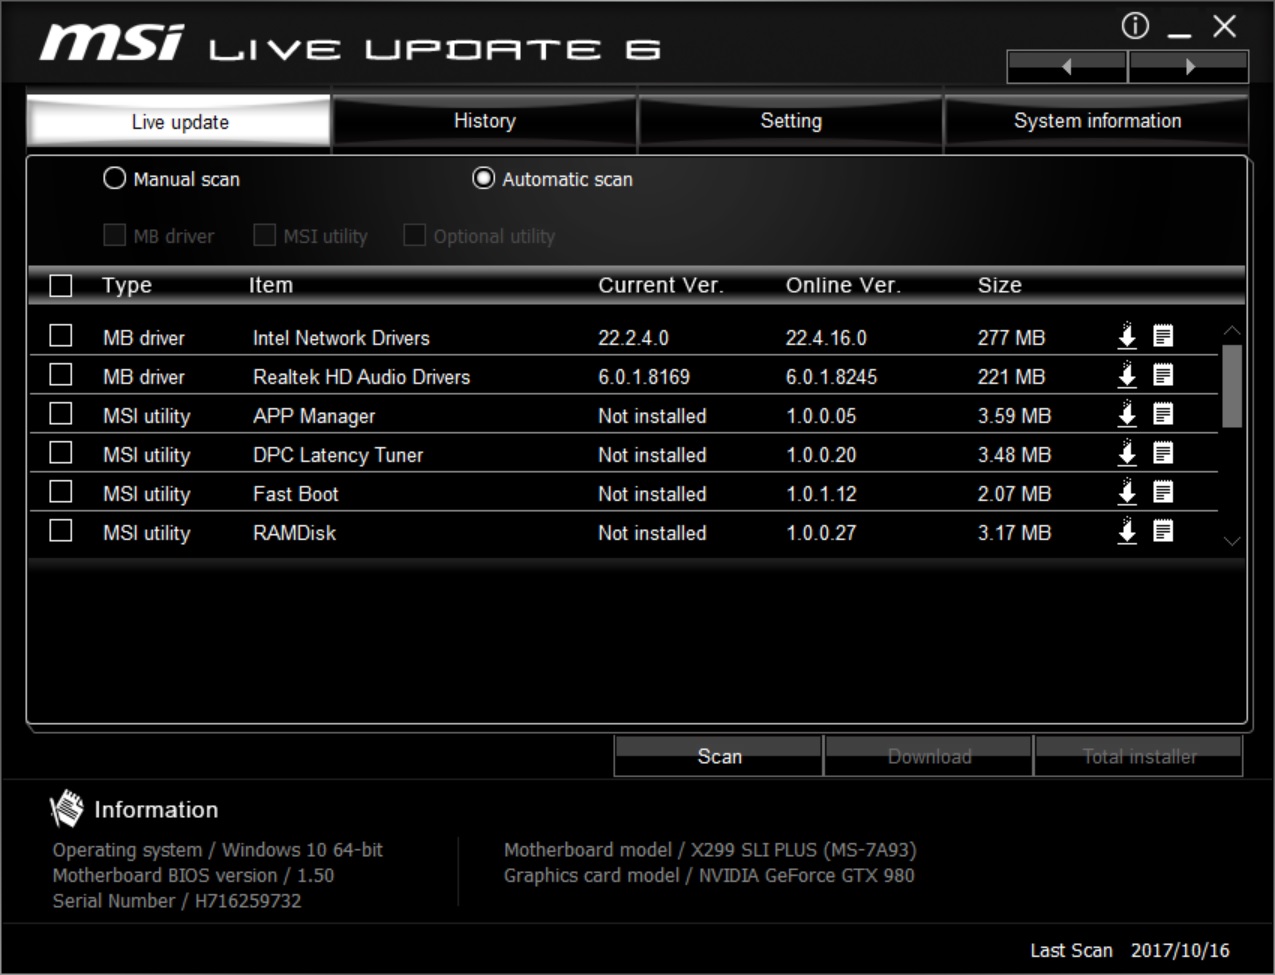
Disc woes aside, MSI's Live Update 6 software is intended for easy updating of the motherboard drivers and utilities. This application looks exactly the same as it did on the Tomahawk Arctic, with its black and white theme. We can see the software picked up different versions of the Intel Network Drivers as well as the Realtek Audio drivers. Using Live Update 6, I updated the software without issue.
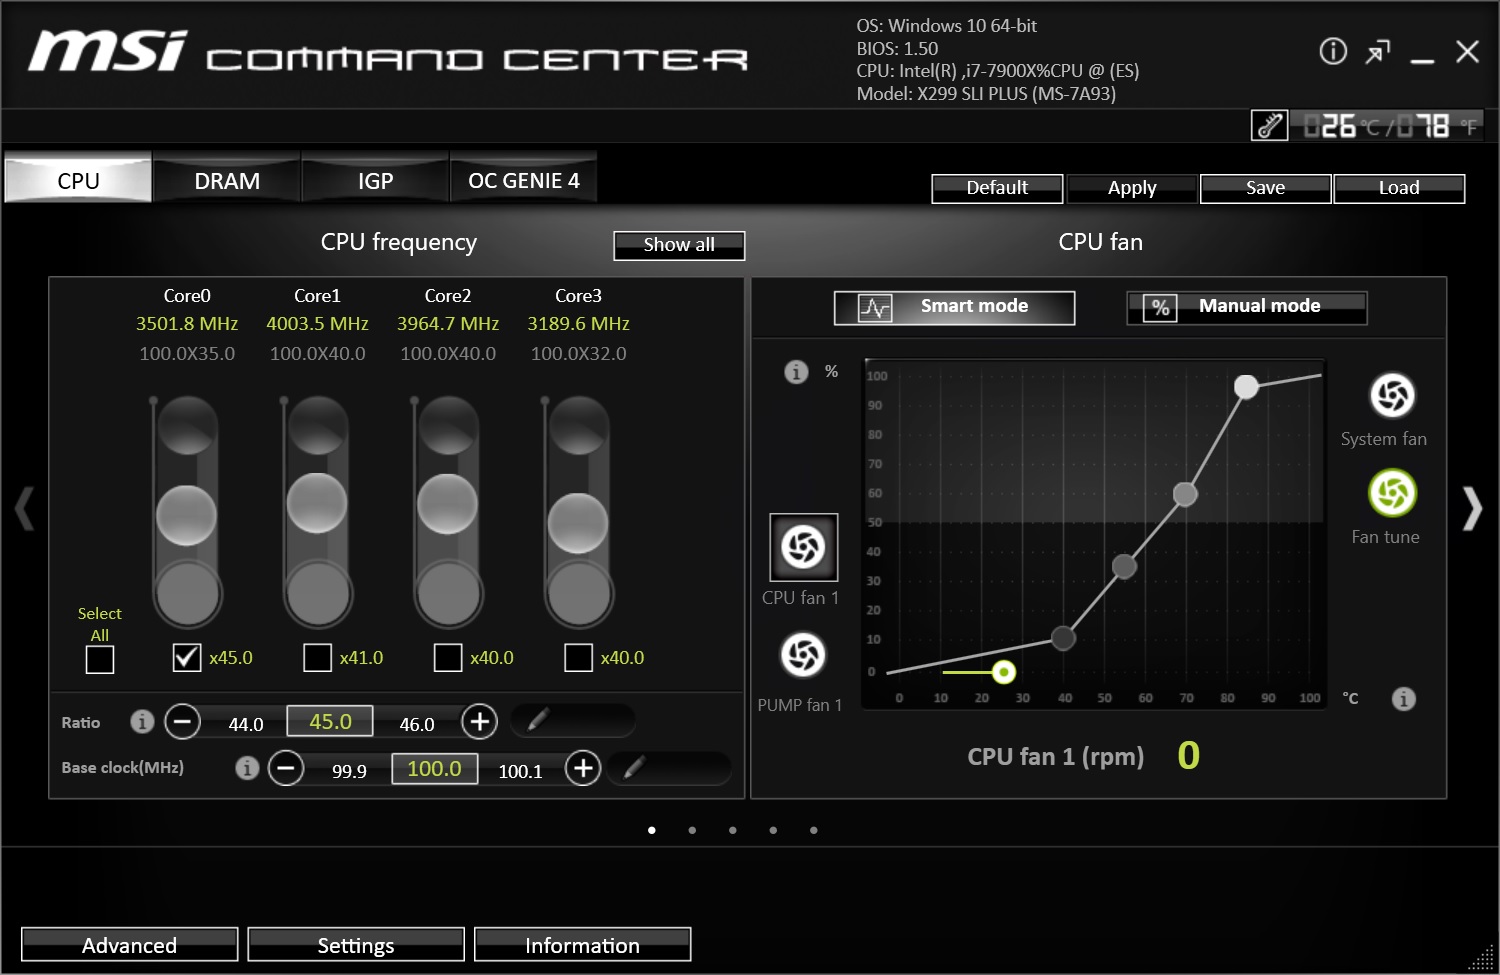
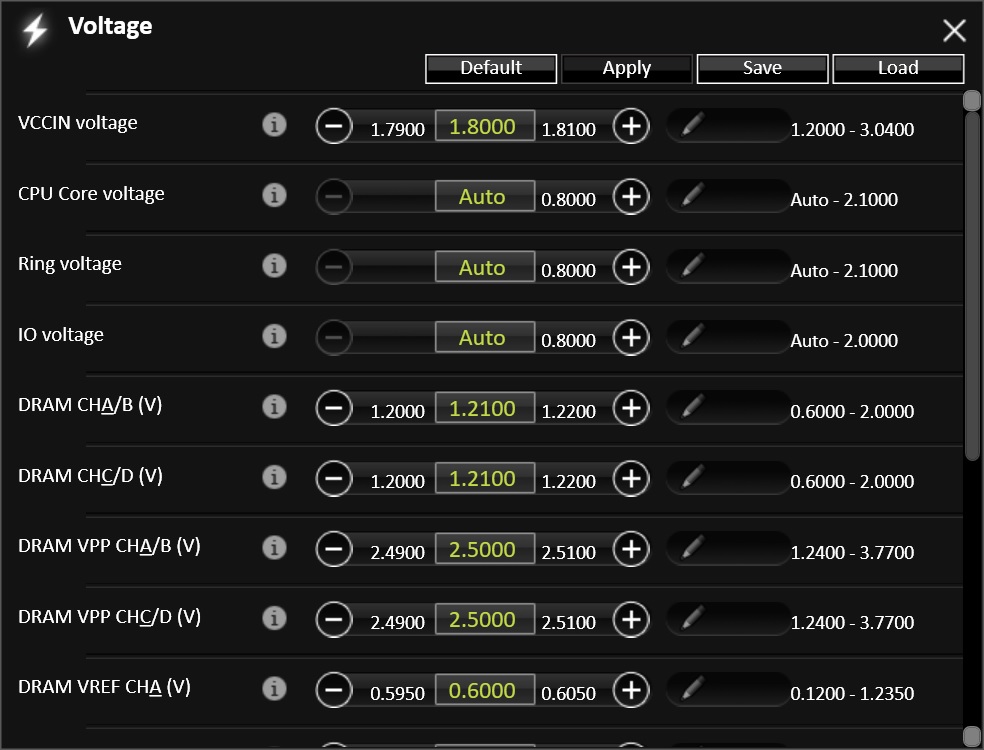
MSI Command Center software is used for Windows-based monitoring and allows users to change several items on the board from overclocking functionality (BCLK, CPU Multiplier, Voltages), DRAM, fan curves, and has an option for the one-touch overclocking offered by the OC Genie 4. Changing clock speeds and voltages worked just fine, however, be sure to check the "Select All" box when changing the CPU multiplier otherwise the changes will only affect one of the cores. In future versions, I would like to see a number of sliders scale with the number of cores when I select the multiplier, rather than having to click the 'show all'.
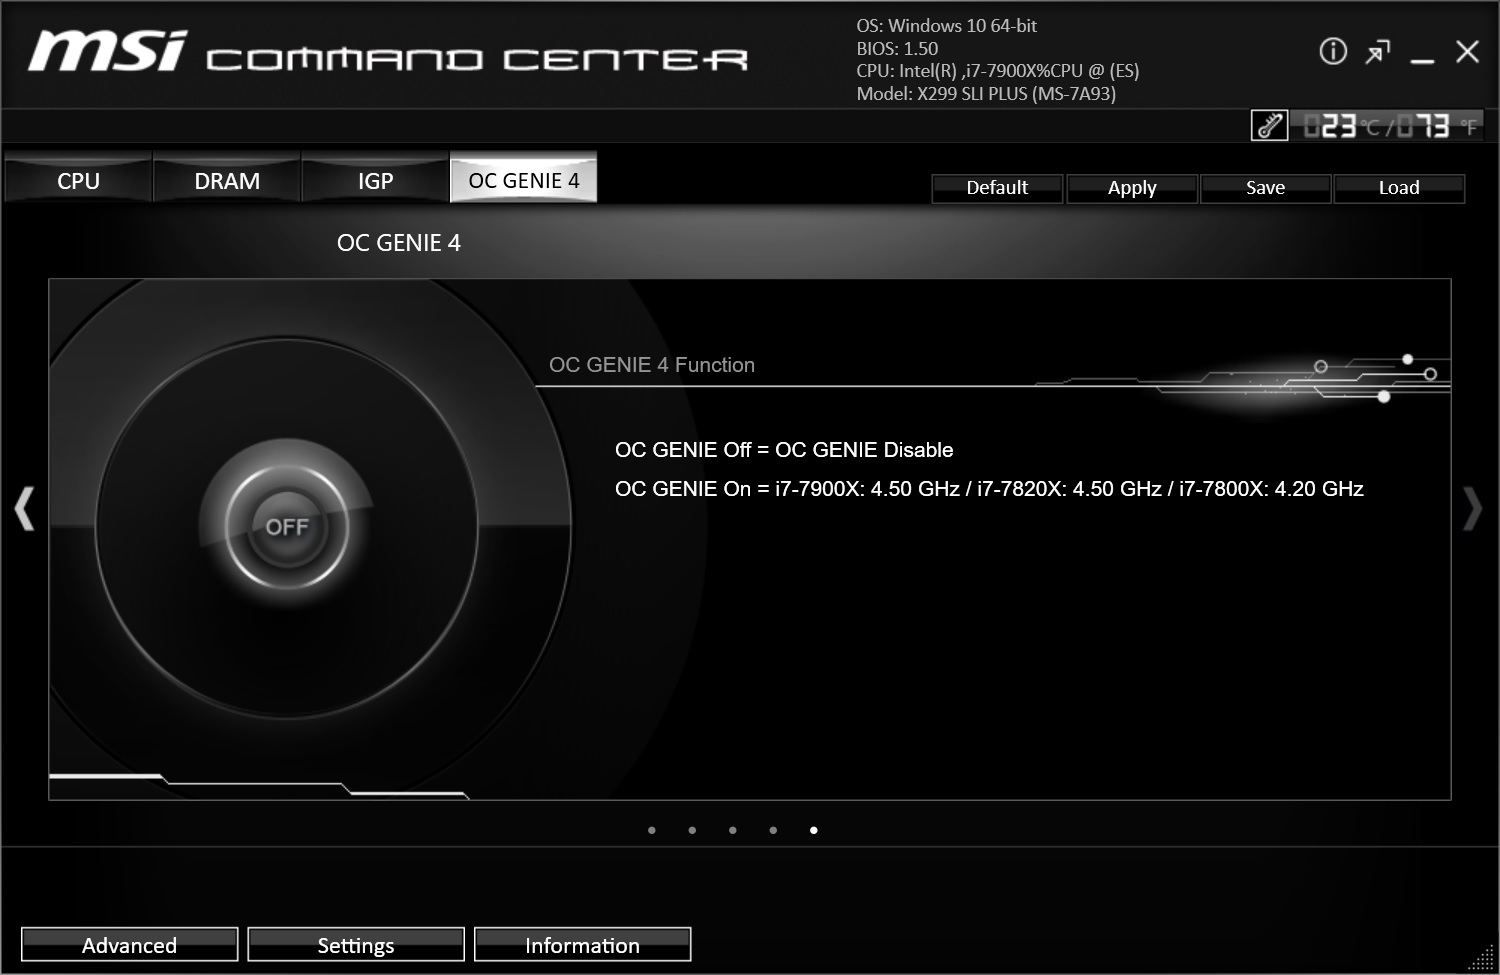
In testing the OC Genie 4, we are able to see from the screenshot below, and expected result of 4.5 GHz for the 7900X CPU we are using for the reviews. Default, the board boosts all cores to 4 GHz around 1.12V. When enabled, all cores go to 3.8 GHz using the same test (OCCT stress test). Single core speeds (Super Pi 32M was used) by default were all over the place, boosting to a peak of 4.7GHz on that one thread, but mostly sitting around 4.1 GHz+. By comparison, with it enabled, the single core boosted to 4.1 GHz solid. Game Boost, the equivalent application in the Tomahawk Arctic, worked as described while here it seems it lowered performance compared to default and the Intel Turbo Boost Max software doing its thing.
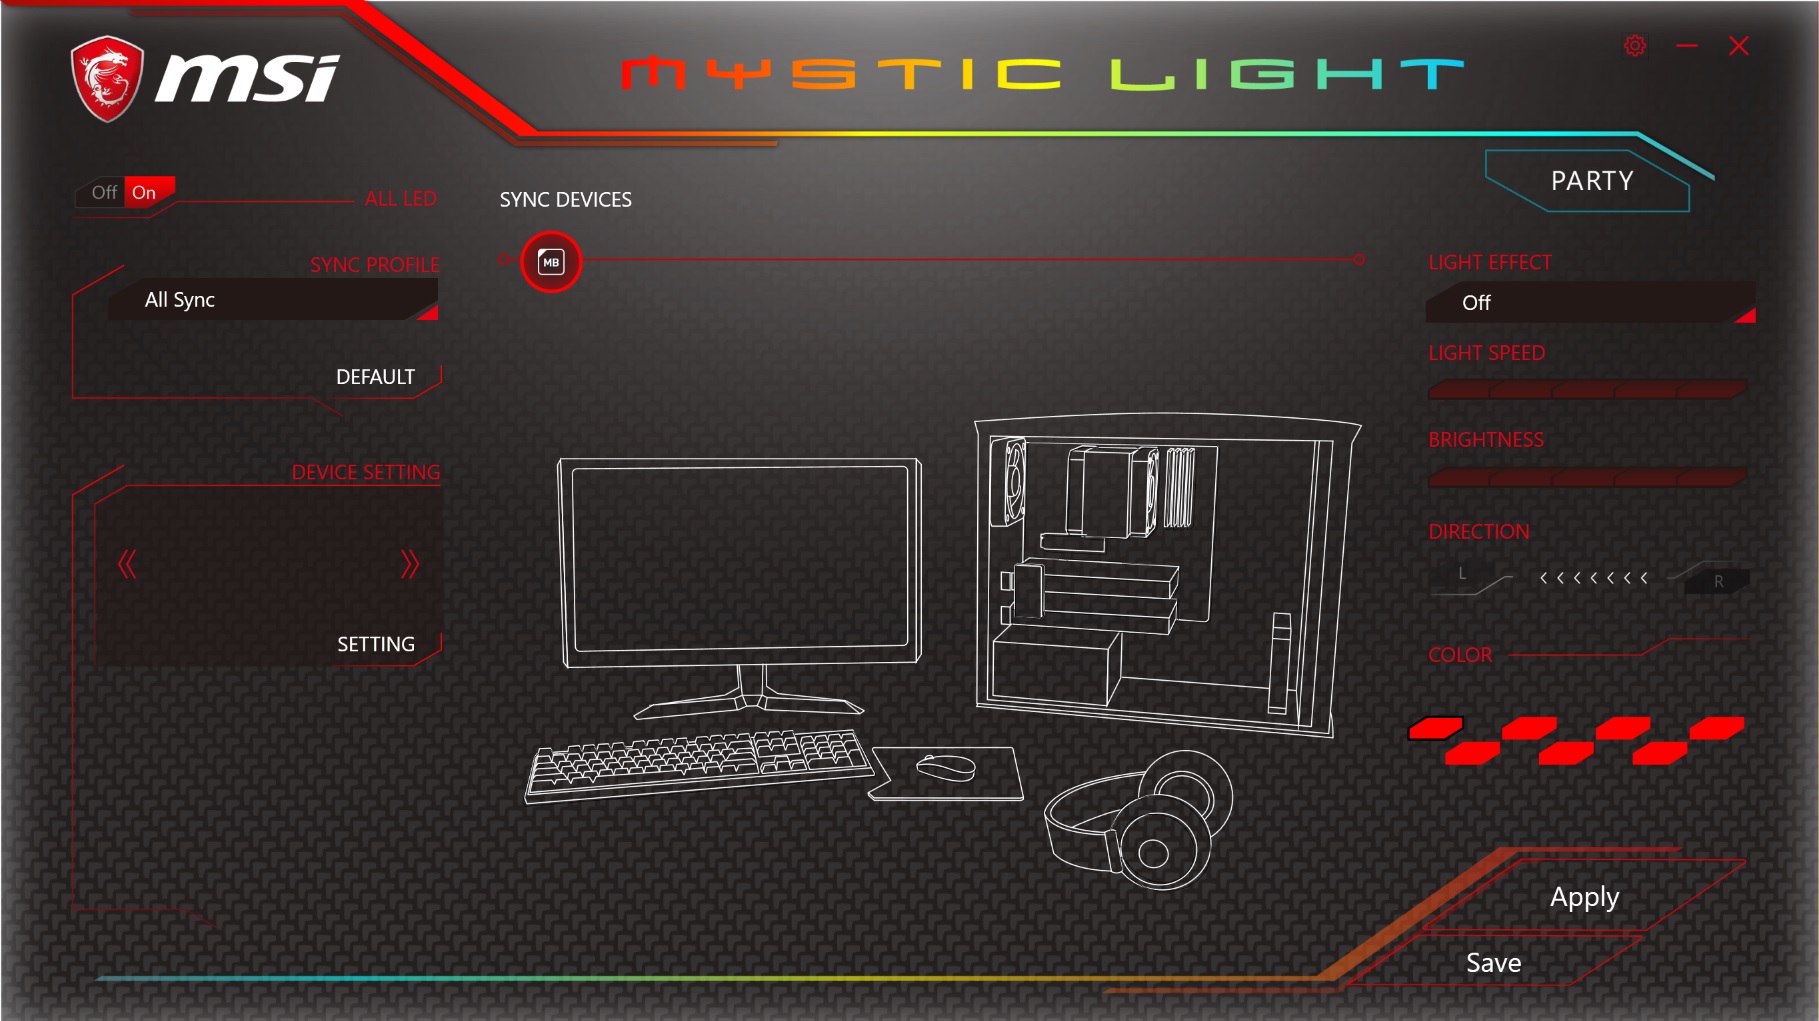
The Mystic Light application is MSI's software which controls any integrated RGB LEDs, or those plugged into its two onboard headers. They are able to be synced or run independently to any number of preset effects. From there, speed, brightness, and direction can all be adjusted as well. Though I do not have external RGB LEDs attached, it changed the onboard without issue. If I were to raise a complaint, it's that the software window scales up on a 4K monitor. In other words, when I open the application, it fills nearly the entire screen instead of scaling to fit.
MSI's Network Manager software is a light-weight application designed to optimize network bandwidth. In the Application section, users can see useful data regarding each application's use and is where the priority for each can be set. Performance metrics such as top 5 applications by traffic are displayed in the Performance section. A Network Test section forwards to the Cfosspeed.de site via your browser.

MSI's Nahimic software doesn't make it to the SLI Plus, however, the Realtek interface still has plenty of ways to change how the sound hits your ears.
MSI includes other software such as Xboost for optimizing external storage/memory card speed, Ramdisk software for creating fast storage through RAM, MSI Smart tool for integrating USB 3.0 drivers in your windows installation, and a SuperCharger app designed to charge your Apple iPhone/iPad. These can all be found in the Support section and under Utilities for the motherboard.


20 Comments
View All Comments
Vatharian - Wednesday, November 29, 2017 - link
Why, why manufacturers won't let the U.2 die? We are already past SATA Express, and now this. I get it, it's one of the most popular connectors to connect SAS backplanes, and most of HBAs and RAID controllers do use it, but please, let it die in desktop space. If anything SFF8087 should remain, as SFF-8639 (U.2) is much flimsier and easier to break.Also, we already have far superior standard just behind the corner, in the form of OCuLink.
peterfares - Wednesday, November 29, 2017 - link
Why not have it there though? X299 is a prosumer platform, they may want to use U.2 drives.Lolimaster - Wednesday, November 29, 2017 - link
x399 laughs at X299 being called "prosumer" 44pci-e lanes vs 64 pci-e lanes, bootable nvme raid support.BillyONeal - Wednesday, November 29, 2017 - link
I'm a "prosumer" who built both X299 and X399 boxes and couldn't care less about those things. Compiler want MOAR CORRRREEEESSSSSSdrajitshnew - Friday, December 1, 2017 - link
Why call it a prosumer product when it doesn't have ANY m2/u2 connected to the processor?andychow - Wednesday, November 29, 2017 - link
Doubtful it will disappear. With Optane coming out with only a U.2 connector on the SSD format, it rather insured that U.2 will grow in demand.BillyONeal - Wednesday, November 29, 2017 - link
The 750 was also like that but didn't spur demand for U.2. The add-in cards are just fine.Dr. Swag - Wednesday, November 29, 2017 - link
Could you guys do some better vrm testing? X299 vrms have been a hot topic (pun intended) due to Skylake X drawing a lot of power when OCed and because of the addition of up to 18 cores. Some vrms get quite toasty under load so if you guys had good vrm temp measurements and perhaps even measurements on voltage ripple and stuff coming out of the vrm that would be awesome.vgray35@hotmail.com - Wednesday, November 29, 2017 - link
And let's not forget measurement of VRM power efficiency to compare the quality of VRMs across motherboards!Lolimaster - Wednesday, November 29, 2017 - link
Just but Threadripper and forget about those problems.