Airport Extreme (5th Gen) and Time Capsule (4th Gen) Review - Faster WiFi
by Brian Klug on August 5, 2011 10:22 PM EST- Posted in
- Mac
- Airport Extreme
- Time Capsule
- WiFi
WiFi Performance Testing—Methodology
To settle this, I decided on a testing methodology for comparing both generations of Airport Extreme, and the latest generation Time Capsule on two different platforms with 3x3:3 support, and a 2x2:2 design.
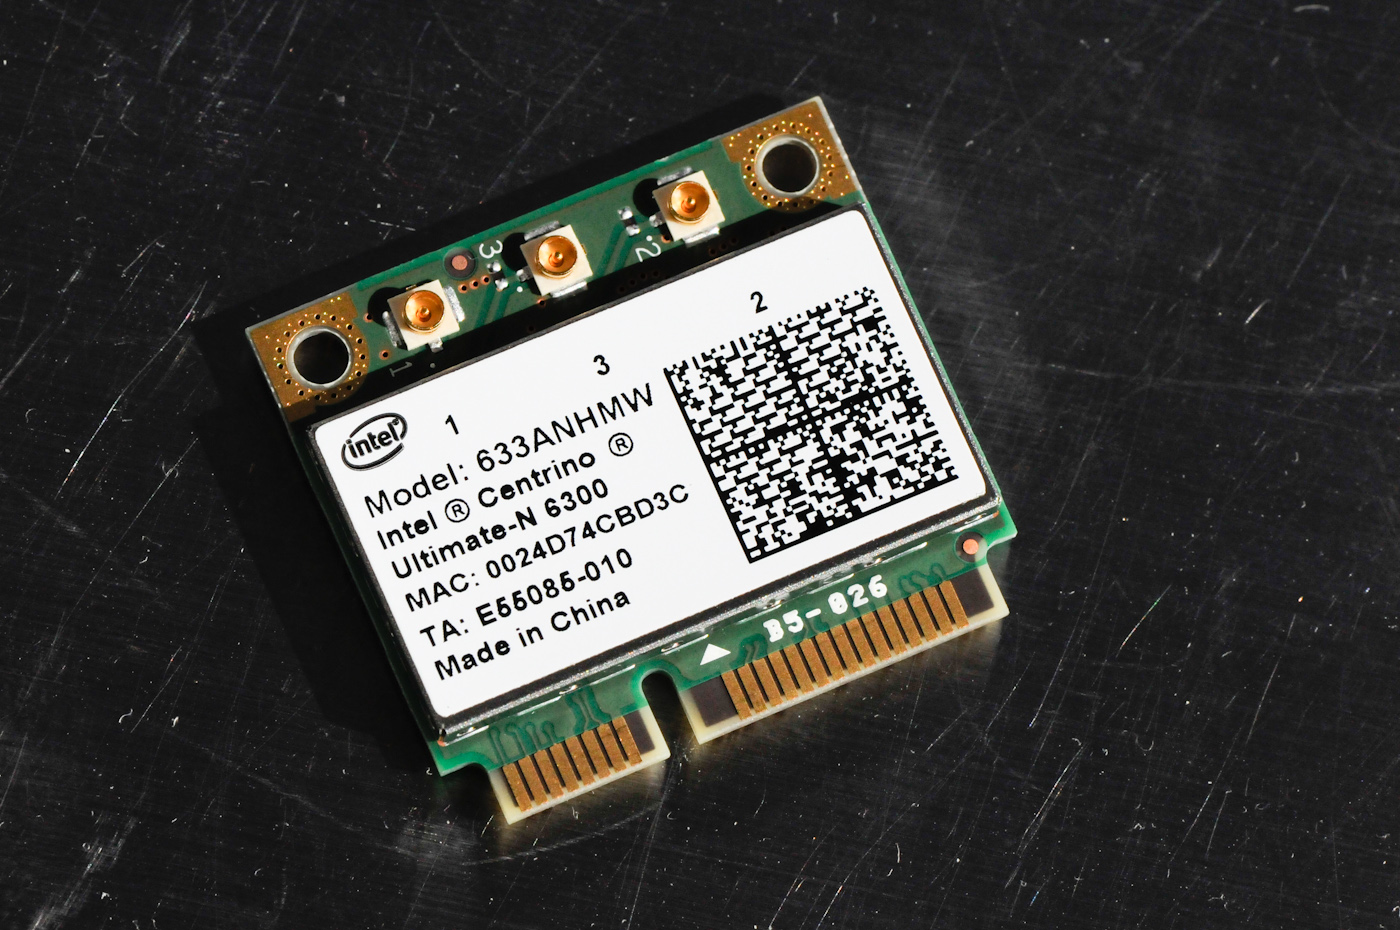
The first is a Lenovo X300 notebook. I acquired one of Intel’s latest and greatest WLAN cards, the Centrino Ultimate-N 6300, which is a dual-band 3x3:3 half height mini PCIe x1 card for notebooks.
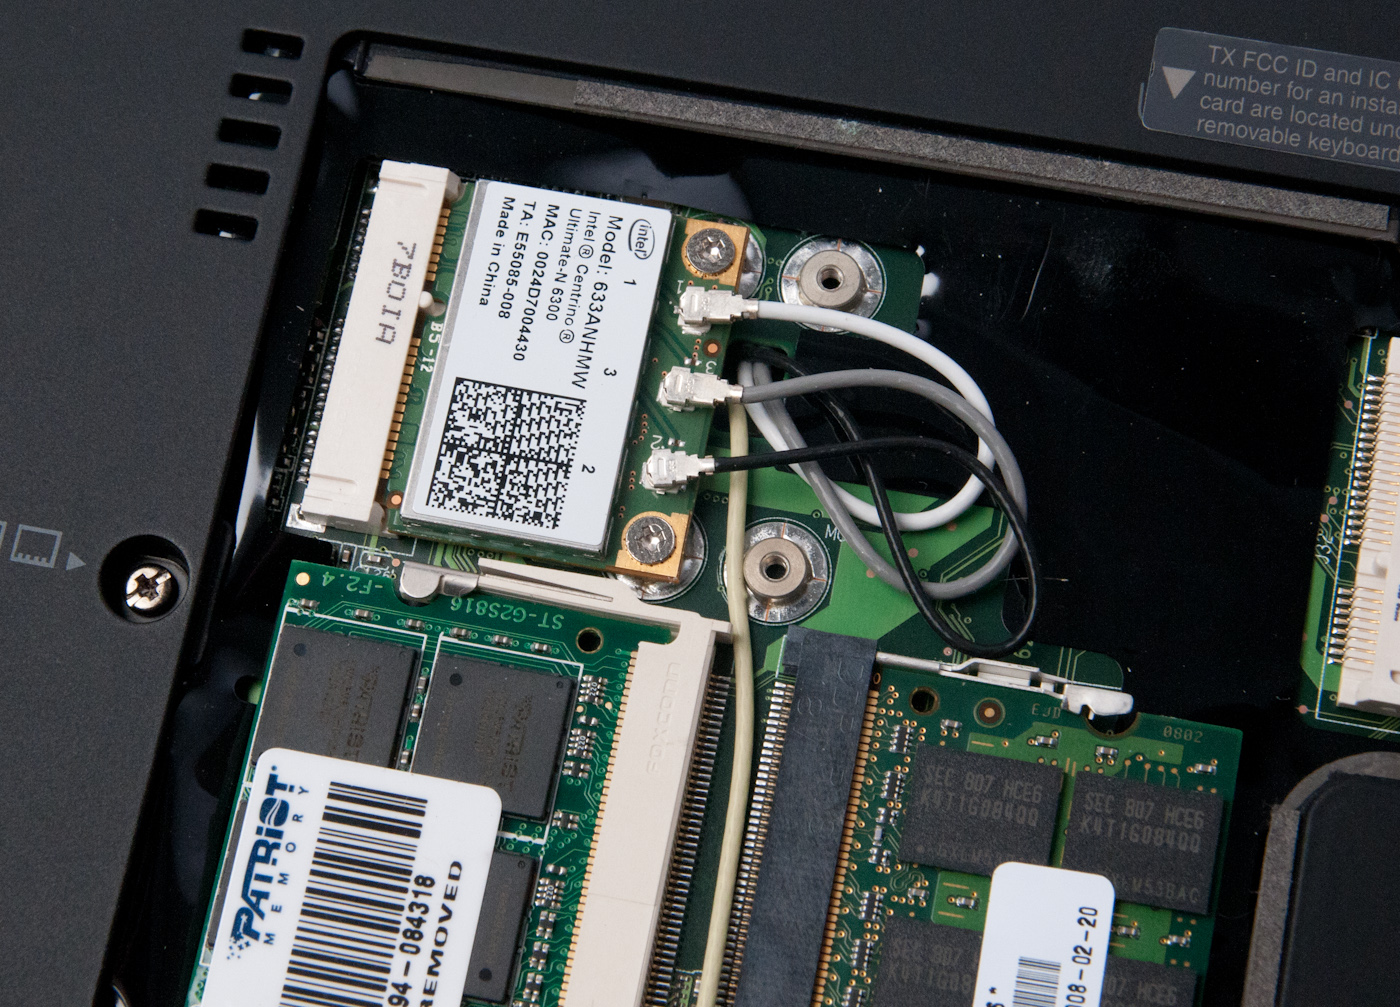
It’s Intel’s highest end card, which I hastily inserted into the X300. Interestingly enough, I encountered an issue with installing just any WLAN card in the X300—it appears that Lenovo has some built in BIOS protection which prevents installation of “unauthorized” WiFi cards. Fortunately, the adjacent mini PCIe slot (ostensibly intended for cellular WAN) has no such protection. However, I then noticed another problem—the card wouldn’t turn on.

Some more searching revealed the solution—pin 20 (wireless disable) needs to be taped over to signal the card that the wireless disable switch (which doesn’t exist, since this is the WAN port) is in the on position. A quick surgical application of tape, and the card worked perfectly—take that, Lenovo security. As an aside, what a completely pointless and trivial barrier this is—the Mini PCIe standard (and moreover WiFi notebook cards themselves with U.FL connectors) are designed to be completely and absolutely interchangeable. The notion that this provides any added security (when the adjacent slot is completely unguarded) or—even more absurd, convenience—is nothing short of a surrealist notion.
My second testing platform was a 2010 MacBook Pro, which has a 2x2:2 solution provided by a BCM4322 based design. Finally, a 2011 MacBook Pro with a BCM4331 based 3x3:3 solution was my last test platform.
I tested in four locations in my home which has a loft-like two level layout and cinder block construction. My office is upstairs and in a corner, where the AP sits on a shelf about 5 feet in the air resting in its normal operating position (marked AP). Normally I mount the Airport Extreme on the wall in the vertical position using an Air Mount wall bracket, but for testing I relocated everything to a shelf for ease of changing between multiple devices and drives.
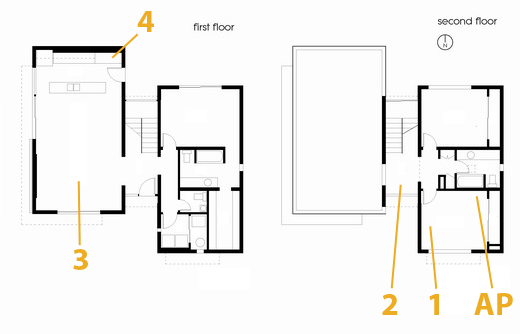
The first position (marked 1) is inside the office and on a relatively standard wooden desk. The next test location (marked 2) is in the stairway on a metal desk made out of a conductive material (likely aluminum). Downstairs are locations 3 and 4. Location 3 is on a wooden coffee table, to emulate just using the device while watching TV, and Location 4 is the most challenging position in the house in the corner of the kitchen.
The downstairs living room and kitchen area has proven to have challenging and undesirable RF propagation characteristics with the AP in my office, as the signal must propagate through two cinder block walls and change elevation. In addition, the entire staircase is one solid piece of steel, with the middle portion almost a quarter inch thick. If you draw a line from the AP to location 4 it’s pretty obvious that the testing location is directly in a shadow cast by the huge staircase.
In reality, testing is best performed in an anechoic chamber or some other completely controlled environment, but alas I lack any access to one and thus we’ll have to go with a real-world environment instead. I also did as much of my testing as possible after midnight to cut down on spurious interference from neighboring APs. Luckily I’m not in a dense urban environment and interference isn’t much of an issue.
For testing, I configured the APs to use channels 11 and 157 for 2.4 and 5GHz respectively, separate 2.4 and 5GHz AP names for manual selection, and 40 MHz channels on 5GHz. As a reminder, Apple still doesn’t allow for the use of 40 MHz channels on 2.4GHz in order to not use so much spectrum that it degrades Bluetooth HID performance.
For testing network throughput, I settled on two different things. First is Apple File Protocol (AFP) which is easy enough to test by creating an AFP share on one computer and then transacting huge files and averaging network bandwidth. Because I lack additional Macs, I turned to a positively ancient 2GHz iMac G5 with 2GB of RAM running 10.5.8 that I fixed a while ago. Rest assured, the iMac G5 does have a 1 GigE port with jumbo frame support, and ample power to serve this purpose. Instead of installing an SSD to guarantee that the sluggish HDD wasn’t throttling AFP performance, I created a 1GB RAMdisk and shared it on the network. The RAMdisk can do around 300MB/s sustained reads and writes locally and almost 800 Mbps over ethernet, so we’re not artificially bottlenecked. For a test file, I used a 500MB zip of AVCHD video and some random huge PDFs.
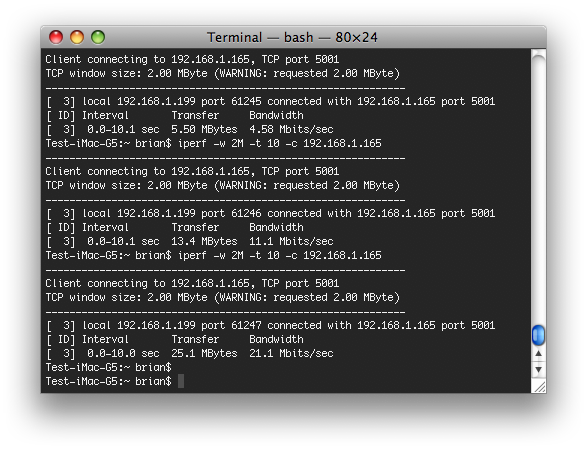
The second test I settled on is the cross-platform, open source iperf which is a network tool for measuring TCP network throughput among a bunch of other things. I compiled iperf 2.0.5 from source on all three Macs (yes, even a PPC binary for the 10.5.8 iMac G5), and used a version in conjunction with Cygwin on the Windows based notebook. After some tuning in my office I settled on a 2MB TCP window for maximizing throughput.
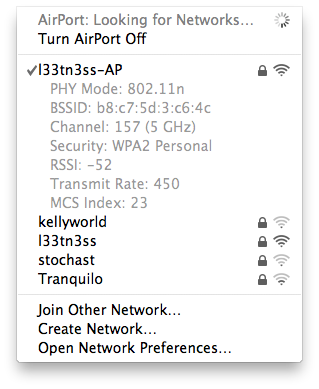
When I set up this testing, I was interested in really three things. First, the Modulation Coding Scheme (MCS) being used at each location, which tells you the data rate of the wireless link and how many streams are in use. Second, the received power level to see if I could measure a difference thanks to the increased power in the newer generation routers. Finally, actual network throughput both up and down on the wireless link.
On the Macs, it’s easy enough to get both MCS and RSSI. You can either run:
/System/Library/PrivateFrameworks/Apple80211.framework/Versions/Current/Resources/airport -I
and look at the output, or option-click on the WiFi symbol.
On Windows, getting this information is a bit more challenging as you have to rely on the WLAN card maker supplying a utility that shows any good details. Intel doesn’t directly show RSSI unless you enable logging in the advanced statistics utility and cross-correlate with samples recorded every second or so, and this proved far too time consuming. For MCS, you have to abstract backwards from the rate shown in the wireless network connection status using a table.


90 Comments
View All Comments
bigrobsf - Friday, August 5, 2011 - link
Minor typo in AFS discussion paragraph in the "WiFi Throughput and Range - Improved page:"Airport Extreme makes a hue difference"
I'm guessing you wanted to write "huge" :-)
Brian Klug - Saturday, August 6, 2011 - link
Good catch, thanks, should be fixed!-Brian
iwod - Saturday, August 6, 2011 - link
I just wish they put out a Raid 1 2.5" HDD Time Capsule so i know my data is going to fairly safe. HDD failure are happening more often these days and with their huge capacity i just cant afford to lose some of my content.repoman27 - Saturday, August 6, 2011 - link
Just use one of these: http://www.icydock.com/goods.php?id=121Combine with a brace of Western Digital WD10JPVT or Samsung Spinpoint M8 HN-M101MBB and you'll have 1 TB of RAID 1 goodness.
Penti - Sunday, August 7, 2011 - link
Raid 1 doesn't really protect from bit rot, just pure 1 drive failure. However they should take reliability and data corruption seriously, but it's not enterprise hardware so you can't really expect it.jackwong - Sunday, August 14, 2011 - link
I will never go with TC unless they have a better backup solution of the TC itself.I have a Synology 1 bay NAS with a external USB to backup all the contents on it.
cheinonen - Saturday, August 6, 2011 - link
Though I imagine most people won't be confused, labeling it as "Smaller values are better" when all the values are negative could cause people to read the data incorrectly. Perhaps "Closer to 0 is better" or something else?Brian Klug - Saturday, August 6, 2011 - link
Totally agreed, edited those tables to make it more easy to follow.-Brian
jigglywiggly - Saturday, August 6, 2011 - link
time capsule wins an award for stealing your money.500$ for a wireless 3tb hd? Don't be sodding st00pid.
repoman27 - Saturday, August 6, 2011 - link
$300 for a $150 simultaneous dual-band, three-stream router with gigabit switch, on board SATA controller and an $80 HD, all in one compact little unit along with the PSU? Not a bad deal, really.Paying $200 (2/3) more for a $70 HD upgrade that only provides 50% more storage space? Questionable, but Apple knows that most people won't bother to upgrade themselves because they'd be out of pocket an additional $150 for the drive and then have to open a brand new device to make the swap.