ASUS Maximus VII Impact Review: Premium Gaming Z97 in mini-ITX
by Ian Cutress on December 9, 2014 10:00 AM ESTASUS Maximus VII Impact BIOS
The last ROG motherboard we reviewed was the Rampage IV Black Edition at the beginning of the year which brought a few of ASUS’ newer features to the X79 platform at the time. Fast forward almost a year and we get a big change all around. The main difference will be that ASUS now uses different fonts for different parts of the BIOS, allowing certain screens like EZ Mode and SPD Information to show more information on the screen at one time. The red and black ROG theme is here as well.
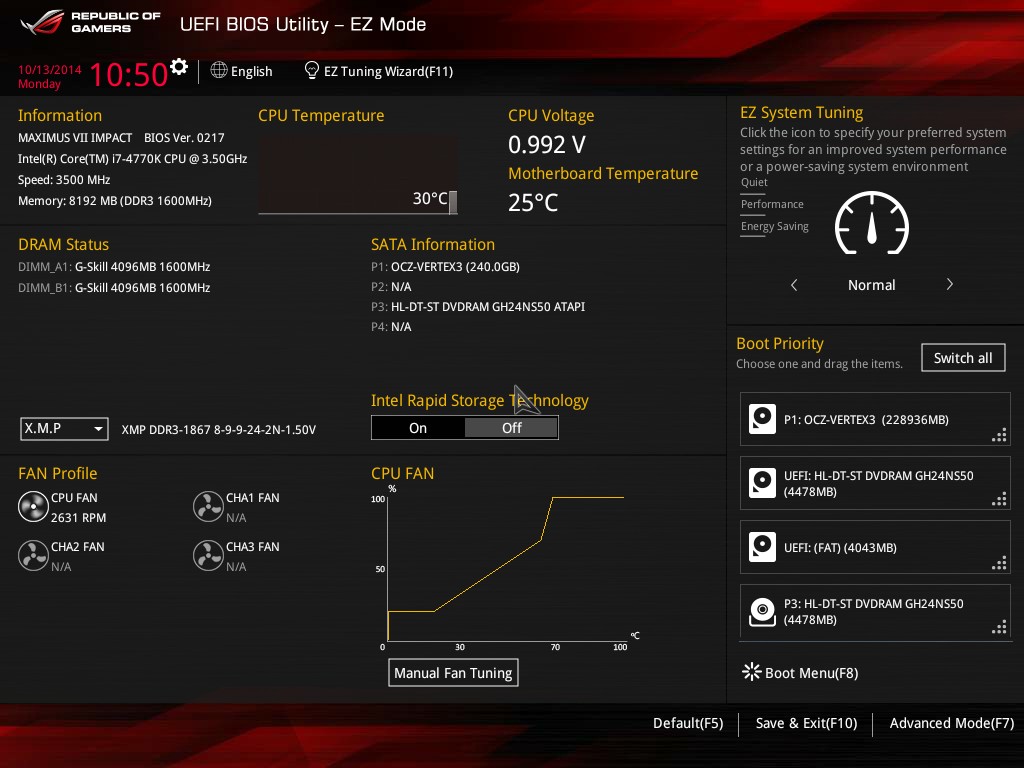
In the EZ Mode is the name of the motherboard, the BIOS version, the CPU installed, the speed of the CPU, the memory installed in each DIMM slot, the speed of the memory, the CPU temperature as a graph (useful if you forget to plug the CPU fan in), the CPU voltage, the motherboard temperature, a per-SATA port run down of what is attached, an option to enable XMP, the current fan speeds, a quick overview of the fan profile, a section for EZ System Tuning and Boot Priority. As far as lists for the front page of a BIOS go, that list is pretty extensive and complete. For a system builder or debugger, this is a lot of information all at once on the first screen. Users have several options here, including selecting to manually adjust the fans:
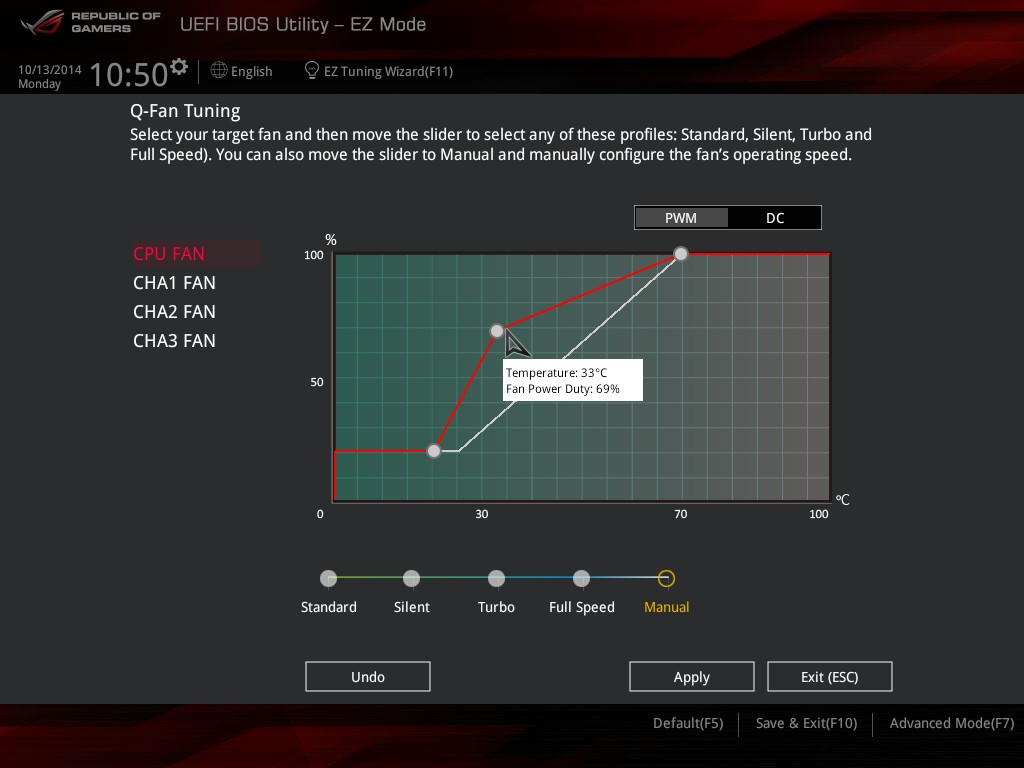
For each fan header we can control it by DC or PWM, and either use one of the preselected fan profiles underneath the graph or select manual and adjust a three point gradient. Three points is OK for a custom gradient, although an option to set all fans to the same profile at once would be handy.
Also on the EZ Mode screen, by pressing F11 or selecting the option at the top, is the EZ Tuning Wizard.
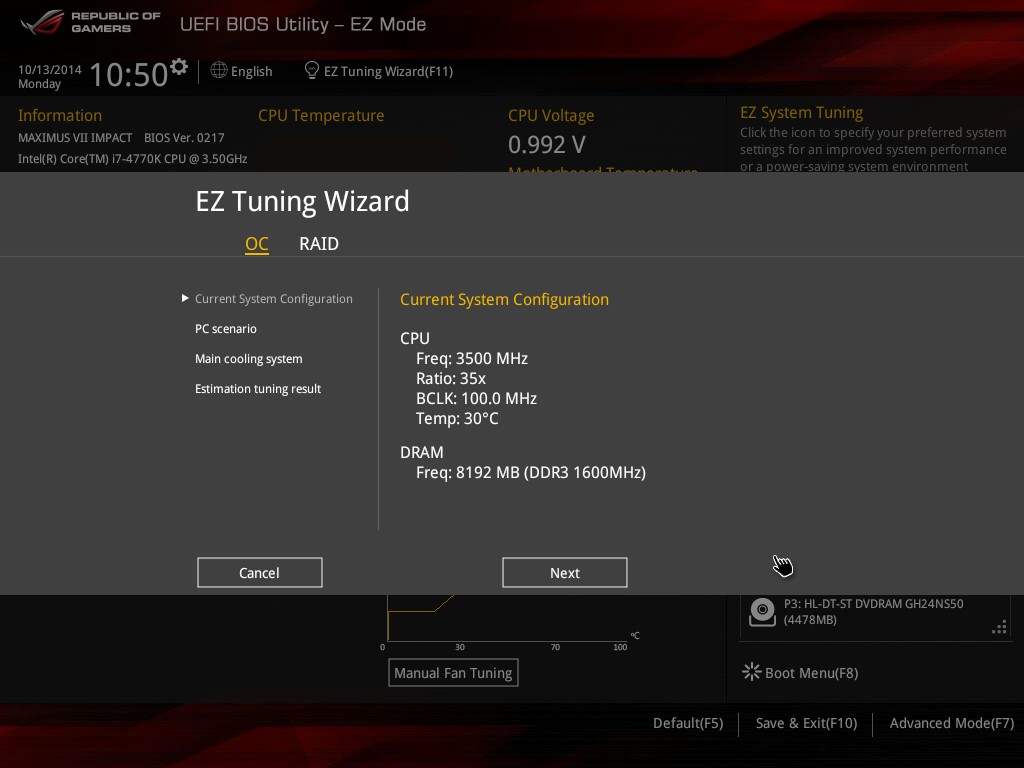
This interface is for users to set up either a quick RAID solution or for a quick overclock. In terms of the overclock selections, it first shows the current system arrangement as above, and then asks about the typical CPU usage:

Then the cooling:
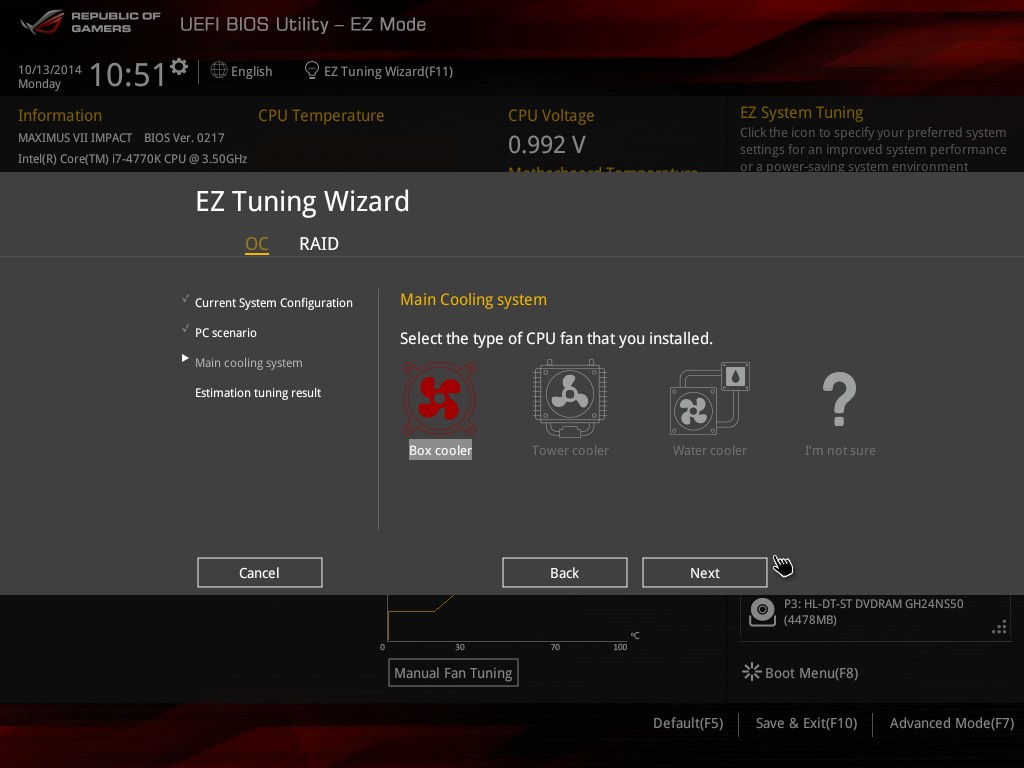
With this information at hand, it will give a final overclock prediction for the system which can be implemented with a restart.
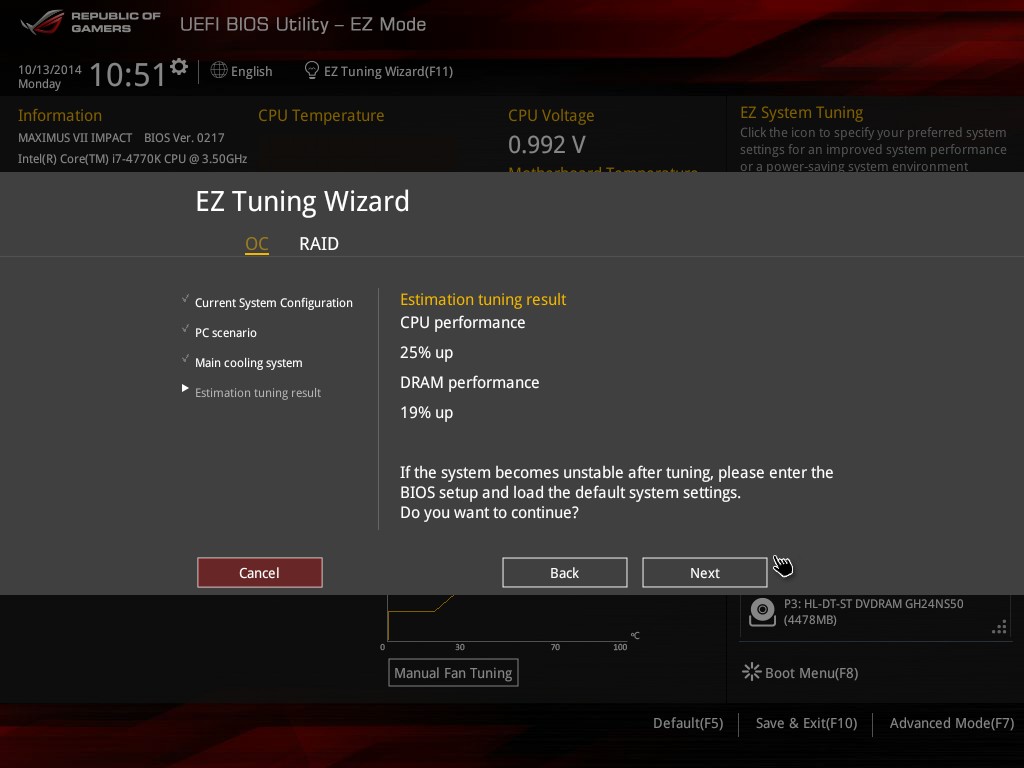
Here it offers a 25% overclock on the CPU (3.5 GHz to 4.375 GHz) and 19% on the memory (DDR3-1600 to DDR3-1904).
ASUS puts all the juicy options for extreme overclocking in the advanced menu. We get taken straight into the Extreme Tweaker section:

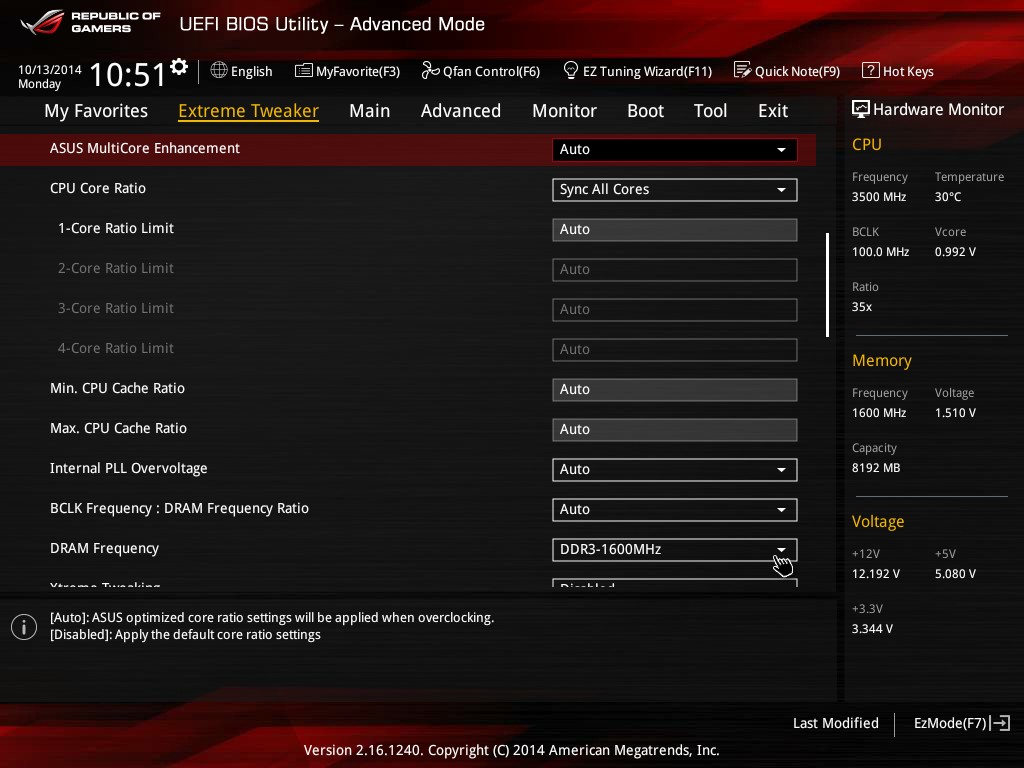
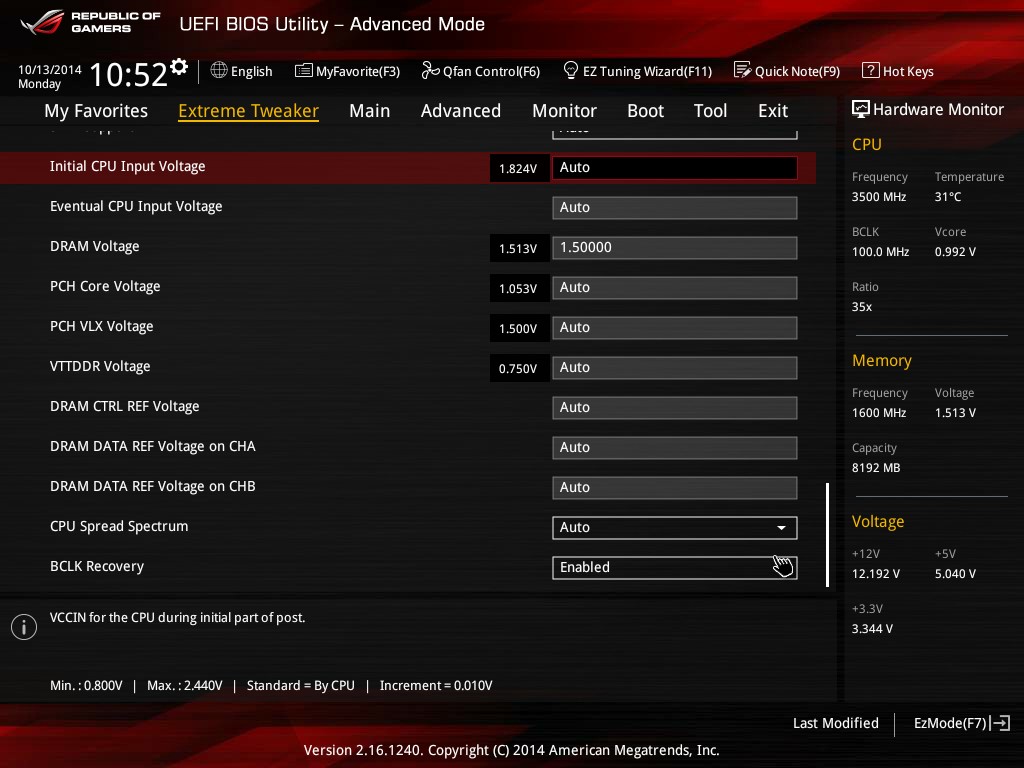
The Extreme Tweaker initial menu contains a lot of the interesting options for overclocking, although some of them will be quite foreign. Motherboard manufacturers are currently in a decision making process whether to offer all the overclocking options in one single menu, or partition it off into sections. Due to the sheer number of options, sometimes the result is the mix between the two, such as here on the Impact.
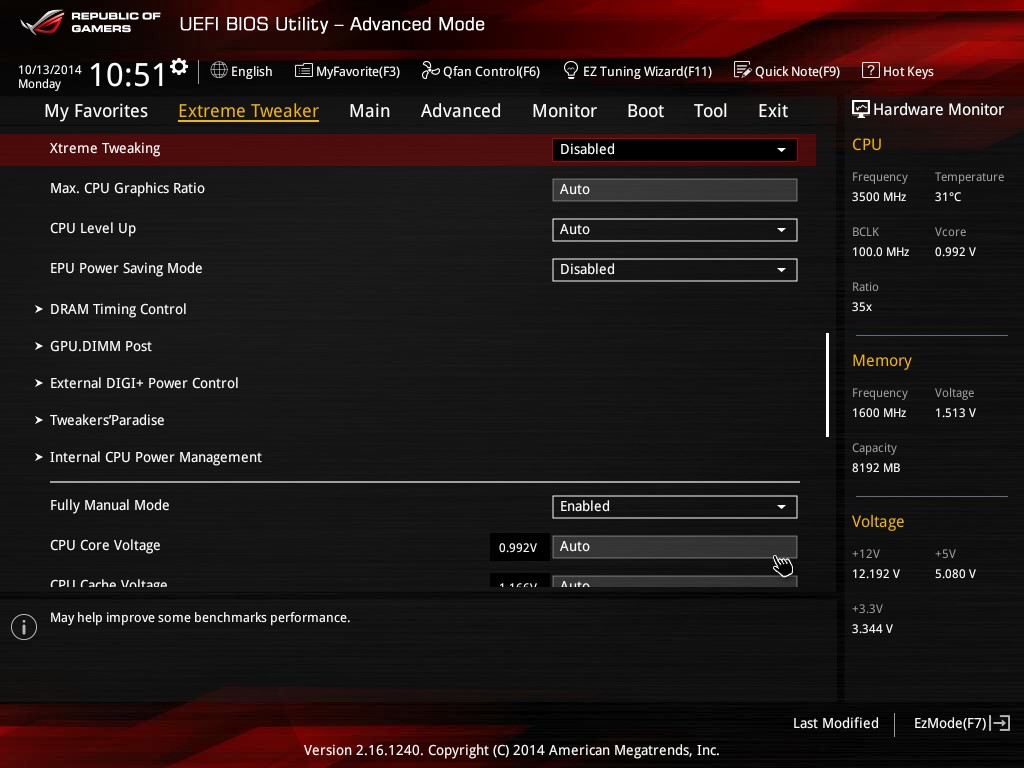
Right off the bat we are given the indication that LN2 Mode is disabled and the first option is a series of overclocking presets:

For users with sufficient knowledge and cooling, these presets adjust some of the more obscure settings to a better default value in order to help break records.
The DRAM Memory timing options are equally as verbose as the Extreme Tweaker selection:

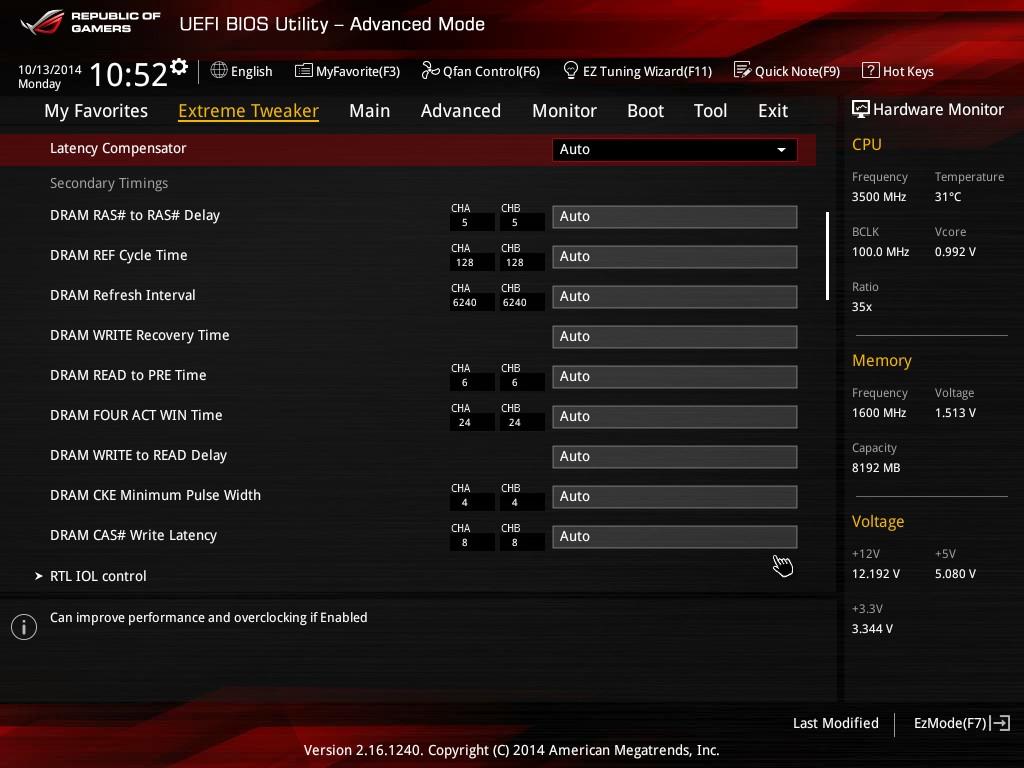

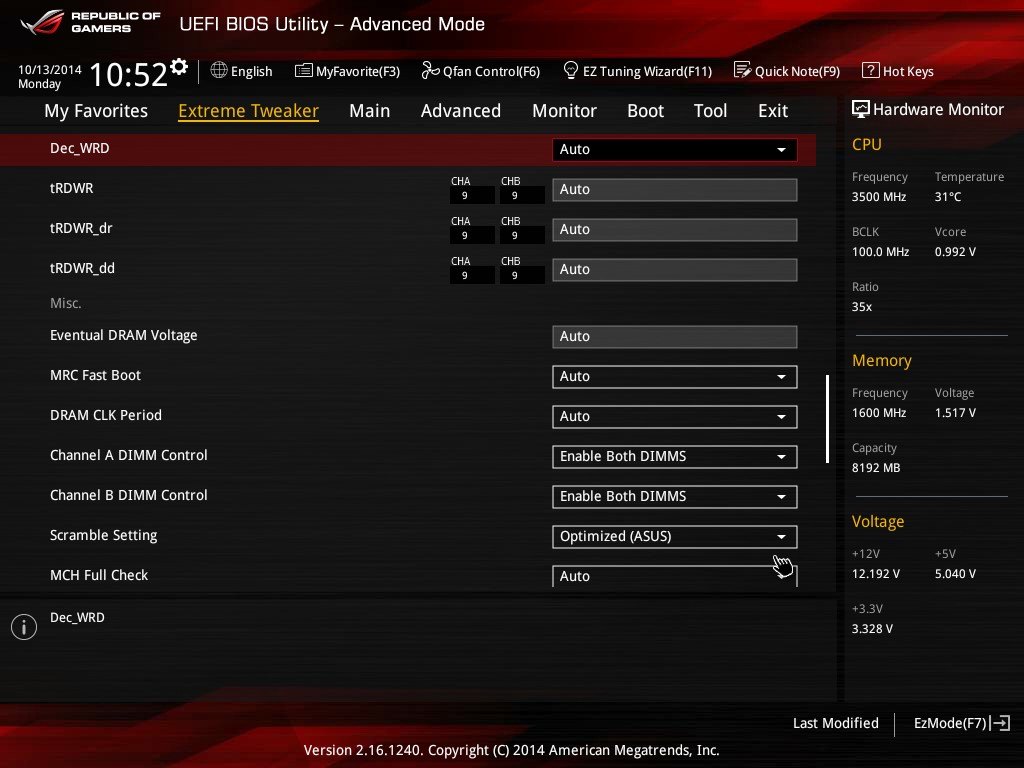
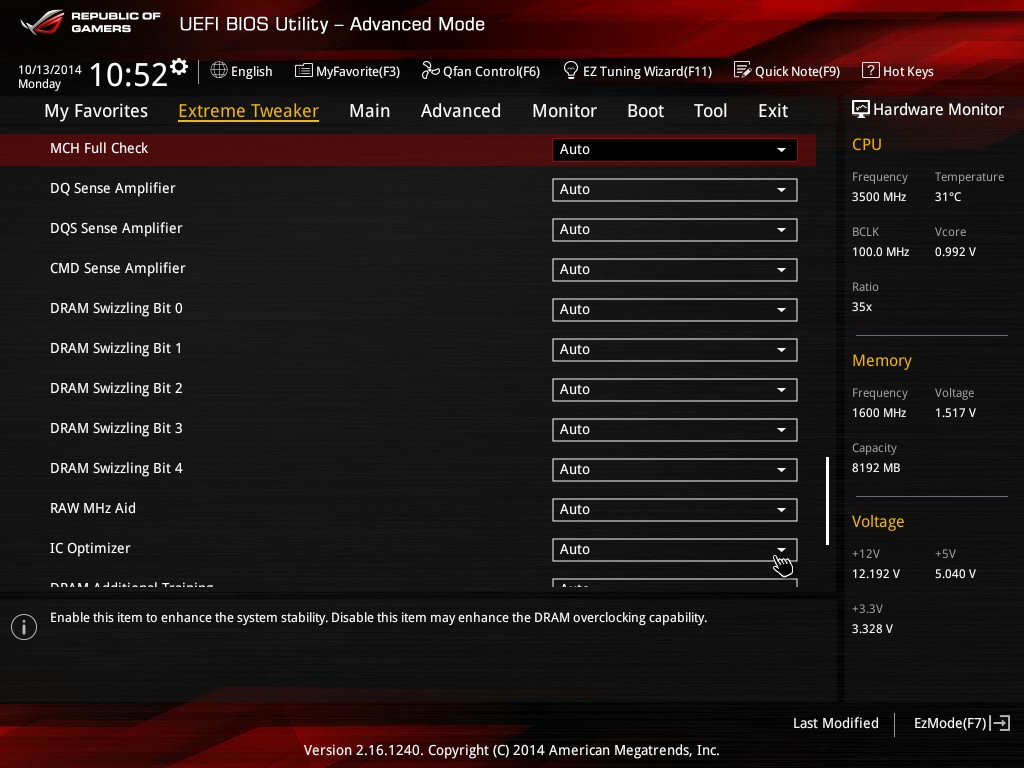
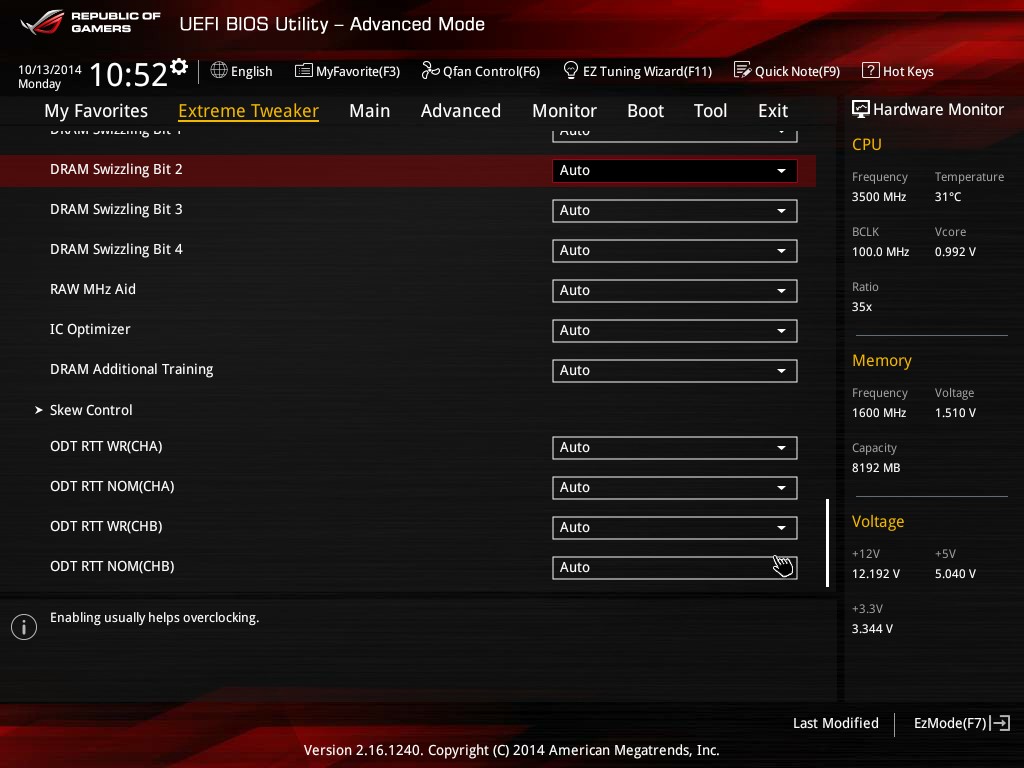
Six screens of DRAM options for 99.99% of owners is a bit manic, however there will be one user who might be able to squeeze out that extra MHz for a record to hang on ASUS’ wall. ASUS often produces overclocking guides for their BIOSes, so it might be worth heading over to the ROG forums to have a look for one.
In the DRAM menu we also get a series of options for memory presets:
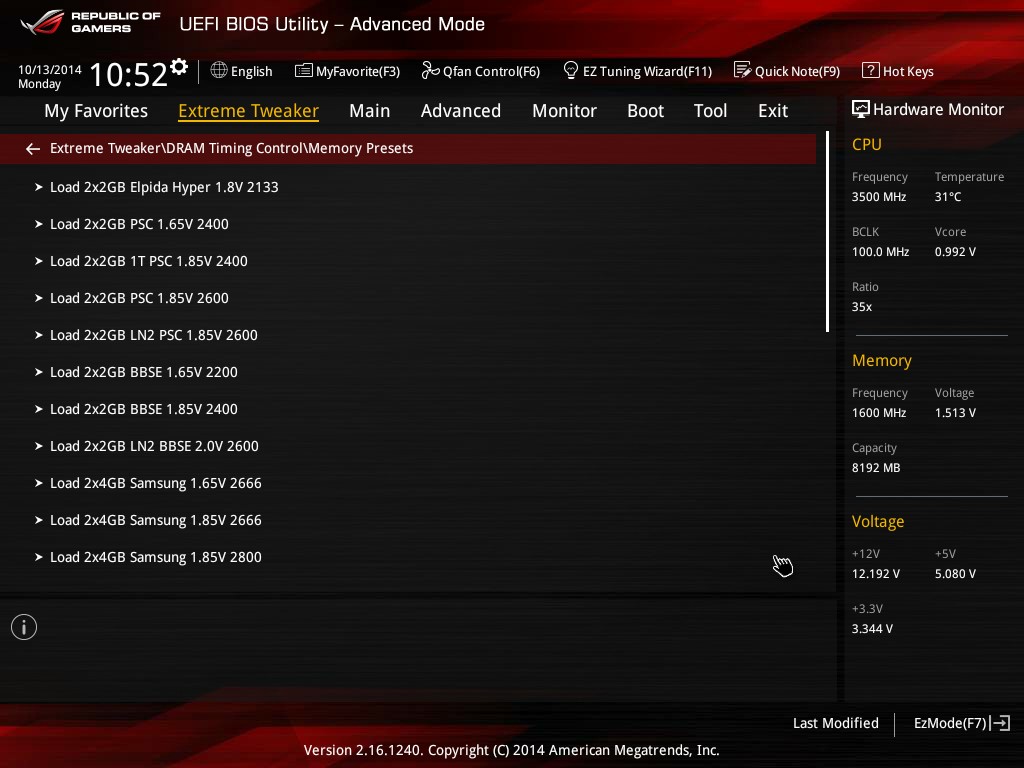
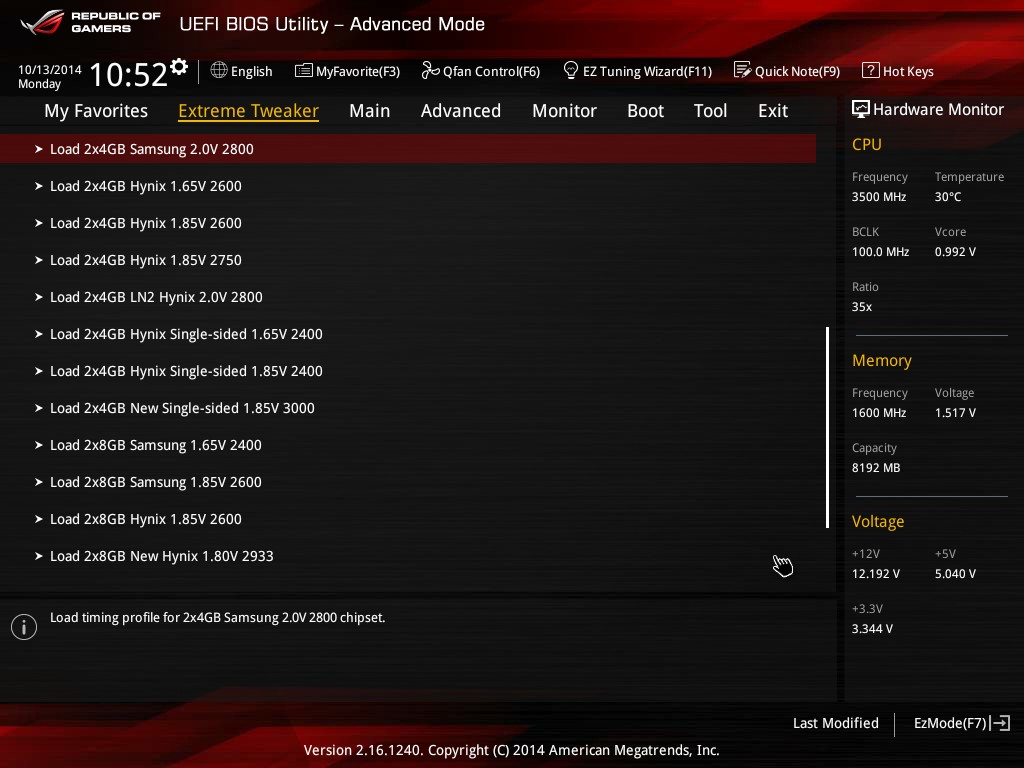
Professional overclockers often have access to the best memory kits in the business, especially the rare or expensive ones. ASUS has a number of extreme overclockers internally to help drive these presets.
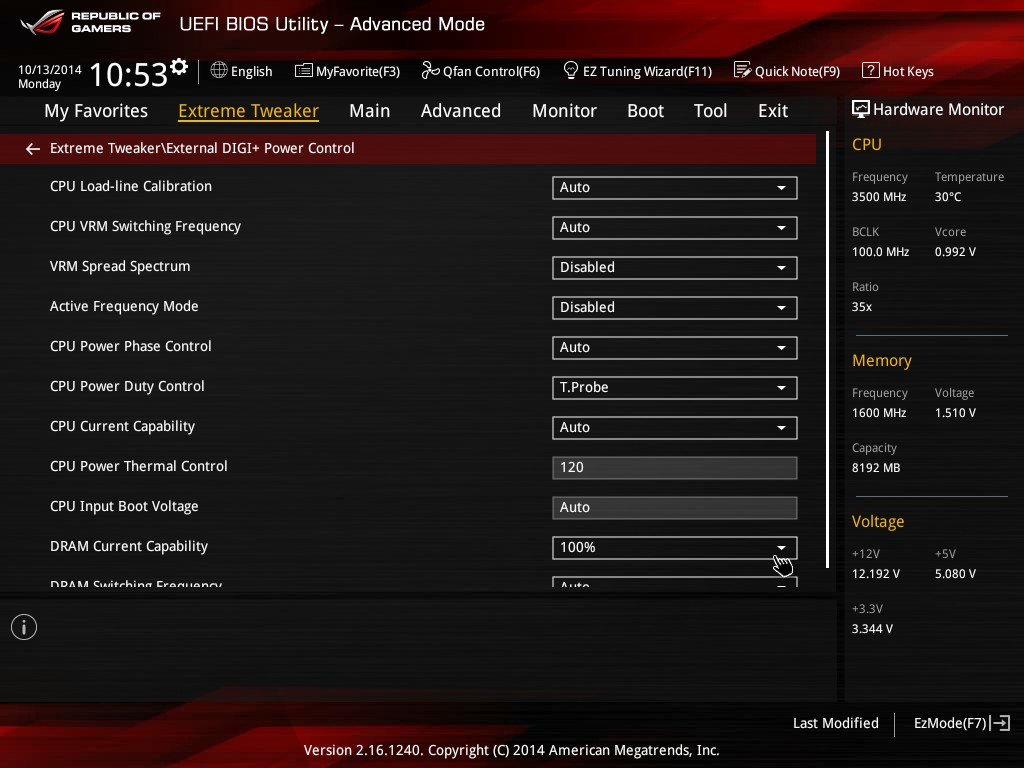
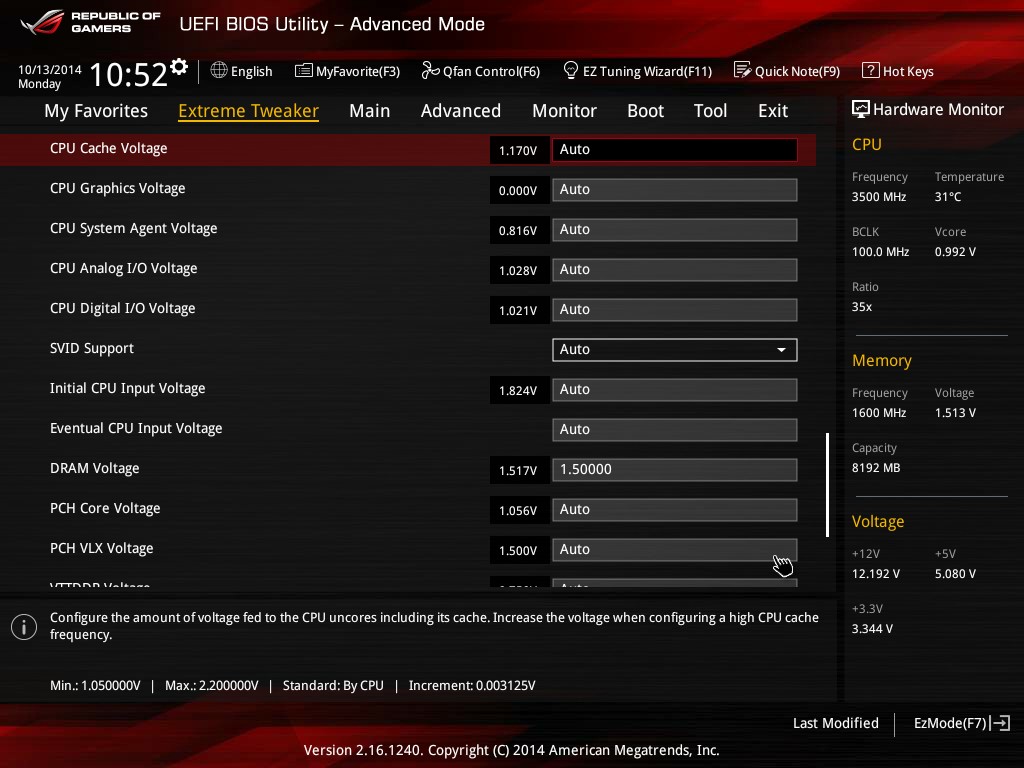
Digital Power control is also in the Extreme Tweaker section of the BIOS, with Load Line Calibration and VRM Switching frequencies being important options right at the top. A lot of these options are also in the operating system software.
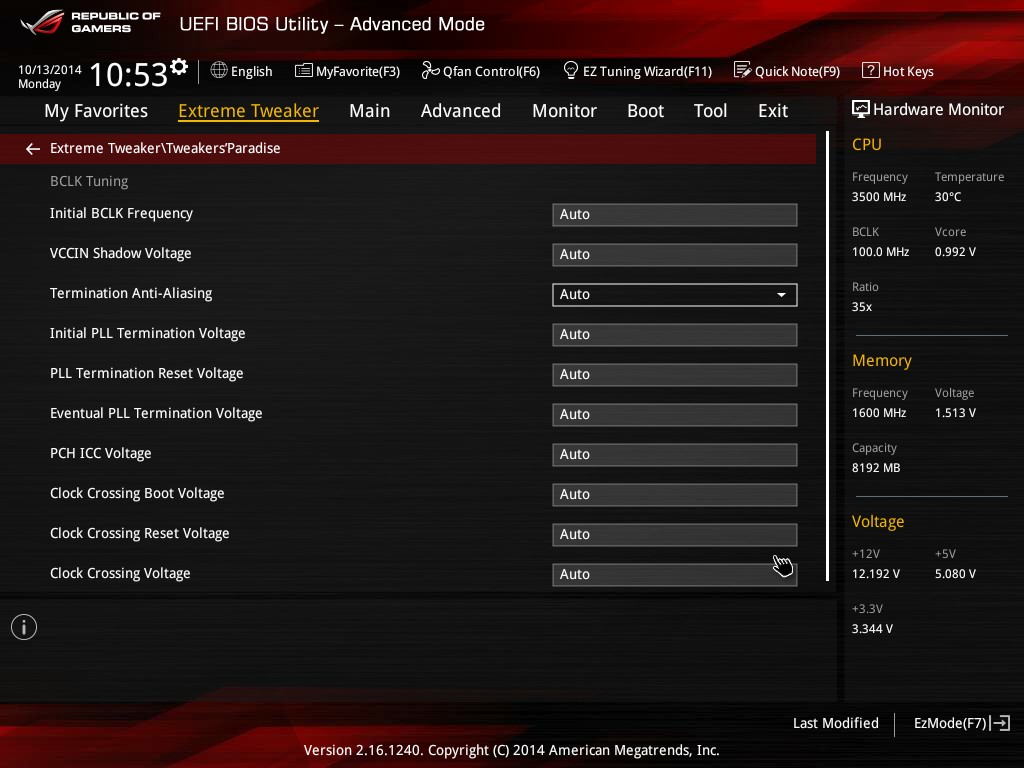
If all the overclocking and DRAM options were not enough, there is another page for the ‘Tweakers’ Paradise’. Again, best refer to the ASUS ROG overclocking guide on this one.
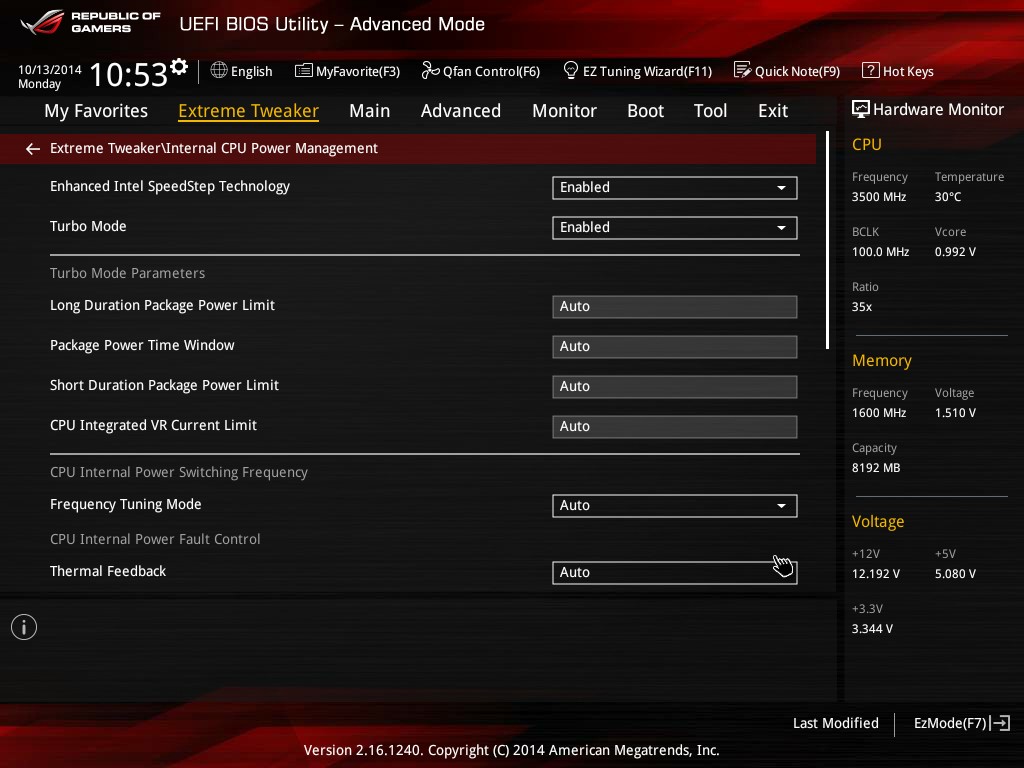
Some of the CPU Power Management tools are here in Extreme Tweaker too, useful for turbo modes and power limits.
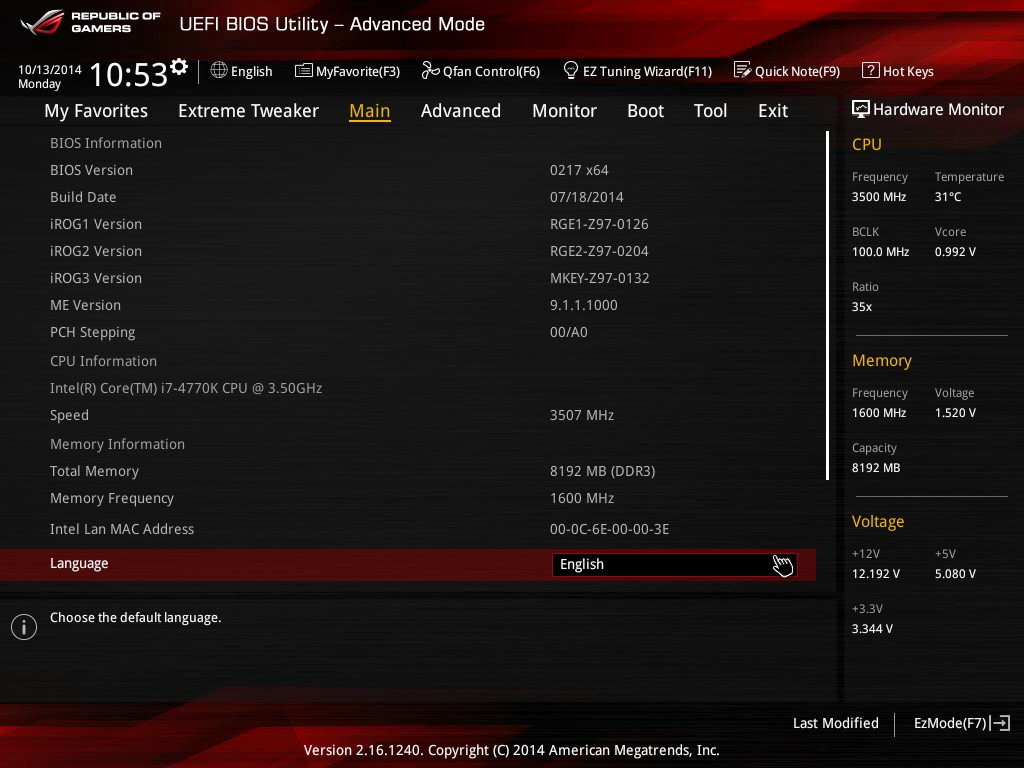
Moving away from the overclocking options puts us on the Main tab, giving the BIOS version of the board as well as the CPU name, speed, ME version, MAC Address of the NIC and memory info. This is more the entry screen we are used to without an EZ Mode, but it is worth noting that the three ROG ICs used for ASUS’ ROG line are all mentioned here as well with their respective version designations.
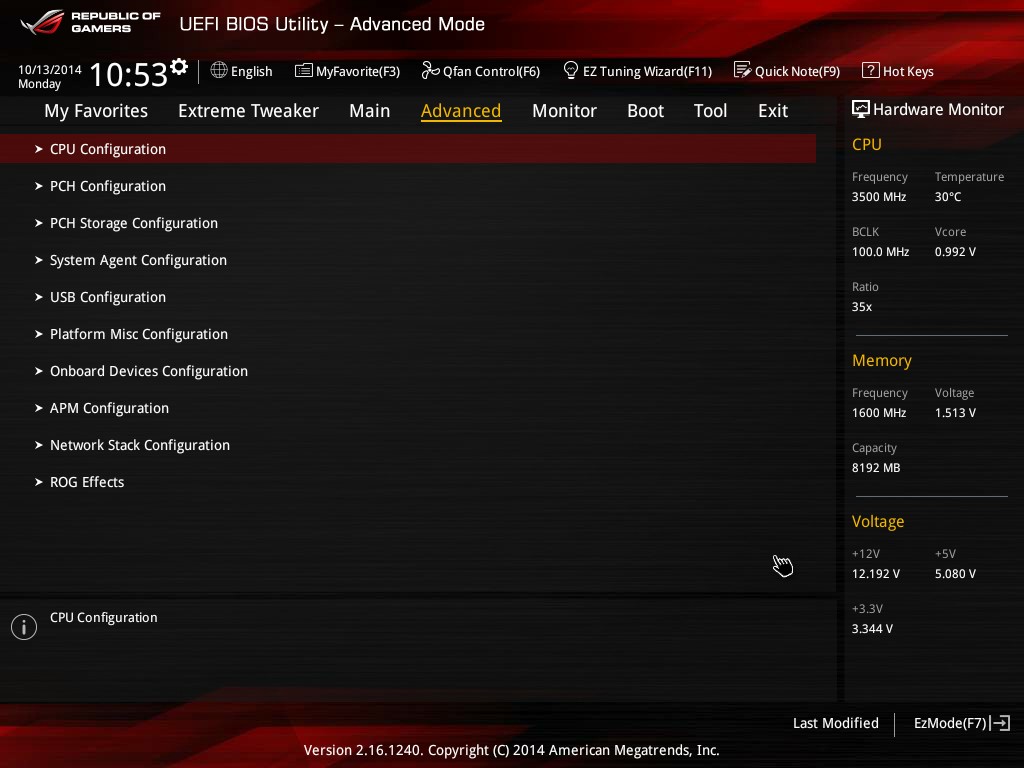
The Advanced tab fills out most of the rest of the BIOS, giving more options related to non-overclocking related tools such as controllers, PCIe operation, onboard devices and ROG custom effects.
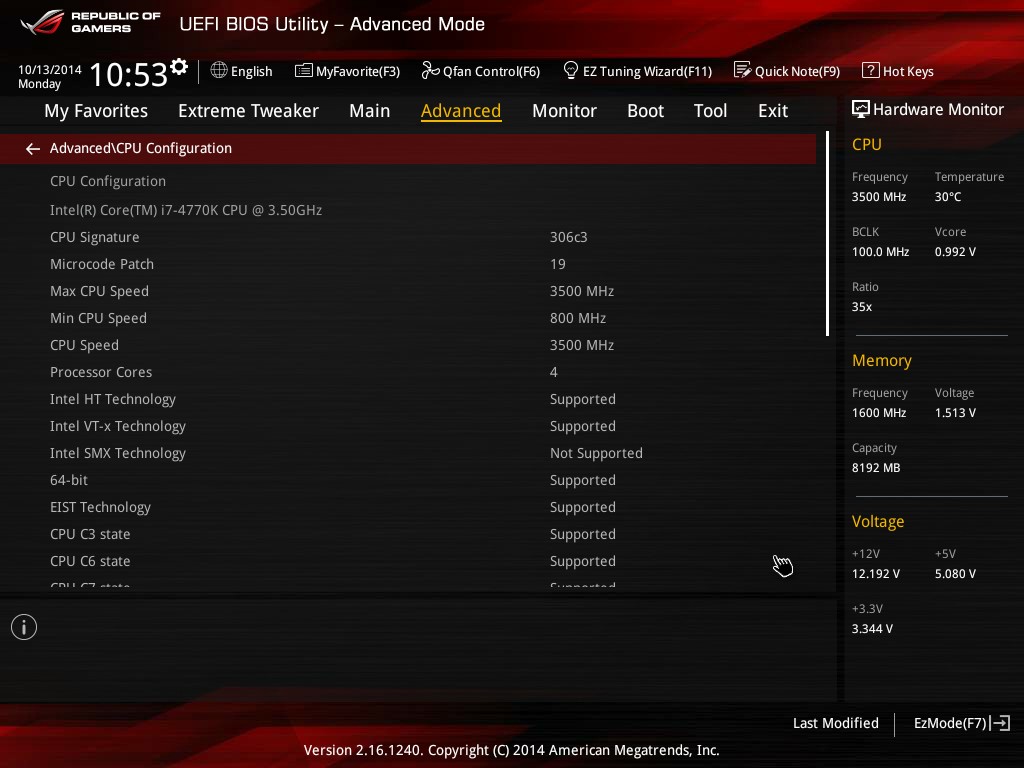

The CPU Configuration menu allows users to enable VT-d or adjust the number of cores in operation. The Dynamic Storage Accelerator, to keep the storage in a high power mode for best performance, is disabled by default.
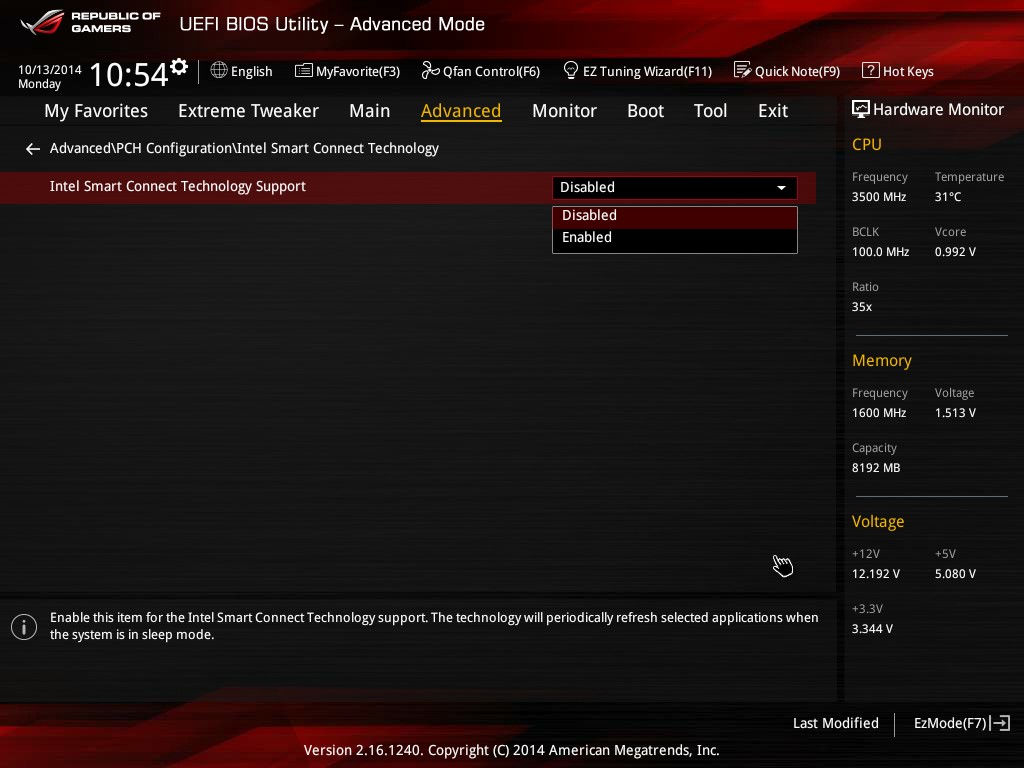
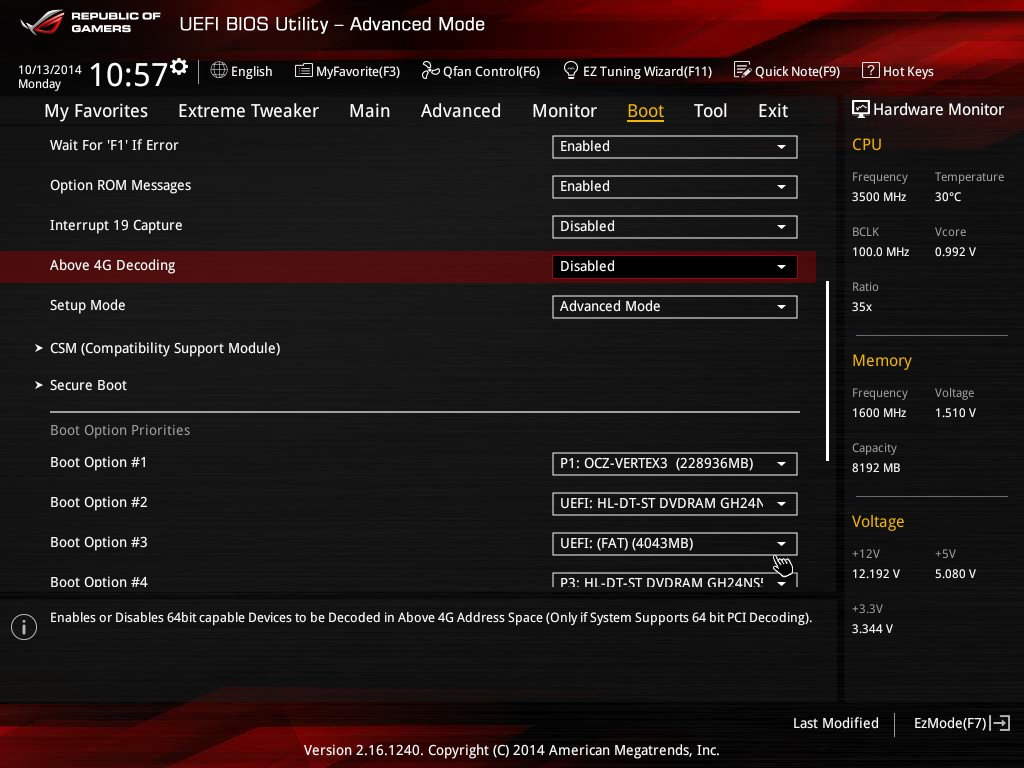
In the BIOS both RST and Smart Connect Technology are disabled by default, as well as Above 4G Decoding for GPU co-processors.
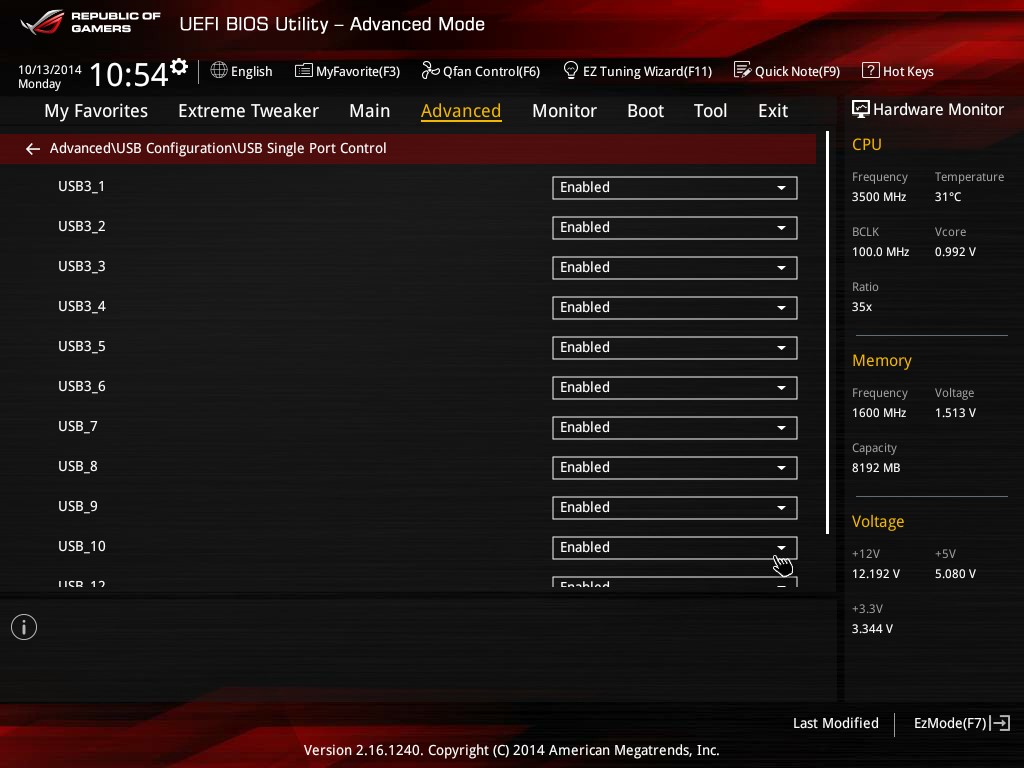
Each of the USB ports can be controlled manually, allowing system builders to save power or to adjust how USB ports are used if one of them fails:
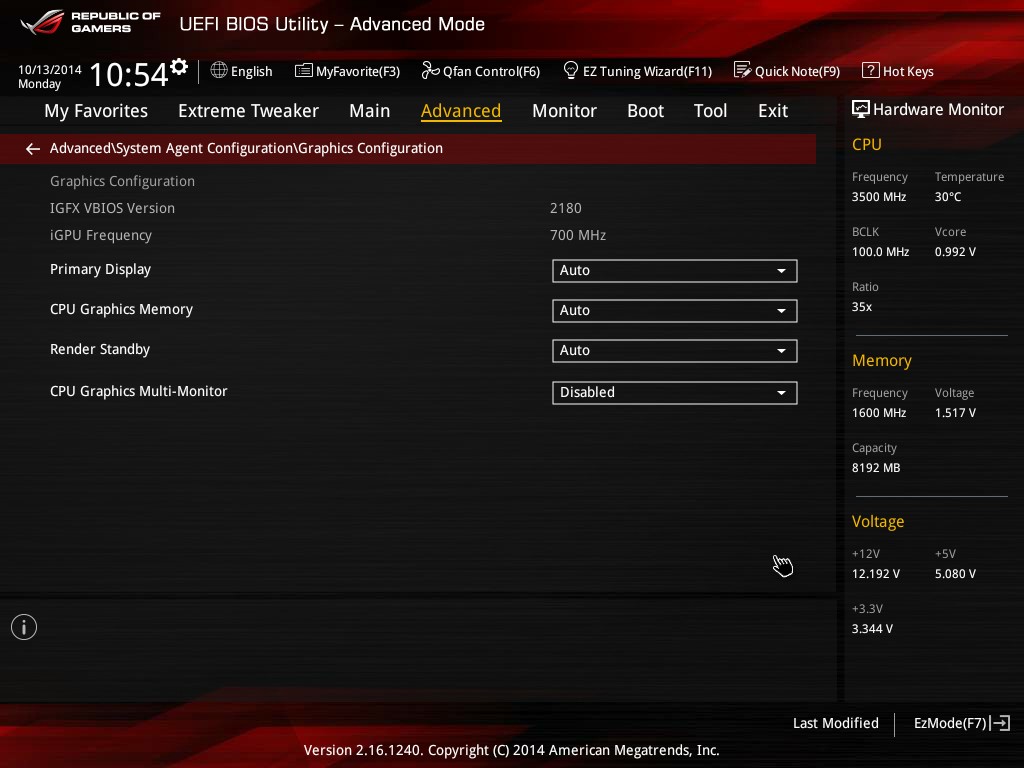
Also by default the system has CPU Graphics Multi-Monitor disabled:
However all the directly usable onboard devices are enabled:

The ROG Effects option relates towards the Onboard LEDs and the Q-Code dual digit debug LED on the rear panel:
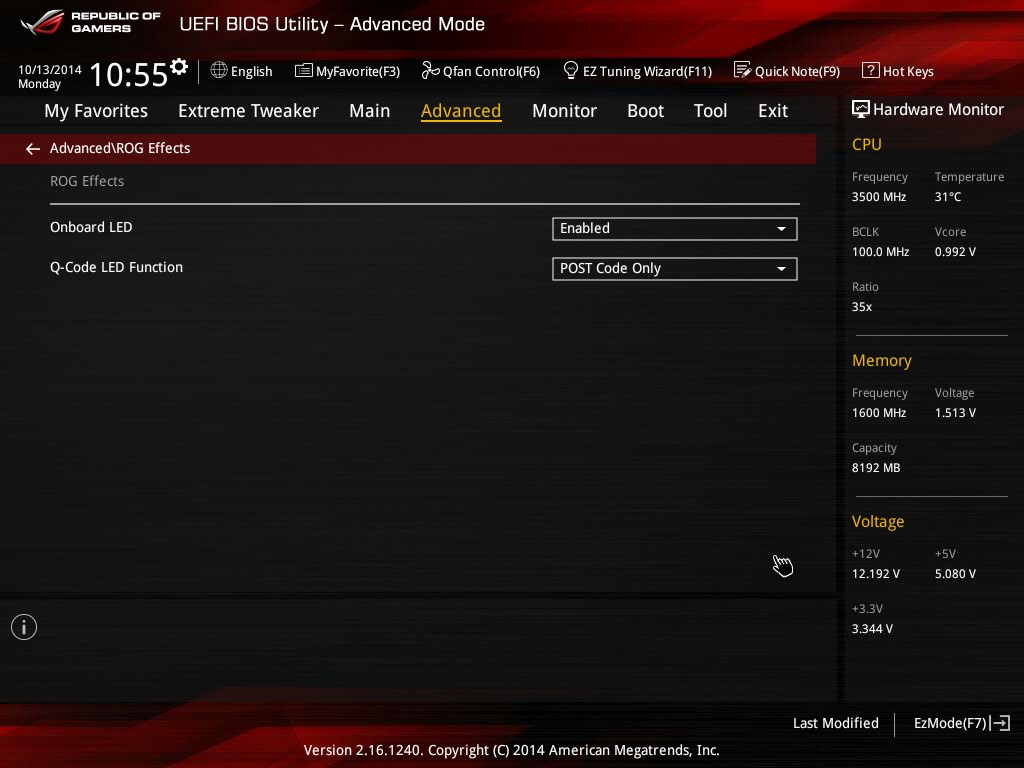
Users can disable this if they want fewer lights enabled when the system is powered on.
The Monitor tab is split into voltage/temperature monitors followed by fan monitoring and control. This is historically in separate menus on the channel motherboard line, but for ROG it gets split accordingly.
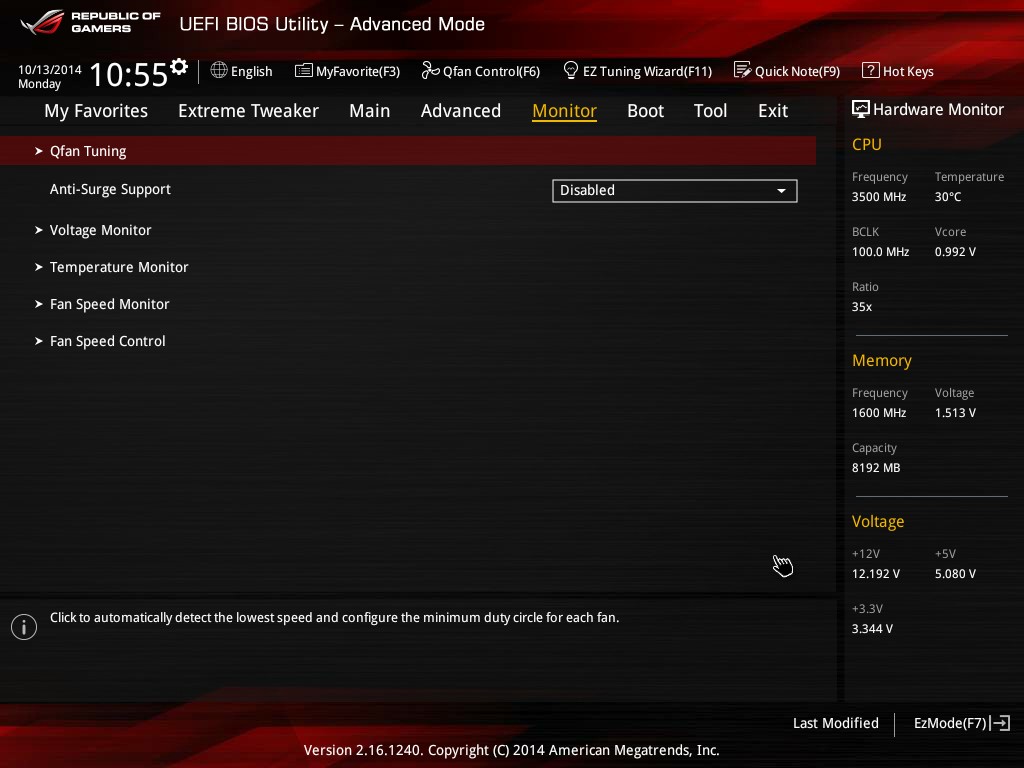
Users with fans attached to the motherboard can implement Q-Fan Tuning which will detect the dead point of each fan and adjust the fan profiles to match the lowest RPM up until the CPU hits a certain temperature.

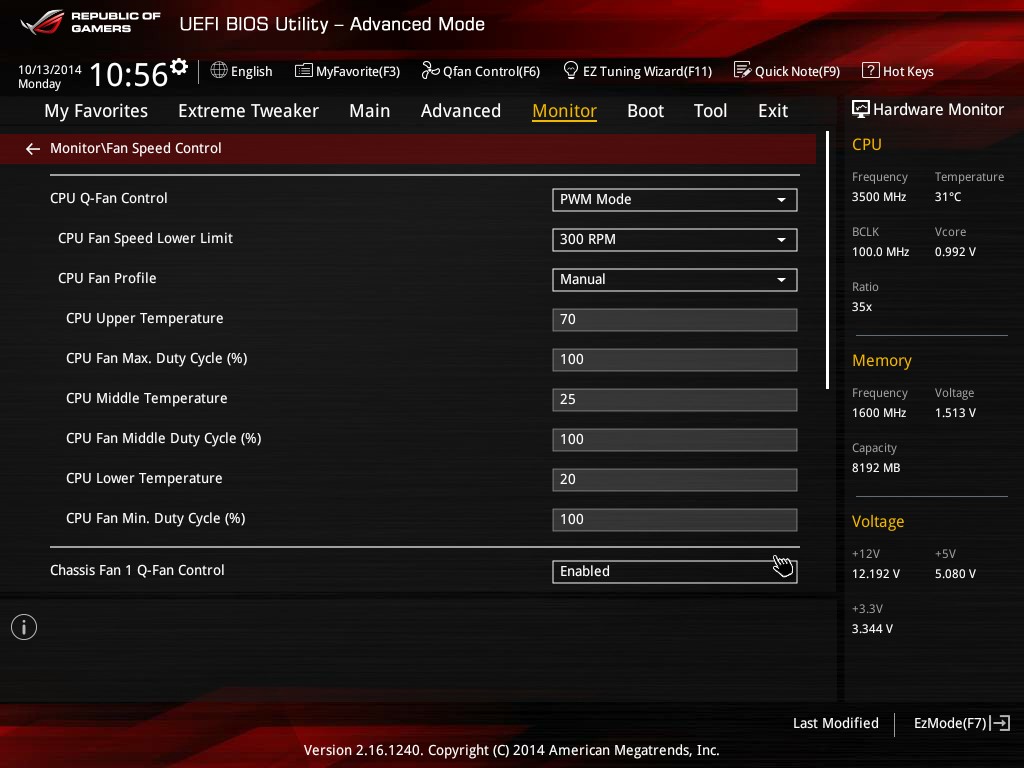
Users can navigate to the Fan Speed Control option to have a textual based fan setting experience. Ideally ASUS would move the graphical fan controls here as well.
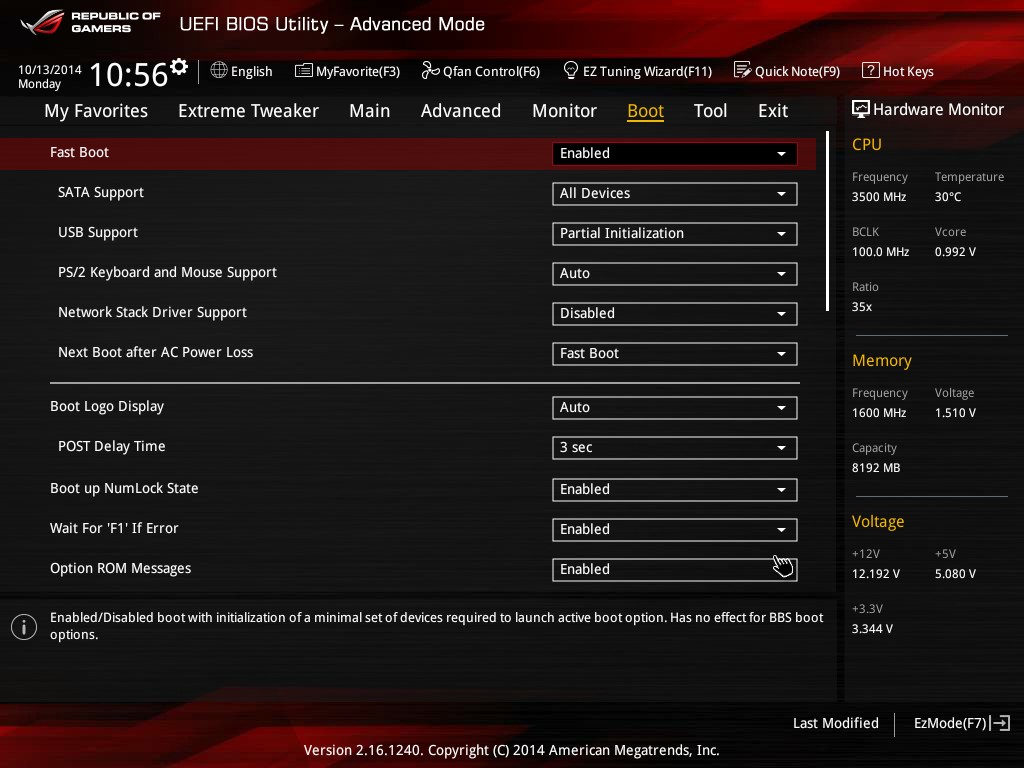
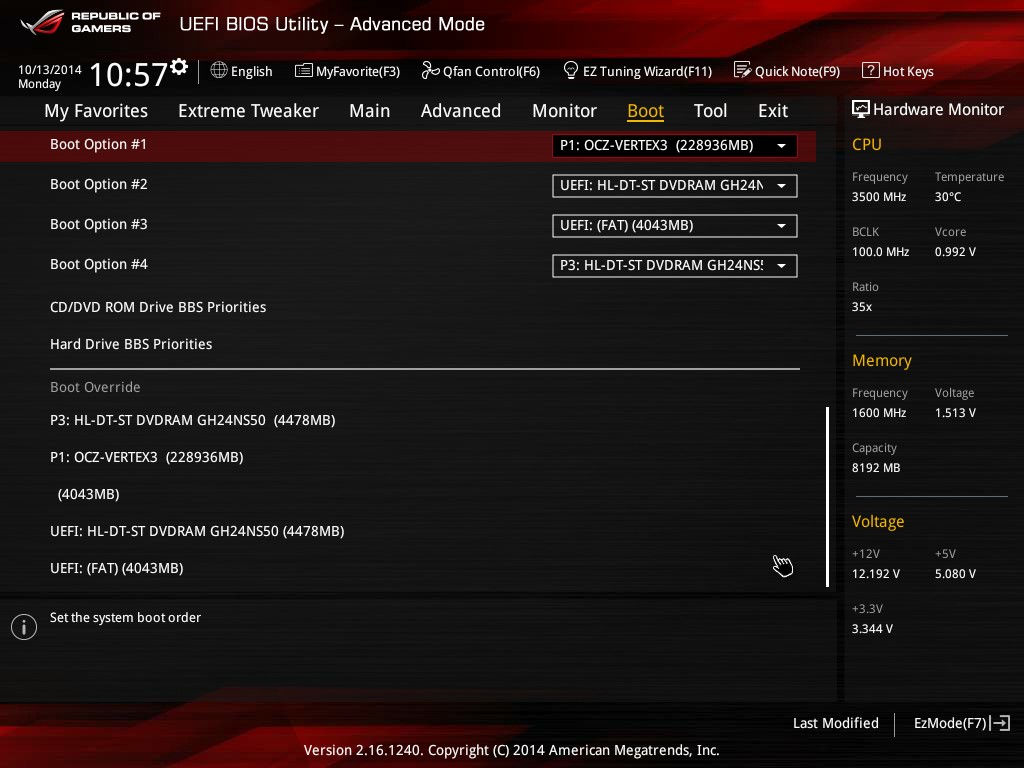
The Boot tab is similar to previous Z97 ASUS BIOSes, giving options for Fast Boot followed by Boot Order and Boot Override.
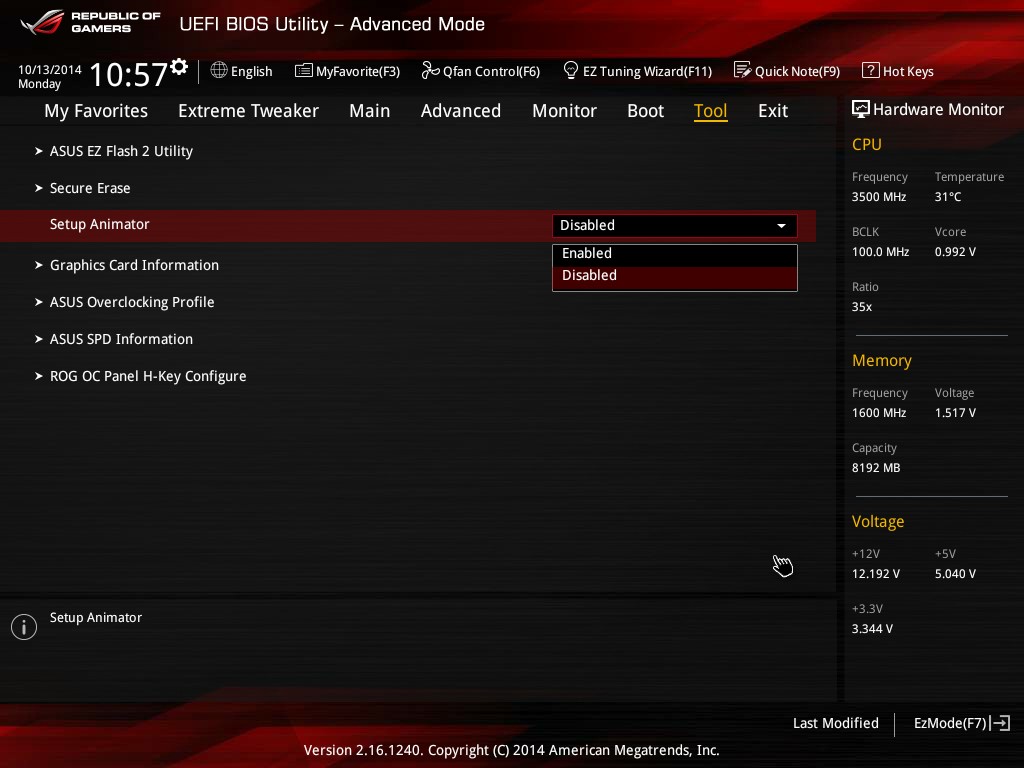
The Tools tab is where more of the fun options exist, and users can disable the screen swipe animations here as well:
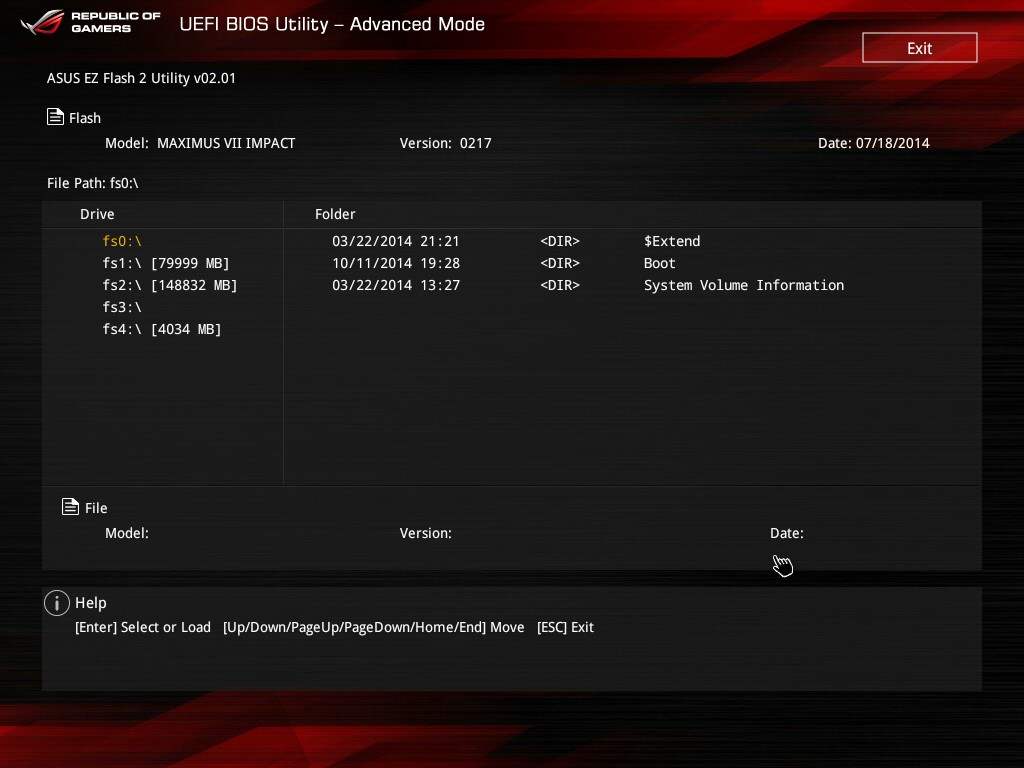
In the tool kit from ASUS is the BIOS flashing/updating utility, EZ Flash 2:
For the Z87 Impact we saw the first iteration of Secure Erase, which is similarly present here on the Z97 model:
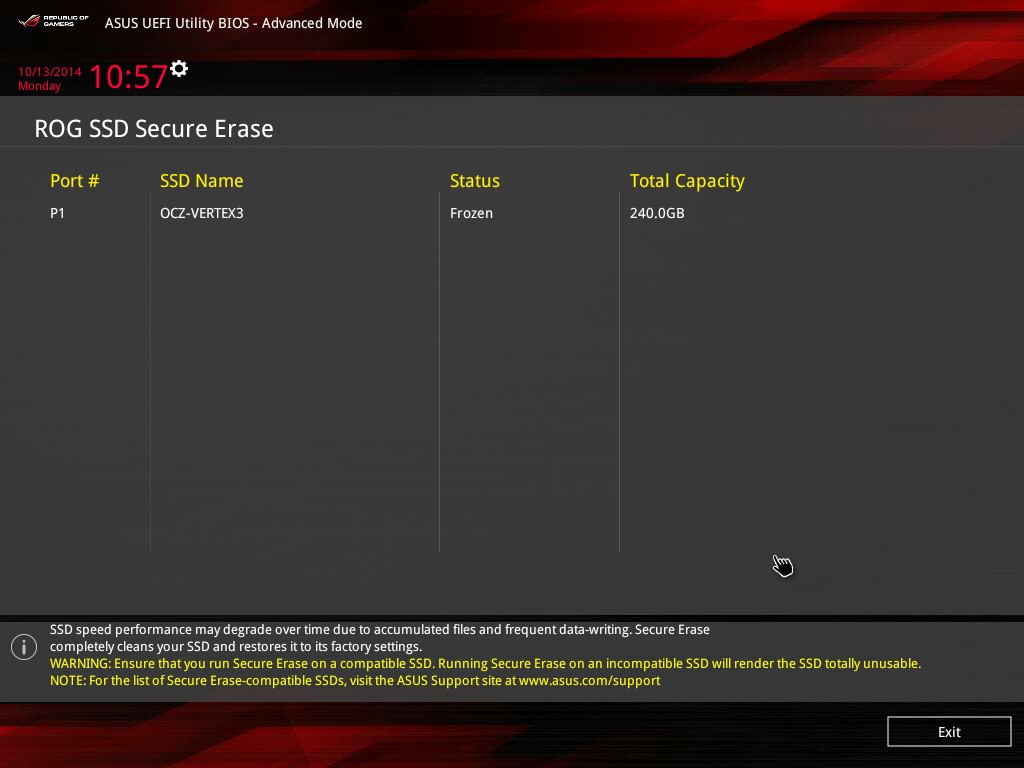
This allows users to return their SSD back to its default factory-state (minus some wear) in terms of speed rather than doing hocus-pocus with hdparm and Linux. ASUS has noted that they put this tool in when they were confident it would work with most if not all the drives on the market.
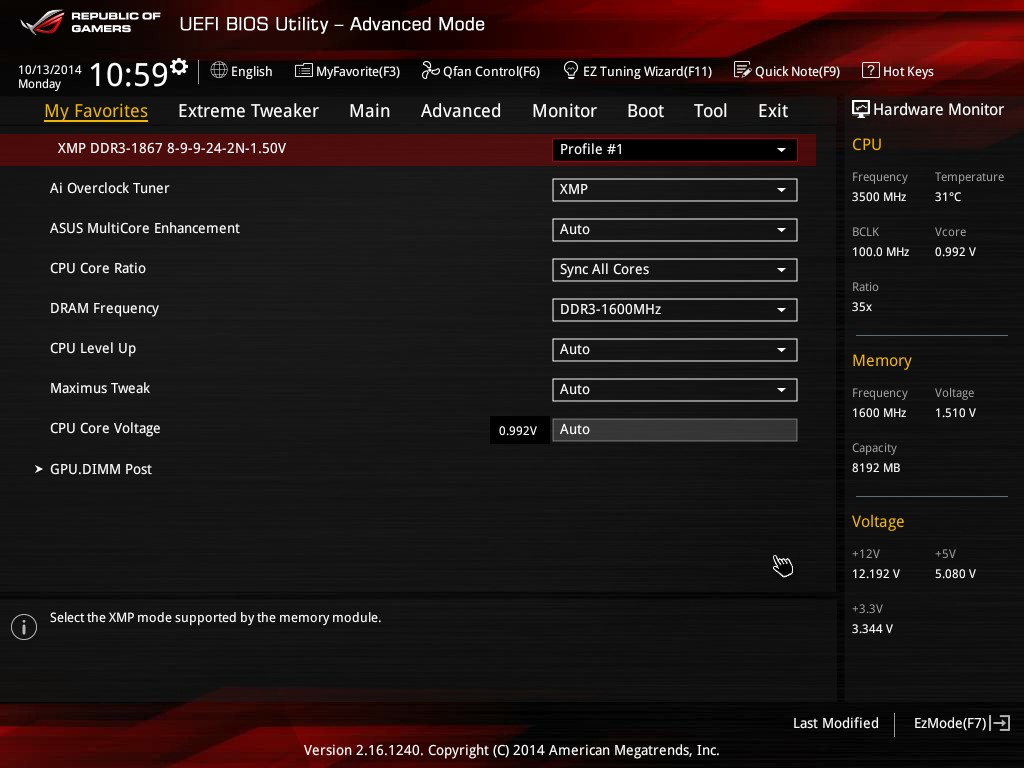
ASUS still has the My Favorites page for easier overclocking or option setting. Here I selected a few of my most commonly used options when I am testing my maximum 24/7 overclock.


41 Comments
View All Comments
TheinsanegamerN - Tuesday, December 9, 2014 - link
looks like a very nice motherboard, if a tad expensive. especially the fan control with custom fan curves...wish my p8-z77 pro had that. wonder why 1.05 volt is the lowest voltage available?ME5H - Tuesday, December 9, 2014 - link
Man these boards are nice! Im pretty sure my next build will be a itx or atx, but for now my 2600k @ 4.8/GTX 780 can handle everything I throw at it. I was this close to buying a used Maximus for my 2600k but didnt trust them coming from Hong Kong :/ Thanks for the review. Peacevarg14 - Tuesday, December 9, 2014 - link
I am in the same boat with my CPU I have falling in love with going on 4 years old. A good ole Sandy Bridge i7 2600k @ 4.9ghz on a p67-ud4-b3 MB with 2 EVGA GTX 770 4GB Classifieds in SLI I do not see a CPU upgrade coming until PCI-E 2.0 @8X start limiting GPU performance at high res and settings. As of now you only see a real difference between 3.0 and 2.0 at low res with low settings.Morawka - Wednesday, December 10, 2014 - link
the real hero are the millions of i7 920's still in circulation. You can get one on ebay for like $75. Quad core with HT ftwmapesdhs - Thursday, December 11, 2014 - link
CPUs for P55 still run nicely too (cheaper than X58 CPUs, less power, easier to oc). I recently
tested an i5 760 @ 4.2GHz with single/dual 7970 3GB, it was easily able to match or beat a
5GHz 2700K with a single GTX 980. I can't post the URL here, but Google for, "SGI Ian pc
benchmarks". I tested with Stalker COP, CoJ, FC2, all the Unigine tests, and the 3DMark suites.
Only down side of Lynnfield CPUs is that P55 mbds have become highly valued for some
bizarre reason.
Best used value atm though is a Z68 board and a 2500K, as the mbds go for diddly.
Ian.
Samus - Thursday, December 11, 2014 - link
True the i7-920 (even the 950) are cheap, but a decent X58 board still sells for $200. I know because I just sold my Asus P6X Deluxe for that much on eBay. It's ridiculous how much these boards command, but I kind of get it, they're ridiculously good. I feel my H87's stability pales in comparison...but I wanted to do an ITX rig so the negligible performance increase and PCIe 3.0 weren't really the selling factors over X58.mooninite - Tuesday, December 9, 2014 - link
This review is a little late. The board has been for sale for a couple months now. There is one issue I've had with my board and it's with Turbo settings. The default core ratio settings are to sync all cores. This will bring your CPU outside of its rated spec and in the case of a i7 4790k it will cause your CPU to overheat and throttle at extreme loads. At first I thought I had a defective CPU, but after investigation the board is maxing out at 4.4ghz with 4 cores instead of 4.2ghz. With the correct settings my CPU does not throttle and stays within thermal limits. With an aftermarket cooler I can run at 4.4ghz on all cores, but just barely.This Turbo / stock CPU cooler issue should be a good topic for Anandtech to investigate. It seems many (all?) motherboards have wrong defaults for this and stock coolers cannot do the job.
varg14 - Tuesday, December 9, 2014 - link
Really overheats on stock voltage? What Cooler you using ? Also have you tried undervolting a tiny bit?Zap - Wednesday, December 10, 2014 - link
tl;drThis board (along with many other "enthusiast" boards) overclocks the CPU by default through "multicore enhancement." It has been around for a few years, and AnandTech even had an article about it.
http://www.anandtech.com/show/6214/multicore-enhan...
mooninite - Thursday, December 11, 2014 - link
No, I specifically said *default* settings. Not with XMP. Not with Multi-core-enhancement. ASUS, Gigabyte, and others are, by default, syncing ratios on all cores.